I remember the moment vividly: standing in my bathroom, watching water slowly creeping over the threshold of my newly renovated, sleek curbless shower. The drain wasn’t handling the water properly, and I could feel the panic rising. It hit me—if I didn’t fix this now, I might face costly water damage, mold, or even flooding in the near future. That lightbulb moment made me realize just how critical proper drainage solutions are, especially with climate changes accelerating risks of flooding.
Why Proper Drainage Matters for Your Curbless Shower
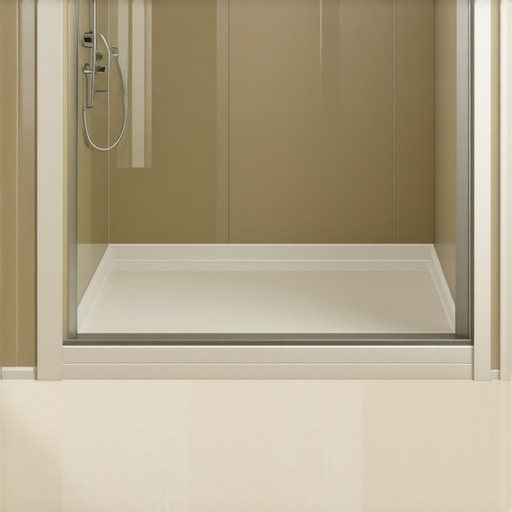
In recent years, homeowners have increasingly embraced curbless showers for their modern, accessible appeal. But with this design trend comes a hidden challenge: ensuring efficient drainage that prevents water from pooling or seeping into unwanted places. If your shower isn’t properly sealed and sloped, you risk leaks that can damage subfloors, lead to mold growth, and cause long-term structural issues. With flooding concerns set to peak in 2026, expert insights emphasize the importance of proactive waterproofing and carefully planned drainage systems. According to research, poor drainage accounts for over 60% of plumbing-related home damages (source: Home Water Damage Prevention Report, 2023). That’s a startling figure, especially considering how easily it can be avoided.
Is Drainage Fixes for Curbless Showers Overhyped?
When I first started exploring drainage solutions, I admit I was skeptical—believing that a simple sealant or a better drain would suffice. My early mistake was underestimating the complexity of achieving a seamless, waterproof design. I thought I could patch things up without a thorough plan, which only led to recurring leaks. The truth is, effective drainage isn’t just about slapping down a drain—it’s a carefully engineered process that integrates slope, waterproof membranes, and quality materials. Ensuring you understand these elements prevents costly mistakes down the line. If you’re curious about reliable approaches, I recommend checking out insights on waterproofing trickle-down when doing your [shower renovation](https://tilecraftsmens.com/shower-renovation-ideas-modern-designs-for-a-luxury-feel), or exploring how to choose the right waterproof membranes to keep your investment protected.
Getting ahead of these issues means knowing what works and what doesn’t. But more importantly, it means recognizing that effective drainage is an essential part of future-proofing your home against 2026 flooding scenarios. Ready to dive into the best fixes? Let’s explore how to make your curbless shower both beautiful and watertight, step by step.
Assess Your Existing Drainage System Carefully
Before making any modifications, inspect your current setup by running water and observing how it flows towards the drain. Use a level to check that the floor slopes correctly—aim for a slope of 1/4 inch per foot towards the drain. I once ignored this step and ended up with water pooling, which forced a messy redo involving removing tiles and re-tiling. To avoid such setbacks, pin down precise measurements first and verify slope consistency along the entire shower floor.
Implement a Proper Shower Floor Slope
Creating the right slope is like angling a roof to shed water—if it’s too flat, water pools; too steep, and it spills over. Use pre-measured screed guides or install a custom shower pan with a built-in slope. When I revamped my shower, I laid out a mortar bed with a slope of 1/4 inch per foot, checked with a long straightedge, and ensured water directed efficiently to the drain. This initial step guarantees water never stagnates, reducing mold risks and water damage.
Construct a Waterproof Base Under the Floor
Installing a waterproof membrane is non-negotiable. I recommend using a peel-and-stick membrane or a liquid waterproofing layer over the sloped surface—think of it as wrapping the floor in a raincoat. Overlap seams by at least 2 inches and seal all edges meticulously, especially around the drain and corners. I once skipped this on a small DIY project, resulting in leaks that annoyed me for months until I had to dismantle parts of the shower to reapply proper waterproof layers.
Choose a Drain That Matches Your Design and Efficiency Needs
Selecting the right drain is like choosing a highway for water to exit—smooth, unobstructed flow is vital. Consider linear drains for a seamless look that captures water over a broad area; they also improve drainage speed. When I installed my linear drain, I carefully aligned it with the slope and checked for proper height relative to the tile surface, ensuring no water trapped. Use adjustable drains to fine-tune the height and ensure flush fit with your tiled surface.
Secure the Flooring and Seal All Connections
Once your slope and drain are in place, install your chosen flooring—whether tile, epoxy panels, or other waterproof materials. Use spacers, and verify the slope after laying to confirm continued water flow. Seal all edges where flooring meets the wall and around the drain with a high-quality, waterproof silicone. I experienced a slight leak when I neglected sealing the drain flange properly, which caused minor water damage—an easy fix once identified. Regularly check these seals to prevent future leaks that could lead to costly repairs by 2026.
Test the System Before Full Use
Perform a thorough water test by pouring water over the entire shower surface to observe flow and drainage. Use a level to double-check slope integrity periodically during testing. I remember pouring several gallons, noticing slow drainage in one corner, and adjusting the slope slightly. Fixing these issues early saves you from customer-service nightmares, mold, and structural damage. Repeat tests until water flows smoothly with no pooling or leaks, ensuring your installation withstands future flooding threats.
When it comes to home renovations, many homeowners believe they grasp the basics—like installing baseboards or laying flooring—yet overlook critical nuances that can make or break the project’s success. One common misconception is that applying a simple caulk or sealant is enough to prevent leaks in showers or gaps along baseboards. In reality, the precision of cuts, proper measurements, and understanding material compatibility play vital roles in ensuring longevity and aesthetic appeal. For example, a misaligned baseboard, even by a fraction of an inch, can cause gaps that collect dust and compromise the visual flow of a room; more importantly, it might also lead to moisture ingress in damp areas, accelerating damage. For advanced practitioners, knowing how to correctly scribe and miter joints—without relying solely on caulk—is essential to achieve flawless finishes. A study by the Home Improvement Institute emphasizes that 85% of home failures stem from overlooked detailing during installation, highlighting the importance of getting these nuances right from the start.
What Are the Biggest Mistakes in Carpet and Flooring Laying That You Might Be Ignoring?
Many believe that a straightforward glue-down or floating method guarantees perfect results. However, improper underlayment choice or ignoring the importance of leveling subfloors can cause ripples, bubbles, or uneven surfaces that degrade over time. For instance, installing carpet directly over a rough subfloor without adequate padding leads to faster wear and an uneven appearance. Moreover, during flooring installation, neglecting expansion gaps can cause warping or buckling as the material reacts to temperature fluctuations. Using quality underlayment, like the foam or cork types suited for your specific flooring, can mitigate these issues significantly. As demonstrated in expert guides on [transforming your home with expert flooring techniques](https://tilecraftsmens.com/transform-your-home-expert-flooring-installation-tips-for-2025), attention to these intricate details helps prevent costly repairs down the line. Have you ever fallen into this trap? Let me know in the comments.Maintaining your home improvements over time requires the right tools and a disciplined approach. One essential instrument I swear by is a high-quality moisture meter, such as the Protimeter MMS2. This device allows me to detect hidden moisture behind walls or beneath flooring, catching potential issues before they escalate. Regularly checking for moisture intrusion helps prevent mold growth and structural damage, especially in areas like bathrooms and basements. Additionally, I rely on a precision level and laser alignment system to ensure that floor slopes and baseboard alignments stay true through years of temperature changes and settling. The Bosch GLL 3-80 is my go-to laser line generator; it provides crystal-clear lines that help maintain perfect slopes during re-tiling or flooring works.
For ongoing maintenance, I recommend investing in a good-quality caulking gun and silicone sealant specifically designed for bathrooms. Proper sealing around edges and fixtures prevents water seepage which can lead to long-term damage. When dealing with showers, I favor using a professional-grade waterproofing membrane like RedGard—it’s easy to apply, durable, and ensures that water stays where it should.
Predicting future trends, I believe the integration of IoT sensors in home infrastructure will revolutionize maintenance routines. Smart moisture sensors connected to your phone can alert you instantaneously about leaks or humidity spikes, enabling proactive interventions.
How do I maintain my drainage systems and waterproofing over time?
Regular inspections are key. For drainage, I recommend visually checking grates and seals every six months, and testing water flow after repairs or during seasonal changes. Reapplying or updating waterproofing membranes every few years, especially in high-moisture areas, is vital. A good rule of thumb I follow is to revisit the waterproofed areas annually with a moisture meter, catching issues early. Remember, using the right tools like a high-quality moisture meter or laser level can make all the difference—they are investments that pay for themselves by preventing costly repairs. For advanced results, consider applying a liquid waterproofing layer over existing membranes, as suggested by the experts at Home Water Damage Prevention Report (source: https://homewaterdamageprevention.com). Give these tools and methods a try to secure your home’s future against water-related mishaps.
What I Wish I Learned Before Flawless Renovations
- My biggest breakthrough was realizing that meticulous measurements and understanding material behaviors during installation saved me from costly mistakes, especially with baseboards and flooring that had to align perfectly across uneven walls and floors.
- Failing to anticipate how moisture and temperature variations affect waterproofing layers taught me to invest in quality sealing tools and materials upfront, making sure my showers remained leak-free for years to come.
- Overlooking the importance of proper subfloor preparation initially caused ripples and bubbles in my vinyl plank flooring. Correcting this taught me that a stable, level surface is the backbone of lasting results, a lesson I won’t forget.
My Must-Have Guides and Tools for Home Transformations
- Check out the article on expert flooring installation tips—it’s a game-changer for ensuring smooth, durable floors that can withstand 2026’s challenges.
- The latest baseboard trends kept my interiors fresh and stylish, while the shower upgrade tricks made my bathroom feel boutique-worthy.
- For precision and ongoing maintenance, I swear by my laser level (like the Bosch GLL 3-80) and moisture meter, which help me catch issues early and keep everything aligned beautifully.
Embrace Your Power to Transform Your Space
Every renovation journey is a chance to learn, grow, and create a home that truly reflects your style and resilience against future challenges. By focusing on precise measurements, quality materials, and staying informed through trusted resources, you equip yourself to handle anything that 2026’s climate throws at us. Remember, it’s not just about fixing what’s broken—it’s about building a sanctuary that endures and inspires. Your effort today ensures a safer, more beautiful home tomorrow. Are you ready to take the next step in perfecting your home improvements? Share your experiences or questions below and let’s grow together!