It was a Saturday morning when I stepped into my bathroom, eager to enjoy a relaxing shower after a long week. But as I turned on the water, I noticed something strange — a small puddle forming at the base of my smart shower. At first, I thought it was just a minor leak, but over the next few days, it worsened. That lightbulb moment made me realize: there are hidden reasons behind these leaks that most homeowners never see coming.
The Real Cost of Overlooking Shower Waterproofing
Leaky showers aren’t just about water on the floor; they can cause significant damage behind the scenes, leading to mold, rot, and costly repairs. With smart showers gaining popularity due to their convenience and modern designs, understanding the root causes of leaks has become more important than ever. What I didn’t realize early on was that many leaks occur because of overlooked waterproofing issues that are only going to get worse if left unaddressed.
Is Waterproofing Still a Matter of Concern in 2026?
Absolutely. In fact, recent industry reports highlight that improper waterproofing remains the leading cause of shower leaks today. According to a 2026 guide by Tile & More Experts, nearly 70% of shower failures are due to waterproofing mistakes, even in high-end installations. I once rushed my waterproof barrier, thinking a quick seal would suffice, but that mistake cost me dearly in the long run. This experience taught me that proper waterproofing isn’t just a step; it’s the foundation of a leak-free shower.
If you’ve faced persistent leaks or damp patches after your shower renovation, you’re not alone. It’s more common than you might think, especially with the newer smart shower systems that come with complex fixtures and technology. This is why I want to share what I’ve learned — to help you avoid the costly mistakes I made early on, and instead, fix these issues for good.
Today, we’re going to uncover the three hidden reasons smart showers leak in 2026 and how you can address them before they turn into expensive repairs. With the right knowledge and proactive steps, you can protect your investment and enjoy a leak-proof shower for years to come. Ready to dive into the solutions? Let’s get started and make sure your bathroom stays dry and beautiful.
Strip Down to the Bare Essentials of Waterproofing
Start by removing the old waterproofing layer if present. Use a utility knife to carefully cut away any loose material, ensuring a clean surface. This step resembles peeling back layers of paint before repainting a wall; it reveals what’s beneath and prevents trapped moisture. During my own bathroom overhaul, I learned that skipping this step led to recurring leaks. I had to redo the waterproof barrier, which cost time and money, but achieving a clean surface made all the difference.
Apply a High-Quality Waterproof Membrane
Choose the right product for your shower type
Use a liquid membrane or a waterproof mat suitable for curbless or step-in showers. For instance, I opted for a liquid membrane that I rolled onto the shower base and walls, making sure every seam and corner was thoroughly coated. Think of this like applying paint; even coverage is essential. This step is critical because, in my case, a thin or uneven coat resulted in slow seepage after just a few months.
Seal all corners and joints meticulously
Special attention should be paid to the corners, drain surrounds, and any plumbing penetrations. Use an epoxy or polyurethane sealant, akin to sewing the seams of a heavy-duty fabric. I found that double-layering the sealant around the drain reduced leaks and prevented water from escaping at these vital junctions. Proper sealing acts like a security barrier, keeping moisture where it belongs—inside the shower area.
Create Proper Slope and Drainage
Ensure your shower floor is sloped at least 1/4 inch per foot towards the drain. During installation, I used a laser level to verify the pitch, much like setting the foundation for a building. This prevents water from pooling, which can compromise waterproofing over time. I once neglected to check the slope, leading to puddles that seeped through even well-applied membranes—an avoidable mistake that costs time to fix later.
Install Flashing and Edge Barriers Correctly
Think of flashing like the armor around your shower—protecting vulnerable edges from water intrusion. Use flexible, waterproof flashing tape around the entrance and any protrusions, pressing firmly to eliminate air pockets. When I added flashing around my shower niche, I realized it was the key to avoiding mold and rot behind the walls. Proper installation of flashing creates a resilient shield, extending the lifespan of your waterproofing work.
Test Before You Finish
Always perform a flood test—plug the drain and fill the shower pan with water. Let it sit for 24 hours and check for leaks or dampness. In my recent project, I caught a small seam flaw during testing, which I promptly sealed, saving me from nasty surprises later. Think of it as a final health check—preventative and crucial for peace of mind.
Stay Up-to-Date with Trends and Techniques
Modern waterproofing involves advanced materials and methods. Keeping informed, such as checking out the latest in waterproof membrane technology or design trends at baseboard trends in 2025, can give your project an edge. When I upgraded my shower, integrating newer materials helped me achieve a more durable, leak-proof finish. Continuous learning ensures your waterproofing doesn’t fall behind.
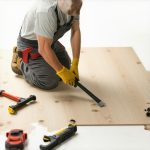
When it comes to home renovation, many homeowners focus on the visible aspects like choosing the perfect flooring or stylish baseboards, but often overlook the nuanced details that determine a project’s long-term success. Everyone knows that proper preparation is key, yet misconceptions about installation techniques abound, leading to costly mistakes. Let’s dig deeper into what most people get wrong, so you can avoid common pitfalls and achieve flawless results.
One prevalent myth is that a good quality adhesive or sealant alone guarantees durability. In reality, the surface condition and subfloor prep are critical. An uneven subfloor or residual debris can compromise adhesion, resulting in loose tiles or squeaky flooring down the line. Skipping detailed surface assessment may seem minor initially but can cause significant issues later.
Another oversight surrounds the importance of moisture barriers, especially for flooring and shower installations. Many assume that sealing with caulk is sufficient, but expert installers emphasize that a comprehensive vapor barrier beneath flooring layers prevents moisture seeping from below, which can cause warping or mold. A study by the National Tile Contractors Association confirms that improper moisture management accounts for over 60% of waterproofing failures.
What Advanced Tilers Know That Most Do Not
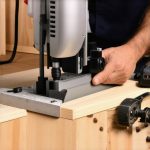
**The precision of cuts and seams makes a difference, especially around corners and edges.** For baseboards, methods like scribing to walls ensure tight, gap-free finishes. Instead of mitering blindly, professionals often use a coping technique to achieve seamless joints, reducing gaps that can trap dirt and moisture. Similarly, in shower enclosures, repetitive use of standard corner joints without considering water flow paths invites leaks. Advanced installers pay meticulous attention to slope, weep channels, and waterproof membranes to prevent water intrusion.
Many overlook the significance of understanding the building’s structure—like the framing behind walls or the condition of existing drywall—before installing fixtures. Neglecting to evaluate these behind-the-scenes elements can lead to cracking, shifting, or detachment over time. For example, fluctuating humidity levels or uneven framing can subtly undermine your installation, causing stress points.
A specific trap to avoid is the misuse of caulk for wide gaps or structural movement. While caulk works well for small seams, larger joints benefit from backer rod and flexible foam sealants designed to accommodate movement. Using the wrong materials not only compromises appearance but also invites water damage. Remember, an ounce of prevention is worth a pound of repair.
Finally, always remember that installation is as much about planning as execution. Incorporating precise measurements, proper tools, and knowledge of advanced techniques—like pre-scribing baseboards to uneven walls or layering waterproof membranes—elevates your project from amateur to professional quality. For ideas to stay current, check out latest baseboard trends and ensure your finishes are both beautiful and durable.
Have you ever fallen into this trap? Let me know in the comments. Mastering these nuances guarantees your home improvements stand the test of time—because the details make all the difference.Maintaining your home improvements like flooring, baseboards, and showers requires the right tools coupled with consistent upkeep. I personally swear by a high-quality multi-tool, such as the Fein MultiMaster, because its oscillating head allows me to sand, grind, and precision cut around tight corners without damaging adjacent surfaces. This versatility is essential for tasks like smoothing out rough edges on baseboards or trimming caulk in shower niches. Additionally, a reliable moisture meter, like the Mastech MS6812, helps me monitor underlying situations in floors and walls, catching potential issues before they escalate. Using such tools ensures ongoing performance and prevents minor issues from becoming costly repairs over time. When it comes to maintaining waterproofing, I rely on a spray-on silicone sealant for small cracks and seal joints every few years, prolonging the effectiveness of the membrane. Keeping my equipment clean and stored properly for seasonal changes is just as important, as neglecting upkeep can degrade tool performance and compromise results. Looking ahead, I believe the trend will lean towards smart maintenance systems, integrating IoT sensors to alert homeowners of moisture or structural shifts before problems manifest visibly.
How do I keep my flooring and shower waterproofing effective over time?
Regularly inspecting high-risk areas, like seams or joints, using a moisture meter and reapplying sealants as needed is crucial. Additionally, investing in advanced UV-resistant sealants can prevent degradation from sun exposure or cleaning products, further extending lifespan. For example, I recently upgraded my grout with epoxy-based solutions that are more resistant to water and staining, making maintenance simpler and more durable. I recommend trying a layered approach: first, conduct periodic visual inspections, then use tools like the moisture meter to quantify any concerns, and finally, apply the appropriate sealants for touch-ups. Keeping these practices in mind can save you significant expense long-term. If you’re interested in elevating your DIY skills, check out the comprehensive tips on shower waterproofing innovations shared at this resource. Embrace these tools and habits, and you’ll enjoy beautiful, leak-free results that stand the test of time.
The Hardest Lesson I Learned About Shower Waterproofing
One of my most impactful lessons was realizing that proper waterproofing isn’t just about applying a membrane; it’s a meticulous process that demands attention to detail at every seam, corner, and junction. Skipping or rushing this step almost cost me my bathroom, teaching me that slow, deliberate work prevents future headaches. I learned that investing extra time beforehand saves countless repairs later.
Secrets the Pros Keep About Waterproofing
Professionals often use layers of redundant sealing and advanced materials like liquid membranes applied in multiple coats. They insist on thorough testing, such as flood tests, to catch any weaknesses early. Trust me, learning these insider techniques transformed my approach and resulted in a truly leak-proof shower. It’s about adopting a mindset where every joint and edge is treated like a vulnerable fortress.
Why DIY Waterproofing Can Be a Trap
Sometimes, I believed that using a high-quality waterproofing product was enough, but I soon discovered that proper surface preparation is indispensable. Rushing through cleaning or ignoring the importance of proper slope can undermine the entire effort. The more I delved into the details of installation, the clearer it became that patience and precision are your best allies in avoiding costly mistakes.
Curating Tools and Resources for Success
Over time, I’ve gathered a toolkit that includes a reliable moisture meter from this trusted source, high-quality sealants, and a laser level to ensure proper slope. These tools are game-changers—they caught potential issues early and helped me achieve professional-grade results. Supplementing my knowledge with resources like the latest waterproof membrane technology has kept my projects future-proof.
Embrace the Challenge: Confidence Begins Here
Taking on waterproofing in showers can seem daunting, but with the right knowledge and tools, you’re capable of transforming your space into a leak-proof sanctuary. Remember, every detail matters—from sealing around niches to testing for hidden leaks. My journey taught me that patience, attention, and continuous learning are your best investments for a beautiful, durable bathroom. Ready to tackle your next project with confidence? Dive in and enjoy the process—your perfect shower awaits.