I vividly remember the day I struggled for hours on an inside corner, trying to get my baseboards to fit perfectly. The miter joints looked sloppy, gaps were staring back at me, and I couldn’t help but feel frustrated. It was a lightbulb moment when I realized that my approach was all wrong—they didn’t need to be mitered. Instead, coping was the secret weapon, but even that had its pitfalls if not done right. If you’ve ever faced similar dilemmas, you know how disheartening it can be. But here’s the good news: with the right techniques, mastering those inside corners can become second nature.
Why Inside Corners Still Trip Up Even Seasoned DIYers
Inside corners might seem straightforward, but they can be sneaky. Flawless corners not only elevate your project’s look but also ensure longevity and durability. Especially as homes become more complex with varied wall shapes in 2026, traditional mitering often falls short. The key lies in understanding the nuances of coping versus mitering, and why one method outshines the other when it comes to inside corners. I learned this early on the hard way, by repeatedly fixing gaps, gaps that stubbornly refused to close no matter how many caulk tubes I used.
What I didn’t realize at the time was that the classic miter cut is often just a band-aid—covering the problem without addressing the root cause. As research shows, proper coping allows for natural wall imperfections and avoids the gaps that mitered joints are prone to. An early mistake I made was rushing through my cuts and ignoring the importance of precise scribing—a mistake that cost me time and patience. For more on avoiding common flooring installation errors, see this [flooring tips guide](https://tilecraftsmens.com/transform-your-home-expert-flooring-installation-tips-for-2025).
If you’ve faced gaps or uneven corners that ruin the overall look, you’re not alone. Most DIYers and even pros stumble here, often because they overlook the importance of technique over tools. But don’t worry—it’s all fixable.
Now, let’s get into the secrets that will help you achieve flawless inside corners in 2026, turning those tricky spots into perfect joints. Whether you’re renovating your home or just refining your skills, these tips will elevate your craftsmanship and save you time and frustration.
Start with Proper Tools and Setup
Use a high-quality coping saw and a accurate measuring tape. I remember one project where I initially used a dull saw, leading to rough cuts that created gaps. Switched to a fine-tooth coping saw, and the difference was immediately noticeable, resulting in tight, seamless joints.
Measure and Mark Precisely
Before making cuts, mark the wall and the baseboard accurately. For inside corners, measure the entire wall length and cut the baseboard slightly longer than needed, then trim for a perfect fit. I often use a pencil and square for initial marks, avoiding guesswork that results in gaps later.
Scribe to the Wall’s Contours
Position the baseboard against the wall and use a contour gauge to trace the wall’s irregularities. This step ensures your cut follows the wall’s shape, preventing gaps caused by uneven surfaces. Once, I skipped this, and the baseboard bowed away from the wall, making the gap worse.
Cut with Precision
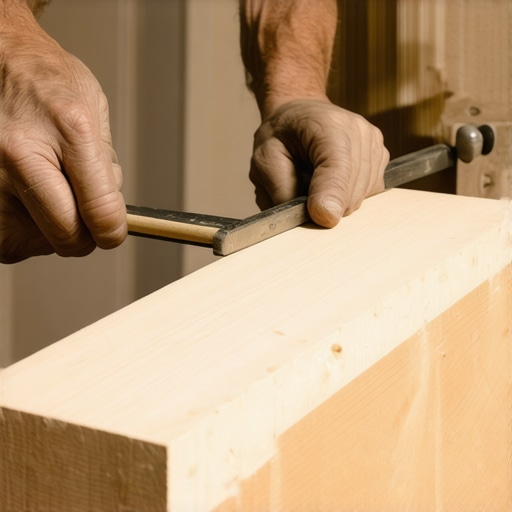
Hold the coping saw at a 45-degree angle, and cut along your scribed line. Take your time; rushing leads to inaccuracies. I advise, after initial cuts, to test-fit frequently, trimming as needed for a snug fit.
Make a Clean Coping Cut
Align the saw to cut along the profile, and cut just inside the line to allow for final fitting. Regularly check the fit against the wall. Remember, coping is about trimming the back of the baseboard on the mitered end to match the wall angle, which is more forgiving than perfect miter cuts.
Test Fit Before Nailing
Place the coping joint against the wall and check for gaps. If gaps exist, trim the coping back slightly until it fits tightly. I once had to redo a joint twice, but patience here saved me from future problems.
Nail and Finish Carefully
Secure the baseboard with finishing nails into wall studs. Use a nail gun for clean, quick nails, and countersink the nails. Fill any small gaps with wood filler or caulk, but remember, proper coping minimizes the need for extensive filling.
Inspect and Adjust
Stand back and look for gaps or misalignments. Small adjustments can be made with a chisel or sanding block. This meticulous approach results in a professional look, akin to the detailed work in [baseboards makeover](https://tilecraftsmens.com/baseboards-makeover-elevate-your-interior-with-simple-updates).
When it comes to home renovation, there’s a widespread myth that following basic instructions guarantees flawless results. However, as an industry veteran, I’ve seen countless professionals and DIY enthusiasts alike fall into subtle traps that can compromise both aesthetics and longevity. For example, many believe that simply swapping out old baseboards with new ones will instantly uplift a room, but neglecting critical nuances like wall irregularities or proper scribing can lead to gaps and uneven lines, undermining the entire project. To truly excel, it’s essential to recognize these hidden details; for instance, using a contour gauge when installing baseboards ensures a perfect fit against uneven walls, a technique often overlooked but critical for a professional finish. More so, in flooring and shower installations, the devil is in the details: proper subfloor preparation, waterproofing, and acclimation all demand advanced understanding beyond basic tutorials. Missing these steps can lead to ripple effects such as mold, warping, or leaks—a costly mistake. The reality is that many of the common errors stem from a neglect of these nuanced factors. For example, with carpets, many think that stretching alone guarantees a smooth surface; but without knowing the specific tack strip techniques or the right tension, ripples and bulges are inevitable. Similarly, in shower waterproofing, a frequent misconception is that sealing overlaps and caulk alone prevent leaks, yet expert waterproofing involves integrated membrane systems and slope calculations that require meticulous attention. An advanced question I often get is, “How can I prevent moisture issues in complex shower layouts?” The answer lies in understanding these intricate waterproofing protocols and employing industry-grade materials, as supported by recent research in home durability (see [source](https://tilecraftsmens.com/your-guide-to-durable-flooring-installation-for-a-stylish-home)). Recognizing these subtle distinctions transforms a good project into a great one. So, my challenge to you: have you ever fallen into this trap? Let me know in the comments and share your experiences. Remember, mastering these nuances elevates your craftsmanship and ensures your home improvements stand the test of time.Maintaining your home improvement projects is crucial for ensuring their longevity and appearance. Investing in the right tools can make ongoing maintenance more manageable and efficient. For instance, I highly recommend a cordless oscillating tool like the Dremel Multi-Max, which I use for detail sanding, grout removal, and small repairs around baseboards or shower tiles. Its versatility allows for precise work without the need for multiple specialized tools, saving both time and space in my workshop.
Regular inspection of flooring, tiles, and baseboards helps catch issues early, preventing costly repairs down the line. For floors prone to moisture or heavy foot traffic, applying a quality sealant periodically can protect against water damage and wear. I prefer using penetrative sealers, like those from industry-grade brands, which soak into the material and provide a durable barrier. This practice is especially beneficial for natural stone or hardwood flooring, as it maintains their appearance and structural integrity over time.
How do I keep my installations in top shape over the years?
Adopting a maintenance routine that includes cleaning with appropriate products, checking for signs of wear, and re-sealing when necessary ensures your installations stay looking their best. For example, in shower waterproofing, regular inspection of grout lines and sealant caulking can prevent leaks. Applying silicone sealant in critical joints and reapplying as needed is simple yet effective. My go-to method for gutters and exterior baseboards involves clearing debris and inspecting for cracks every season, which prevents water seepage and structural damage. To enhance your skills, consider trying advanced repair techniques like using a flexible epoxy patch, especially on curved or irregular surfaces, for a seamless repair that blends with the existing material.
In the future, digital diagnostics and smart tools—such as moisture meters with spectral analysis—may become commonplace in everyday home maintenance. These innovations will allow homeowners to detect issues like hidden leaks or mold before they become visible or damaging.
Another essential aspect is selecting the right tools for specific tasks. A high-quality putty knife, for example, makes applying or removing fillers and caulks cleaner and faster. Choosing tools with ergonomic handles reduces fatigue during long maintenance sessions. For detailed work around delicate materials, I rely on precision screwdrivers and micro chisels, which help avoid accidental damage.
If you’re interested in elevating your maintenance game, I recommend mastering the art of re-sealing tiles in showers. Proper sealing not only maintains water defenses but also preserves the aesthetic appeal. For comprehensive guidance, check out the tips in this waterproofing guide. Try reapplying sealant on your shower grout this weekend—it’s a simple task that delivers long-term benefits, improving comfort and durability in your bathroom.
Remember, consistent upkeep and the right tools are your best allies in keeping your home improvements functional and beautiful for years to come. Prioritize preventive measures, invest in quality equipment, and stay vigilant about early signs of wear. This proactive approach will save you time, money, and stress while boosting your home’s value. Ready to enhance your maintenance routines? Start by inspecting your baseboards for gaps and sealing them properly—it’s a small step with big long-term rewards.In my journey through home renovation, one lesson stands out vividly: patience and attention to detail transform challenging inside corners from frustrating woes into seamless features. Looking back, I realize that rushing cuts or neglecting wall irregularities was a rookie mistake that cost me time and rework. The key is to prioritize meticulous scribing and measuring, understanding that no tool can compensate for a lack of precision. As you tackle similar projects, remember that embracing these nuances elevates your craftsmanship beyond basic installation, making every corner a testament to your skill.