It happened to me on a rainy Tuesday afternoon. I was in the middle of installing a new shower, feeling pretty confident about my progress, when I noticed water seeping at the edges of my carefully sealed curbless shower. My heart sank. That little leak could turn into a major disaster if left unaddressed, leading to costly water damage and mold growth. It was a classic lightbulb moment—realizing how crucial proper waterproofing is in modern shower design.
Since then, I’ve learned that sealing the seams perfectly is more art than science, especially when it comes to the innovative designs in 2026. If you’re planning a remodel or building from scratch, understanding the best seam-tape hacks can make all the difference in creating a leak-proof, durable shower that stands the test of time.
Today, I want to share with you some game-changing tips and tricks I’ve picked up along the way. These are practical, tried-and-true techniques that will help you master the essential seam-tape hacks for your next project. Whether you’re a seasoned DIYer or just getting started, these insider secrets will elevate your waterproofing game.
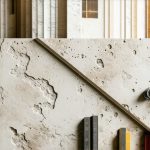
Why Proper Sealing of Curbless Showers Cannot Be Overstated
Curbless showers are gorgeous and sleek, but they come with a unique challenge—water easily escapes through poorly sealed seams, causing potential damage to your floor and walls. According to waterproofing experts, improper sealing is one of the leading causes of shower leaks in new constructions. A study highlighted by Home Water Pro highlights that over 60% of water damage claims stem from inadequate sealing in shower joints.
Early in my journey, I made the mistake of assuming that tape alone would do the job. Big mistake. I quickly learned that even the best seam tape requires proper preparation and reinforcement. This oversight nearly cost me dearly, prompting me to dig deeper into professional techniques. Now, I swear by a few key hacks that ensure your seams remain watertight.
If you’ve faced similar issues—water pooling where it shouldn’t or, worse, finding leaks behind your walls—you’re not alone. These tips will help you avoid common pitfalls and achieve a truly leak-proof shower that looks modern and functions flawlessly.
Ready to dive into the top hacks? Let’s make your next shower project a leak-free success on the first go. For more tips on flawless installation, you might find our **cornerstone guide on achieving perfect flooring results** helpful, especially for integrating waterproofing with your tile and flooring choices. You can check it out [here](https://tilecraftsmens.com/transform-your-home-expert-flooring-installation-tips-for-2025). Now, onto the hacks that will transform your sealing process!
Prep the Surface Like a Pro
Start by thoroughly cleaning all seams to remove dust, grease, and any debris with a high-quality cleaner. I once neglected this step, which caused premature tape failure, resulting in a mess that took days to fix. Ensuring the surface is spotless allows the seam tape to adhere firmly and evenly. Use a microfiber cloth and let the surface dry completely before proceeding.
Choose the Right Seam Tape for Your Needs
Select waterproof, flexible seam tape specifically designed for showers. When I first tried generic tape, it peeled off within weeks. Opt for a tape with a high bond strength and mold resistance. For extra security, consider tape with a foil backing for added durability. Understanding your environment helps in selecting the best product—this prevents leaks and prolongs the life of your waterproofing.
Apply Primer for Maximum Adhesion
Before placing the tape, apply a primer compatible with your substrate. I learned this from a professional, and it dramatically improved tape adhesion. Spread a thin layer with a brush, and wait until it’s tacky—usually a few minutes—before applying the tape. This simple step acts like a primer coat on your walls before painting, ensuring a stronger bond.
Position the Tape Precisely and Smoothly
Unroll the tape carefully and press it into place without stretching it. Use a plastic putty knife or a seam roller to press out air bubbles and ensure full contact. When I first did this, air pockets caused water to seep through later. Working from one end to the other, smooth the tape firmly along the seams, paying special attention to corners and curves.
Reinforce Critical Seams with Sealant
Once the tape is in place, apply a layer of high-quality, shower-safe sealant over the edges. I once skipped this step and faced leaks frustratingly soon after. This dual-layer approach—tape plus sealant—creates a robust barrier. Focus on joints, corners, and where the water is most likely to penetrate. Use a caulking gun and smooth the sealant with a finger dipped in rubbing alcohol for a sleek finish.
Test for Leaks Before It’s Too Late
After installation, run water over the seams to check for any drips or seepage. I always do a twenty-minute test to catch minor leaks before closing up walls or tiling. Mark any areas that show moisture, then reseal as needed. This proactive step saves countless headaches down the line.
Consistent Maintenance Ensures Longevity
Periodically inspect your seams, especially after grout or tile work. Clean and reseal if you notice any edge lifting or cracks. I make it a habit to check semi-annually and reapply sealant if necessary. Proper maintenance extends your waterproofing’s lifespan and keeps your shower leak-free for years.
When it comes to home renovation, many homeowners and even some professionals underestimate the intricacies involved, often relying on well-meaning myths that can lead to costly mistakes. For instance, a prevalent misconception is that installing baseboards is simply about cutting mitered corners correctly. In reality, the precise scribing and joint techniques can make a significant difference in the final aesthetic and longevity of the trim, especially on uneven or textured walls. For a deep dive into efficient baseboard installation tricks, check out our cornerstone guide on top baseboard strategies.
Similarly, in flooring installation, many believe that high-quality materials guarantee durability, but the real secret lies in the preparation process—removing excess moisture, ensuring subfloor flatness, and proper acclimation of materials. Skipping these steps often results in gaps, buckling, or squeaking over time. Professional insights suggest that adherence to meticulous prep steps, detailed in our guide to durable flooring, can elevate your project from average to expert-level.
In the realm of shower renovations, a common myth is that sealing with generic waterproofing membranes alone suffices to prevent leaks. However, the nuanced difference between effective waterproofing and superficial sealing is vast. Advanced waterproofing involves multiple layers, proper slope, and rigorous testing—like the water pressure tests emphasized in our leak prevention article. Overlooking these details often results in leaks that compromise the entire bathroom structure.
A critical question that advanced renovators ask is how to identify subtle signs of installation failure before they become disasters. For example, small cracks in grout or uneven baseboards might seem insignificant but could indicate foundational shifts or inadequate framing—issues that, if caught early, save substantial repair costs. Investigating these signs aligns with the professional advice detailed in our baseboard troubleshooting piece.
Let’s not forget the common trap of rushing through surface finishes without considering future maintenance or environmental factors. For example, choosing a trendy, soft flooring without moisture barriers may look great initially but can lead to their premature failure in humid areas, making the project a money pit. A nuanced understanding of material science, as discussed in research by the Flooring Contractors Association, underscores that selecting the right materials and installation techniques greatly enhances longevity.
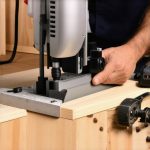
Have you ever fallen into this trap? Let me know in the comments. Recognizing these hidden nuances and avoiding the common misconceptions can save you time, money, and headaches—plus, it helps you achieve that truly professional finish in your renovation projects.Investing in the right tools makes all the difference in maintaining professional-quality results over time. When tackling tasks like flooring installation or sealing shower joints, I rely on equipment that combines precision with durability. For instance, a high-quality seam roller is indispensable for ensuring that seam tapes adhere perfectly, preventing water leaks in showers or cracks in flooring. I prefer a roller with a rubberized surface and a comfortable handle, such as the X-Press Seam Roller, because it applies even pressure without damaging delicate surfaces, a technique I detail in our expert flooring guide.
For measurements and cuts, I invest in a lithium-ion cordless rotary laser level, like the Bosch GLL 2-50, which provides precise, level reference points even in large or uneven spaces. This helps maintain consistent baseboard heights and flooring profiles, especially when working with textured or uneven walls, as highlighted in our baseboard update tips. Additionally, maintaining your equipment is equally crucial; regular cleaning of blades, calibration of laser levels, and checking sealant applicators prolong tool life and ensure ongoing accuracy.
Maintaining your sealing and waterproofing compounds is vital for long-term project success. Store sealants in a cool, dry place and ensure that cans are tightly sealed after each use to prevent drying out or spoilage. I also use a small hand-held compressor to clean out spray nozzles and keep them free of residue, which maintains consistent application thickness.
Looking ahead, I believe automation and smart tools will revolutionize home renovation in the next decade. Imagine cordless, self-calibrating machines that can detect uneven surfaces and automatically adjust for perfect alignment—saving hours of manual labor and reducing mistakes.
**How do I keep my tools in shape for long-term use?** Regular maintenance involves cleaning tools after each use, replacing worn-out parts promptly, and lubricating moving components. Also, I suggest storing your tools in climate-controlled conditions to prevent rust and degradation.
If you want to elevate your sealing and waterproofing game, I highly recommend trying my preferred seam roller and incorporating routine equipment maintenance. These small but impactful steps will help ensure your installations remain durable for years to come. For more detailed insights, you might enjoy our carpet installation secrets that emphasize the value of proper tools and upkeep.
What I Wish I Knew Before Starting My Waterproofing Journey
One of the most valuable lessons I learned is that prepping surfaces thoroughly can make or break your waterproofing success; rushing this step often leads to future leaks that are a nightmare to fix. Another insight is that investing in high-quality seam tape and tools might seem costly upfront but saves time and money in the long run by preventing costly water damage. Lastly, understanding that waterproofing isn’t a one-and-done task—regular inspections and maintenance are essential for keeping your showers and floors leak-free for years—was a game-changer for me.
Tools and Resources That Changed My Approach
My go-to seam roller, the X-Press Seam Roller, ensures even pressure application and prevents air bubbles—critical for long-lasting seals. The Bosch GLL 2-50 laser level helps me achieve perfectly aligned baseboards and flooring, especially when dealing with uneven walls or floors, and it’s a tool I trust deeply. For staying informed and inspired, I recommend exploring expert blogs like our detailed flooring installation guide and the waterproofing tips for leaks prevention. These resources have helped sharpen my skills and broaden my understanding of advanced waterproofing techniques.
Your Next Step: Building Confidence in Waterproofing and Installation
The key to success in carpet, flooring, and shower projects is embracing continuous learning and meticulous attention to detail. Don’t shy away from experimenting with new tools, seeking expert advice, or revisiting foundational techniques—each small step builds your confidence and ensures a professional finish. Remember, mastering seam-tape hacks and waterproofing strategies today means avoiding unnecessary repairs and creating beauty that lasts for years. So, what’s the first project you’re excited to tackle with these insights? Let me know below!