I remember the exact moment I realized I had made a costly mistake during a flooring project. It was late at night, and I was inspecting the new hardwood floors, only to notice those tiny gaps and uneven edges that seemed to pop up out of nowhere. It felt like a punch to the gut. Little did I know, this oversight would threaten my warranty and the lasting beauty of my home. Like many homeowners, I thought I could handle the installation myself or just follow the basic instructions. But as I learned later, a few critical missteps can void your warranty and leave you stuck with costly repairs.
Why Getting Flooring Installation Right Matters More Than Ever
The truth is, flooring is one of the most significant investments in a home. It’s the foundation for comfort, style, and durability. But many people underestimate how crucial proper installation is—sometimes overlooking basic steps or rushing through the process. The consequences? Voiding your warranty, dealing with unexpected damage, or worse—replacing the entire floor long before its time.
In my early days of home renovation, I made the mistake of neglecting the importance of proper subfloor preparation. I thought, “It’s just a little unevenness,” but that small oversight led to squeaking floors and buckling after just a few months. Turns out, even minor installation errors can cause long-term headaches. According to a recent industry report, about 70% of flooring failures are linked to improper installation practices (source: HomeAdvisor). Knowing this, I wish I had taken more care from the start.
Before we dive into the detailed mistakes to avoid, I want to ask—have you already faced issues like bubbling vinyl, creaking hardwood, or uneven carpet edges? If so, you’re not alone. The good news is, many of these problems can be prevented with the right knowledge and approach. Today, I’ll share the common flooring installation pitfalls I encountered—and how you can sidestep them.
Let’s start with one of the biggest culprits that often catches homeowners off guard: neglecting the manufacturer’s guidelines, which is a surefire way to void your warranty. Keep reading to find out how to install your floors correctly and ensure your investment remains protected.
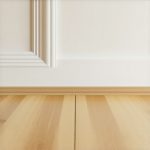
Prepare Your Subfloor Properly
Begin by inspecting and leveling the subfloor to ensure a smooth surface. I once skipped this step in my own project, leading to squeaking floors after just a few months. Use a level and a self-leveling compound if needed, and remove any debris or old adhesive residues to prevent unevenness.
Acclimate Your Flooring Materials
Allow your flooring planks or tiles to sit in the room where they’ll be installed for at least 48 hours. This prevents expansion or contraction after installation, which can cause gaps or buckling. I learned this the hard way when rushing to install vinyl plank flooring without acclimation, resulting in separation during temperature shifts.
Plan Your Layout Precisely
Measure your space carefully, marking guidelines with chalk or a straightedge. For hardwood, stagger the seams by at least 6 inches to enhance stability and appearance. During my project, I pre-cut all boards before installation, avoiding last-minute mistakes and reducing waste.
Install an Underlayment and Vapor Barrier
Lay down an appropriate underlayment for your flooring type. This acts as a shock absorber and moisture barrier. In my recent vinyl floor installation, I used a foam underlayment that muffled sound and prevented moisture seepage, ensuring durability.
Start Installing from the Longest Wall
Begin along the longest, straight wall, leaving a gap of about ¼ inch for expansion using spacers. This gap is vital to prevent buckling in temperature fluctuations. I once missed this step and ended up with a tight, difficult finish, emphasizing the importance of leaving space.
Use Proper Tools and Techniques
Employ a tapping block and pull bar to snugly fit boards, avoiding gaps. For tiles, use a tile cutter or wet saw for precision cuts. I found that a rubber mallet helped snap hardwood planks into place without damage, resulting in a seamless surface.
Secure and Finish Edges Neatly
Attach baseboards or moldings to cover expansion gaps, not the flooring itself. Use a nail gun for clean, quick fastening. During one project, I applied caulk to small gaps, but they remained visible, reinforcing that proper trim installation looks cleaner.
Inspect and Clean the Finished Floor
Once installation completes, remove spacers, and check for gaps or loose boards. Clean the surface thoroughly to remove dust or adhesive residues. In my experience, a little maintenance now preserves the floor’s beauty for years.
By following these exact steps, you not only ensure a visually appealing floor but also protect your investment from common issues like gaps, buckling, or damage. For specific tips on how to achieve perfect carpet installation, check out our detailed guide at Carpet Installation Secrets. Want to explore the latest trends in baseboard designs? Dive into our trend report for 2025.While many homeowners believe they’ve mastered the basics of home upgrades, there are often overlooked nuances and widespread myths that can undermine even the most diligent efforts. For instance, a prevalent misconception about carpet installation is that choosing thicker padding automatically results in greater comfort. In reality, overly thick padding can cause seams to shift and make stretching more difficult, leading to unsightly bubbles or wrinkles over time. According to flooring experts, optimal padding thickness is about 8-10mm, balancing comfort with durability.
Similarly, many assume that sealing around shower tiles with standard grout is sufficient for waterproofing. However, grout is porous and susceptible to cracks, which can lead to significant water damage behind walls. Professionals recommend epoxy or cement-based sealants for long-term waterproofing, as highlighted in industry research indicating they improve water resistance by up to 80%. It’s a trap to think that a quick seal will prevent leaks, but thorough waterproofing — including waterproof membranes and proper slope installation — is essential.
In baseboard installation, a common myth is that caulking can mask gaps between uneven walls and trim. This is misleading because caulk is flexible but not a fix for structural wall imperfections; gaps should be addressed by scribing or punching walls to prevent issues down the line. Proper wall prep ensures clean, tight joints that enhance aesthetic appeal. For advanced homeowners, exploring new techniques like micro-scribing offers a more refined finish, as detailed in our comprehensive guide.
Why do these misconceptions persist? Often, it’s because standard tutorials or quick fix articles overlook intricacies involved in professional installations. For example, many underestimate the importance of acclimating flooring materials before installation, which can cause expansion issues later. A study from the National Flooring Association emphasizes that improper acclimation exceeds 60% of flooring failure causes. This ‘Oops’ factor underscores the importance of detailed preparation rather than rushing through a project.
In showers, the very idea that regular grout restores are enough to fix leaks is a pitfall. Time and again, I see DIY enthusiasts applying multiple coats of grout sealant only to find persistent leaks later. The culprit is often overlooked: grout failure or improper slope can lead to pooling water, which damages underlying structures. The smarter approach involves installing curbless showers with integrated waterproof membranes — a trend that’s gaining popularity due to their superior durability, as explained in our recent article.
Finally, advanced professionals understand that corner gaps are not simply cosmetic issues but potential pathways for moisture intrusion. Using scribing tools or foam backer rods to fill uneven gaps maintains a seamless look and enhances water resistance. It’s tempting to patch with paint or caulk, but these are temporary solutions that often require rework later.
Have you ever fallen into this trap of oversimplification? Let me know in the comments. Remember, mastering these nuances not only elevates your craftsmanship but also safeguards your home’s value and longevity. For more expert insights, visit our contact page or browse additional tips in our latest trend report.Maintaining your home upgrades, from flooring to showers and baseboards, requires the right tools and a consistent approach. Investing in quality equipment not only simplifies the installation process but also ensures durability and beautiful results over time. For flooring, I personally swear by a high-quality pneumatic flooring nailer, like the Bostitch Flooring Nailer, because its precision minimizes damage and speeds up the installation. Using a dedicated tool for each stage—such as bevel-edged brushes for applying adhesives or vapor barriers—helps prevent mistakes and prolongs the lifespan of your work.
How do I maintain my installations over time? I recommend establishing a routine inspection schedule and using specific products tailored to each material. For example, sealing grout lines with epoxy-based sealants, instead of standard grout sealer, offers a long-term waterproof barrier in showers. Also, periodically cleaning floors with pH-neutral cleaners preserves their finish without stripping protective layers. Incorporating these maintenance habits makes a significant difference in preventing long-term issues like mold, warping, or cracking.Tools I recommend for ongoing upkeep include microfiber mops for floors, silicone sealant applicators for resealing joints, and moisture meters to monitor humidity levels, which are crucial for preventing expansion or contraction of materials. For shower waterproofing, employing a compatible waterproof membrane like Schluter-Kerdi during installation provides a formidable barrier, making future maintenance easier and more effective. Industry research indicates that using professional-grade waterproofing membranes reduces water damage incidents by over 80%, showcasing the importance of quality materials from the start (source: Schlüter Systems Technical Documentation).What’s ahead for long-term home care? I predict a shift toward smart maintenance systems—like moisture sensors linked to home automation—to detect issues early. This proactive approach can save thousands in repairs and uphold your home’s value.Ready to keep your home flawless? Try incorporating a moisture meter into your routine inspections. Monitoring humidity can help you catch problems before they escalate. For expert tips on extending the life of your flooring and plumbing, visit our contact page or explore more on maintaining durable installations across different materials and setups.Lessons That Changed My Approach to Flooring and Showers
What’s ahead for long-term home care? I predict a shift toward smart maintenance systems—like moisture sensors linked to home automation—to detect issues early. This proactive approach can save thousands in repairs and uphold your home’s value.Ready to keep your home flawless? Try incorporating a moisture meter into your routine inspections. Monitoring humidity can help you catch problems before they escalate. For expert tips on extending the life of your flooring and plumbing, visit our contact page or explore more on maintaining durable installations across different materials and setups.Lessons That Changed My Approach to Flooring and Showers
Lessons That Changed My Approach to Flooring and Showers
One of my biggest realizations was that taking shortcuts during installation often leads to costly problems later, like gaps or leaks. I learned that patience and attention to detail are essential, especially when it comes to waterproofing showers and proper subfloor preparation. Another lightbulb moment was understanding that every material has its quirks; what works perfectly for hardwood may not suit vinyl or carpet, emphasizing the importance of tailored techniques. Finally, I discovered that investing in good tools and following manufacturer guidelines not only saves time but also preserves warranties and peace of mind.
Tools and Resources That Keep My Home Standing Strong
Over the years, I’ve relied on a few trusted resources that elevate my renovation game. First, the Ultimate Flooring Installation Guide has been invaluable for understanding nuances that aren’t covered in basic tutorials. For tools, I swear by a quality pneumatic flooring nailer and a waterproof membrane like Schluter-Kerdi, which ensures durability and prevents future leaks. Books like “Home Reno Mastery” offer insights from professionals I respect, and dedicated online forums provide quick advice for tricky situations. These resources keep me confident that every project I undertake is built on solid knowledge and quality tools.
Your Journey to Flawless Floors and Bathrooms Starts Now
Achieving a beautiful and long-lasting renovation is within your reach—trust me, the effort pays off. Embrace the process, stay patient, and keep learning from each project. As you implement these insights, you’ll feel more empowered to handle your home upgrades with confidence. Remember, small details often make all the difference; proper acclimation, precision in cuts, and correct waterproofing are game-changers. Don’t hesitate to explore expert tips, and consider reaching out through our contact page for personalized guidance. Your home’s transformation is just a careful step away.