I remember the first time I attempted to install new flooring in my home. I was eager, full of enthusiasm, but all I got was a warped, uneven surface that made me want to hide my head in a pillow. That lightbulb moment taught me one thing: rushing through the process without proper strategies only leads to disappointment. Over the years, I’ve learned that the key to a perfect, durable finish isn’t magic or luck — it’s knowing the right techniques and paying attention to details.
Why Your Floor Installation Matters More Than You Think
When you walk into a room with a beautifully finished floor, it’s like stepping into a space that’s been thoughtfully curated. But behind the scenes, flawless installation is what makes that aesthetic magic last. Poorly installed floors can warp, squeak, or wear unevenly, costing you more in repairs and replacements down the line. According to industry experts, the biggest mistake homeowners make is rushing the process or neglecting proper prep work, which can drastically reduce the lifespan of your flooring. This is why I’m committed to sharing the strategies I’ve gathered — so you don’t have to go through the same frustration I did.
Have You Faced This Common Flooring Nightmare?
Chances are, if you’ve ever tried to install or even just lay new carpet or hardwood, you’ve run into issues like uneven seams or gaps. Early in my journey, I made the mistake of skipping the acclimation process — letting the material sit in the room for a few days before installation. It seems minor, but it’s essential. Materials expand and contract with temperature and humidity, and ignoring this step can lead to warping or buckling over time. Trust me, the small extra effort makes a huge difference in the long run. Want to learn how to avoid these pitfalls and ensure your flooring looks professional and lasts for years? Stick around, because I’ll walk you through proven techniques that I swear by — from prep to finishing touches. For more detailed insights, check out this comprehensive guide.
Natural, long-lasting results don’t happen by chance. They’re crafted through careful planning, patience, and the right methods. Ready to transform your space with a flawless finish? Let’s dive into the practical steps that will turn your flooring project into a success story.
Prep Like a Pro
Start by acclimating your flooring material in the room where it will be installed. Spread out the planks or tiles and leave them to adjust to the room’s humidity and temperature for at least 48 hours. I once neglected this step with a hardwood floor, and a few months later, I noticed gaps forming — a costly mistake that could have been avoided. Proper acclimation ensures the material expands and contracts naturally, preventing warping and buckling down the line.
Level the Surface for Perfection
Before laying your flooring, ensure the subfloor is solid, clean, and level. Use a self-leveling compound if necessary. I remember a time I skipped this step and ended up with uneven seams that made the entire floor look amateurish. Think of it like laying a foundation for a house; if it’s uneven, everything built on top will wobble. Use a long straightedge to check for dips and high spots, and sand down or fill as needed.
Seal Gaps and Cracks
Inspect the subfloor carefully for gaps or cracks. Fill these with appropriate compound to prevent movement. I once ignored a small crack, which later caused a noticeable bump in my hardwood planks — a reminder that small issues can become big problems if left unchecked.
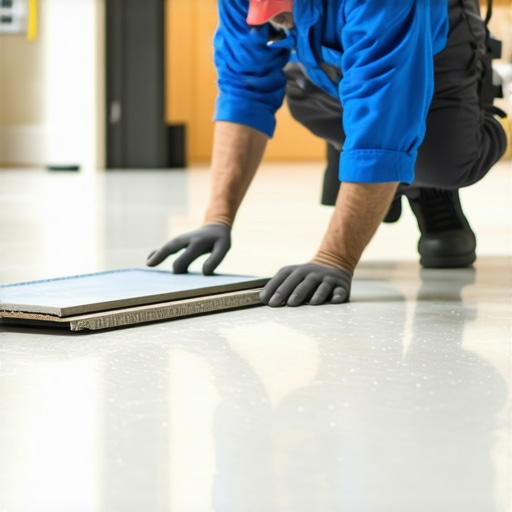
Cut and Fit with Precision
Measure twice, cut once. Use a high-quality saw to make clean cuts, and always double-check measurements before cutting. I once had a miscut that led to a gap at the seam, which I had to fix with additional trim. Precise cuts ensure tight fits, reducing gaps and improving the overall appearance.
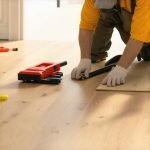
Lay Down the Flooring Carefully
Start from the longest wall or the most visible area. Use spacers to maintain expansion gaps around the perimeter — typically about 1/4 inch. For hardwood, click or tongue-and-groove systems make installation straightforward, but double-check locking mechanisms. I once rushed and skipped spacers, resulting in buckling after a few weeks. Always remember, patience during this step pays off later in a seamless finish.
Secure and Finish Properly
Fasten the flooring as recommended, whether nailing, stapling, or gluing. Pay attention to manufacturer instructions to avoid damage. After installation, install baseboards or transition strips to cover expansion gaps. For a polished look, paint or stain the baseboards and reattach them securely. I once painted baseboards before installing them, which made touch-ups necessary — a lesson in planning your finishing touches.
Final Touches for a Professional Look
Inspect the entire floor for gaps, squeaks, or loose planks. Use a rubber mallet to gently tap loose planks into place. Clean the surface thoroughly to remove dust and debris. Applying a sealant or finish enhances durability and appearance. Remember, a little extra effort here ensures your flooring will stand the test of time.
For more detailed tips and tricks, check out this comprehensive guide or contact us at our team for expert assistance. With these strategies, your flooring project is set for success — lasting beauty and durability guaranteed.
Many homeowners fall prey to misconceptions that can sabotage their flooring projects, leading to costly mistakes and less-than-stellar results. As someone who has spent years refining the art of installation, I want to shed light on these misconceptions and share the nuanced truths that often go unnoticed. Let’s dig deeper into what most people get wrong about flooring installation and how to avoid these pitfalls.
Why Cutting Corners Usually Costs More in the End
It’s tempting to skip steps like acclimation or surface leveling to save time and money. However, experts agree that neglecting these crucial steps can cause long-term issues like warping, buckling, or uneven wear. For example, a study published in the Journal of Construction Engineering highlights that improper subfloor preparation increases the likelihood of floor failure by over 40%. Rushing these steps might seem like a shortcut, but it’s a false economy. The real secret is understanding that patience and precision at the start save you from expensive repairs later.
Common Mistakes That Derail Perfect Results
One of the most overlooked errors is mismeasuring. It sounds simple, but even a small miscalculation can lead to gaps or overlaps. High-quality tools and double-checking measurements are essential but often ignored. Also, many underestimate the importance of maintaining consistent humidity levels during installation. Wood and laminate floors are sensitive to moisture changes, which can cause expansion or contraction after installation, leading to gaps or buckling. This is why I always recommend monitoring indoor humidity and ensuring proper acclimation.
Advanced Tip: How to Achieve a Flawless Finish
For those aiming for professional-level results, understanding the nuances of expansion gaps and transition strips is vital. For example, knowing the optimal width of expansion gaps varies based on material and climate conditions. Too small, and the floor will buckle; too large, and it looks unprofessional. Expert installers also pay attention to the direction of the wood grain and the pattern of laying planks for aesthetic harmony. These details can elevate your project from good to exceptional.
Finally, don’t forget that finishing touches matter. Proper sealing and finishing protect your investment and enhance appearance. Skipping or rushing this step can compromise durability and look. Remember, the difference between a DIY job and a professional finish often lies in these small but critical details. Want to see how expert techniques can transform your space? Check out this comprehensive guide for more insights.
Have you ever fallen into this trap? Let me know in the comments. When you understand these nuances, your flooring will not only look fantastic but also stand the test of time.
Maintaining your flooring over time is crucial to preserving its beauty and durability. The right tools and techniques can make all the difference in ensuring your investment stands the test of time. One essential tool I rely on is a high-quality moisture meter, such as the Protimeter Surveymaster. It helps me monitor humidity levels in the subfloor and ambient air, preventing issues like warping or buckling caused by moisture imbalance. Regular checks with this device are a game-changer, especially in climates with fluctuating humidity.
Another indispensable piece of equipment is a flooring roller. I use a heavy-duty laminate or vinyl flooring roller to press down seams and ensure tight adhesion. This simple, yet effective tool helps eliminate air pockets and improves the overall finish, reducing the likelihood of future gaps or lifting. Investing in a good roller is worth it, as it saves time and effort in the long run.
For cleaning and prep, I swear by a microfiber dust mop. Keeping the surface free of debris before applying sealants or finishes ensures a smooth, professional look. When it’s time for maintenance, a soft-bristle broom and a non-abrasive cleaner tailored to your flooring material will keep your floors looking pristine without causing damage.
Looking ahead, the trend in flooring maintenance is moving towards smart tools and IoT-connected devices. Imagine moisture meters that sync with your smartphone to alert you when humidity levels are out of range, or robotic vacuum systems designed specifically for hardwood and tile surfaces, which can also perform spot cleaning on demand. These innovations promise to simplify long-term upkeep and extend your flooring’s lifespan significantly.
How do I keep my floors looking perfect over time?
Consistency is key. Regular cleaning, prompt repairs, and monitoring environmental conditions can prevent many common problems. I recommend establishing a maintenance routine that includes checking humidity levels monthly and using the appropriate cleaning agents for your flooring type. Additionally, applying a protective finish or sealant periodically can safeguard against scratches, stains, and wear. For expert guidance on these processes, visit this comprehensive guide.
Finally, don’t forget to invest in quality tools from reputable brands. Cheap equipment often leads to subpar results and can even damage your floors. By choosing reliable tools and maintaining them properly, you ensure your floors stay beautiful and functional for years to come. Want to learn more about professional maintenance techniques or need help choosing the right equipment? Reach out to our team through this contact page — I’m here to help you keep your floors in top shape!
The Hardest Lesson I Learned About Flooring
One of the biggest realizations I had was the importance of patience during installation. Rushing through steps like acclimation or leveling often led to costly mistakes, such as warping or gaps. I learned that taking extra time to prepare properly saves time and money in the long run, making the project look professional and last longer.
3 Myths About Flooring That Held Me Back
Initially, I believed that any flooring material could be installed quickly without much prep. Turns out, each material has its quirks—wood needs acclimation, tile requires proper subfloor prep, and vinyl must be carefully sealed. Dispelling these myths helped me avoid common pitfalls and achieve a flawless finish.
What Experts Won’t Tell You About Flooring Durability
One secret I discovered is the value of quality tools like moisture meters and rollers. These might seem like small investments, but they drastically improve the precision of your work, preventing future issues. Learning to monitor humidity and ensure tight seams has been a game-changer in maintaining my floors’ beauty over time.
Where to Go from Here
If you’re serious about getting it right, check out this comprehensive guide for expert techniques and tips. Remember, mastery comes with experience and attention to detail—so don’t rush your project. Embrace each step, and your flooring will reward you with durability and style for years to come.