Ever experienced the sinking feeling of seeing your carefully laid flooring buckle, warp, or just not look quite right? I remember my first big project—thinking I could wing it without proper guidance—and ending up with uneven surfaces and gaps that made me want to hide under the couch. That lightbulb moment taught me a lot about how crucial proper installation is. Today, I want to share with you the secrets that can save your home from similar pitfalls and help you achieve flawless results in 2024.
Why Proper Flooring Installation Matters More Than Ever
In recent years, the home improvement scene has exploded with innovative flooring options—luxury vinyl, engineered hardwood, eco-friendly carpets, and more. But no matter the material, the key to a stunning finish lies in the installation process itself. Poorly installed floors not only look bad but can also lead to costly repairs down the line. Plus, with the rise of open-concept living, your flooring now acts as the canvas for your entire space, making perfection more important than ever. According to industry experts, a well-done flooring job can increase your home’s value and longevity significantly—making it a smart investment.
Have you ever faced the frustration of uneven flooring or gaps after a DIY attempt? You’re not alone. I’ve been there, and I learned the hard way that rushing through the prep work or ignoring the manufacturer’s instructions can sabotage your project. That’s why I’m here to help you avoid those rookie mistakes and set your home up for success.
Is Skipping Professional Help Actually a Good Idea?
Honestly, I once thought I could save money by skipping expert advice, only to end up with a subpar finish that needed redoing. The mistake? Underestimating the importance of proper subfloor preparation and correct tools. When I finally consulted seasoned pros, they pointed out simple steps I overlooked, like ensuring the subfloor was perfectly level or choosing the right adhesive. Trust me, investing a little extra time and effort on the front end can make your project smoother and your results much more impressive. For detailed guidance, check out expert flooring tips that I swear by.
Now that I’ve shared my experience, let’s dive into the practical steps that turn your flooring dreams into reality—without the stress—and make 2024 the year your home truly shines.
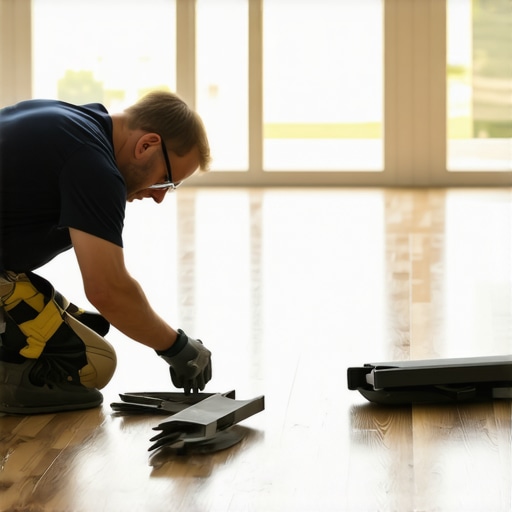
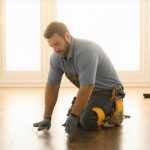
Preparation Sets the Foundation
Start by removing all furniture and fixtures from the room. I once skipped this step, thinking it was unnecessary, only to find myself crawling around with a broom and dustpan mid-project. It’s like building a house on a messy lot—untenable and frustrating. Clear the area thoroughly, then check the subfloor for levelness using a long straightedge. If you notice high spots, sand them down; low spots require a leveling compound. Ensuring a flat, clean surface prevents future buckling or gaps, making your flooring look professional from the start.
Choose the Right Materials and Tools
Select flooring suited to your lifestyle and space. For high-traffic areas, durable vinyl or laminate works well. I opted for engineered hardwood in my living room, and choosing quality materials paid off. Gather essential tools: a saw, spacers, a hammer, a rubber mallet, a tape measure, and safety gear. Using the correct tools ensures clean cuts and proper fitting, similar to having the right brush for a painting job. For detailed guidance on selecting materials, visit this comprehensive guide.
Accurate Measurements and Planning
Measure your space meticulously. Draw a layout plan that accounts for doorways, vents, and transitions to other flooring types. I once miscalculated and ended up with a narrow strip of flooring in a tricky corner—wasted material and time. Use a chalk line for straight reference points and plan your starting point along the longest wall. This planning saves you from awkward cuts and ensures a symmetrical, balanced appearance.
Install the Underlayment
Lay down a quality underlayment if your flooring requires it. This acts as a cushion and moisture barrier. I recommend unrolling it and cutting it precisely to fit, then fastening it with tape or staples. A well-installed underlayment prevents squeaks and unevenness down the line, much like laying a solid foundation for a building. Proper underlayment installation is critical for longevity and comfort.
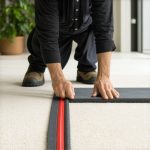
Fitting the Flooring Pieces
Start in a corner, leaving a small expansion gap (about ¼ inch) along the walls. Use spacers to maintain this gap. When laying planks, connect them snugly, but don’t force. During my first installation, I tried to snap pieces together with excessive force—resulting in damaged edges. Instead, gently tap with a mallet and a scrap piece of flooring to ensure tight joints. For a seamless look, stagger the seams between rows by at least 6 inches. Check regularly with a level to keep everything straight.
Managing Transitions and Edges
Use transition strips or thresholds where your new flooring meets other surfaces. Secure edges with appropriate adhesives or nails, ensuring they are flush. I once neglected this step, and the transition creaked underfoot. Proper finishing touches like this give your floor a polished appearance and prevent damage over time—visit this article for ideas on upgrading baseboards to complement your new flooring.
Finish with Baseboards and Accessories
Reinstall or replace baseboards, ensuring they cover the expansion gap neatly. Use a nail gun for a clean look, and caulk gaps for a seamless finish. I like to paint or stain baseboards beforehand for a professional touch. This final step elevates the overall aesthetic, making your flooring installation look intentional and refined. For inspiring styles, check latest baseboard trends.
Many homeowners believe that flooring installation is straightforward, but the reality is more nuanced. One of the most overlooked aspects is understanding the importance of subfloor conditions. Even minor imperfections, like a slight slope or residual moisture, can cause buckling, gaps, or uneven wear over time. Experts emphasize that meticulous inspection and preparation of the subfloor can save you from costly repairs later. Don’t fall into the trap of rushing this step; instead, invest time in leveling and moisture testing, which are crucial for durability. For a comprehensive approach, check out this guide on durable flooring installation.
Maintaining your flooring over time is essential to preserve its beauty and durability. A key aspect of this is using the right tools and adopting effective maintenance routines. Personally, I swear by a high-quality microfiber mop for regular dusting and light cleaning. Its gentle fibers lift dirt without scratching, which is vital for hardwood and laminate floors. For deeper cleaning, I recommend a steam mop that utilizes gentle heat and moisture—perfect for tiles and sealed wood—helping to eliminate grime without harsh chemicals. Just ensure your flooring type is compatible, as some materials, like unsealed hardwood, require specific care. Regularly inspecting your floors and catching issues early can prevent small problems from turning into costly repairs. For example, I check for signs of moisture buildup or scratches monthly, addressing them promptly to extend the life of my floors.
Investing in the right tools also means choosing quality adhesives and sealants when necessary. For instance, if you notice gaps or loose planks, a premium wood glue designed for flooring can make a significant difference. Additionally, maintaining your tools—cleaning them after use and storing in a dry place—ensures they perform optimally over time. As flooring technologies evolve, so do the tools. I predict that in the future, we’ll see more smart cleaning devices integrated with sensors to detect wear or moisture levels, automating maintenance tasks and preventing damage before it happens.
How do I maintain my flooring over time?
One of the most effective strategies is establishing a regular cleaning schedule tailored to your flooring material. For example, vacuuming or sweeping daily prevents abrasive dirt from scratching surfaces. Using mats at entry points reduces dirt and moisture ingress, especially in high-traffic areas. Applying protective pads under furniture minimizes dents and scratches, which are common issues over years of use. When it comes to deep maintenance, scheduling professional inspections every few years can identify underlying problems—like subfloor issues—that are not visible on the surface. For detailed insights on long-term flooring care, check out this comprehensive guide.
Don’t forget that proper humidity levels in your home also play a critical role. Too much moisture can cause wood to swell or warp, while too little can lead to cracks. Using a humidifier or dehumidifier to maintain consistent conditions can significantly extend your floors’ lifespan. Lastly, staying proactive with small repairs—like replacing worn-out caulking or reapplying sealant—keeps your floors looking flawless for years to come. Try implementing these advanced maintenance tips today, and you’ll enjoy beautiful, durable flooring well into 2025 and beyond.
The Hardest Lesson I Learned About Flooring Installation
One of the most valuable lessons I learned was never underestimate the importance of subfloor preparation. Skipping this step felt like building a house on quicksand—no matter how perfect the top layer, underlying flaws caused buckling and gaps. Now, I always dedicate extra time to level and moisture-test my subfloor before laying down any flooring material. This simple step saves hours of frustration and money in repairs later.
3 Myths About Flooring That Held Me Back
Firstly, I used to believe that DIY flooring was always less durable than professional installation. Turns out, with proper tools and knowledge, I could achieve results that rival experts. Secondly, I thought all flooring materials were equally easy to install; I found that choosing the right material for your space makes all the difference. Lastly, I used to think that maintenance was complicated—regular cleaning routines with the right tools, like a microfiber mop, have made my floors look brand new for years.
What Experts Won’t Tell You About Long-Lasting Floors
Many professionals emphasize the significance of proper expansion gaps and transition strips. These details prevent buckling and water damage over time. I overlooked this initially, but now I make sure to follow these finishing touches meticulously. Additionally, maintaining optimal humidity levels in your home can dramatically extend your flooring’s lifespan—something I only appreciated after experiencing minor warping in a humid season. For a comprehensive understanding, check out this guide.
My Essential Toolkit for Flooring Success
Over the years, I’ve curated a set of tools that make installation smoother. A high-quality saw for precise cuts, spacers to maintain expansion gaps, a rubber mallet for snug fitting, and a level for ensuring even surfaces are my staples. I also trust expert tips on choosing adhesives and underlayment. Investing in good tools and trusted resources like these guarantees professional-looking results and peace of mind.
Your Turn to Shine with Flooring
Embarking on a flooring project might seem daunting, but with the right knowledge and preparation, you can transform your home into a masterpiece. Remember, the key is patience, attention to detail, and using quality materials and tools. This approach doesn’t just create beautiful floors—it adds lasting value and comfort to your space. So, are you ready to take on your next flooring adventure and make 2024 your most stylish year yet?
2 thoughts on “Ultimate Flooring Installation Tips for Flawless Home Results in 2024”
Emily Carter
January 20, 2026 at 10:50 pmReading through this post really resonated with me, especially the part about subfloor preparation. I learned that lesson the hard way when I installed new laminate flooring last year. Skipping proper leveling and moisture testing led to some noticeable buckling within months. Since then, I’ve become much more diligent with that initial step, and it’s made a huge difference in the longevity of my floors. It’s surprising how many DIYers overlook this crucial stage, thinking it’s just an extra chore. Personally, I’ve also found that investing in good underlayment and tools makes the entire process smoother and results more polished.
One thing I wondered about is the best way to identify subtle subfloor imperfections without specialized equipment. Has anyone tried using a laser level or other tools for a more accurate assessment? Would love to hear about different techniques or tips that others have found helpful for ensuring a perfectly even foundation before laying down new flooring.
Sophia Bennett
April 15, 2026 at 10:10 pmReading about the importance of subfloor prep really hit home for me, especially since I made the mistake of rushing that step on a recent project. I noticed minor squeaks and slight unevenness that I initially thought I could overlook, but it turned into bigger issues down the line. Since then, I’ve started using a laser level to check for high spots and irregularities—it’s surprisingly affordable and highly accurate. I think investing in a good quality laser level or even a self-leveling tool can save a lot of headaches, especially for DIYers who want to get as close to professional results as possible. Has anyone else found that these tools make a difference, and what specific methods do you recommend for detecting even small imperfections? It’s fascinating how that tiny detail can influence the longevity and look of your floors, isn’t it? Would love to hear other tips on identifying subfloor issues early on.