I vividly remember the moment I finished installing new hardwood floors in my living room, only to find they started creaking and warping within just a few months. It was a lightbulb moment for me—realizing that the secret to lasting beauty isn’t just about choosing the right material but also about expert installation and proper care. I learned the hard way that rushing through the process or skipping crucial steps can turn a dream renovation into a costly nightmare.
Why Proper Flooring Installation Matters More Than You Think
Many homeowners overlook the importance of expert installation, thinking that the quality of the material alone determines how long their floors will last. But the truth is, the foundation you lay your floors on can make or break their durability. Poorly installed flooring is prone to gaps, buckling, and damage that can be expensive to repair down the line. That’s why, in 2024, focusing on professional techniques is more critical than ever. Proper installation not only enhances the lifespan of your floors but also keeps them looking stunning for years.
Have you ever faced uneven or damaged floors shortly after installation? If so, you’re not alone. Many homeowners discover that a quick DIY job or a cheap contractor can lead to costly mistakes. I once made the mistake of ignoring the importance of moisture barriers, which caused my floors to warp in a humid season. This early error taught me that attention to detail during installation is essential for long-term success. For a step-by-step guide on choosing the right flooring and ensuring it lasts, I recommend checking out this comprehensive guide.What You’ll Learn Today
Stick with me, and I’ll walk you through the key expert tips that can transform your flooring project from a potential disaster into a durable masterpiece. We’ll cover everything— from selecting the right materials to mastering installation techniques that stand the test of time. Whether you’re tackling a DIY project or hiring pros, these insights will help you make smarter choices and avoid common pitfalls.
So, are you ready to give your floors the lasting results they deserve? Let’s dive into the practical steps that will make your 2024 flooring project a true success.
},
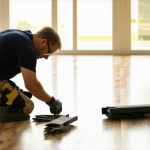
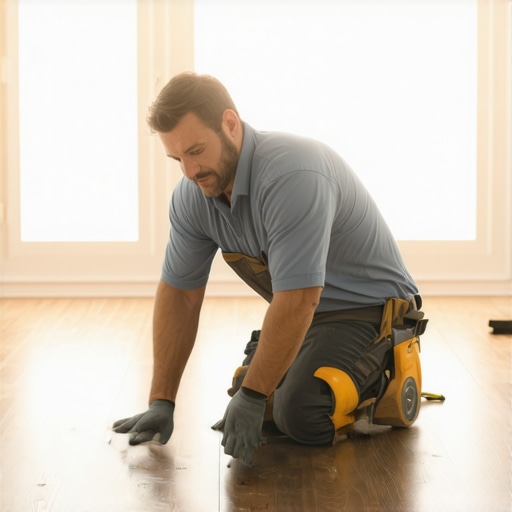
Prepare the Surface Carefully
Before laying down the new flooring, inspect the subfloor thoroughly. Remove debris, repair any cracks, and ensure the surface is level. I once overlooked a minor dip in my concrete slab, which later caused my hardwood planks to develop gaps. Use a level and a straightedge to check for high and low spots, and fill or sand as necessary. Think of this step as laying a solid foundation for a house; without it, everything else can crumble.
Set a Moisture Barrier to Protect Your Investment
Moisture is a silent enemy that can cause warping, cupping, or buckling. Always install a high-quality moisture barrier, especially in basements or humid climates. I learned this lesson the hard way when my DIY approach skipped this step, leading to my floors warping during a rainy season. Choose a vapor barrier suitable for your flooring type and climate, and follow manufacturer instructions meticulously. This simple step can save you hundreds in future repairs.
Measure and Acclimate Materials Properly
Before installation, bring your flooring materials into the room and let them sit for at least 48 hours. This allows the wood or vinyl to acclimate to the room’s temperature and humidity, reducing post-installation expansion or contraction. During my last project, I stored planks in a garage that fluctuated wildly in temperature; as a result, I faced gaps and buckling that could have been avoided with proper acclimation. Think of this as giving your materials a chance to settle in, like getting used to a new home.
Follow Manufacturer Instructions to the Letter
Each flooring product comes with specific installation guidelines. Skipping or improvising can lead to issues down the line. I once tried to speed up the process with a shortcut, which resulted in uneven seams. Read the instructions carefully, pay attention to recommended expansion gaps, and use the proper tools. For expert guidance, you might want to review this detailed guide.
Use Proper Tools and Techniques for Installation
Invest in quality tools like tapping blocks, spacers, and flooring pullers. Use a rubber mallet instead of a hammer to avoid damaging edges. During my last installation, I used a makeshift tool that left scratches on the planks, which I had to sand out later. Proper techniques include staggered seams for aesthetics and stability, and leaving an expansion gap around the perimeter. Think of these as the finishing touches that ensure durability and a professional look.
Finish with Secure and Clean Edges
Once the main installation is complete, install baseboards or quarter rounds to hide expansion gaps. Secure everything tightly but avoid overtightening, which can crack the flooring. I once ignored this step, and a poorly fitted baseboard caused a slight movement in the flooring. Also, clean the surface thoroughly to remove debris that can interfere with the finish. For stylish and modern updates, check latest baseboard trends. This final step seals the deal on a long-lasting, beautiful floor.
Many homeowners believe that choosing the most affordable materials or rushing the installation process will save money and time, but this is a dangerous misconception. In reality, most pitfalls stem from underestimating the nuances of expert flooring installation. For example, a prevalent myth is that all floors behave similarly, regardless of climate or subfloor conditions. However, in my experience, ignoring the importance of proper acclimation and moisture barriers can lead to warping and buckling, especially in humid environments. This is supported by studies from industry experts who emphasize that climate-specific preparations are essential for durability. Don’t fall into the trap of thinking that cheap shortcuts will pay off in the long run.
What Advanced Homeowners Need to Know About Subfloor Preparation
Many assume that a level subfloor is enough, but the real secret lies in understanding the material specifics. For instance, engineered wood responds differently to moisture than solid hardwood, requiring tailored preparation steps. Overlooking these details can result in costly repairs down the line. In my practice, I’ve seen projects fail because homeowners skipped moisture testing or ignored the need for additional leveling in high-traffic areas. The takeaway? Invest in meticulous subfloor prep—your floors will thank you for it. For expert tips on durable installation, check out this comprehensive guide.
Another common myth is that finish quality doesn’t matter if the installation looks good initially. In reality, a flawless finish requires precise edge finishing and attention to expansion gaps—details that many overlook. Improper sealing or neglecting the finishing touches can lead to gaps, squeaks, or damage over time. Remember, the way your floor looks immediately after installation is only part of the story; durability hinges on these subtle yet critical details. For more insights, explore this article.
Have you ever fallen into this trap? Let me know in the comments. Taking the time to understand these advanced nuances can save you thousands in repairs and replacements—so don’t settle for surface-level knowledge when it comes to flooring.
Maintaining your floors over time is crucial to preserving their beauty and functionality. The right tools and techniques can make all the difference, ensuring your investment lasts for decades. In my experience, using specialized equipment not only speeds up the process but also prevents damage that can lead to costly repairs down the line.
Invest in a Quality Floor Buffer
A high-quality floor buffer is indispensable for maintaining hardwood, vinyl, or laminate flooring. I personally prefer the Eufy by Anker HomeVac because of its lightweight design and powerful suction, which makes routine polishing effortless. Regular buffing removes minor scratches and restores shine, keeping your floors looking fresh. For areas that see a lot of foot traffic, I recommend doing this at least once a month.
Use a Microfiber Mop for Daily Cleaning
A microfiber mop is gentle yet effective at picking up dust and debris without scratching delicate surfaces. I avoid traditional string mops because they tend to push dirt around, which can dull the finish over time. Instead, I opt for a microfiber head that can be washed and reused. This simple tool helps maintain a clean surface daily, reducing the need for deep cleaning and prolonging the intervals between refinishing.
Apply Protective Finishes with a Pump Sprayer
For periodic touch-ups or applying a new coat of finish, I use a handheld pump sprayer like the Chaplin Pump Sprayer. It ensures even application and minimizes waste. Proper finishing not only enhances the appearance but also adds a layer of protection against stains and wear. Remember, always follow the manufacturer’s instructions and allow sufficient drying time for the best results.
Keep an Eye on Climate with a Hygrometer
Fluctuations in humidity and temperature can cause floors to expand or contract, leading to gaps or buckling. I recommend using a reliable hygrometer, such as the ThermoPro TP55, to monitor indoor conditions. Maintaining a consistent climate, ideally between 35-55% humidity, helps your floors stay stable over the years. This small investment can save you from major repairs caused by environmental stress.
Plan for Future Upkeep with a Maintenance Schedule
Beyond tools, developing a regular maintenance schedule is vital. This includes periodic deep cleaning, reapplying protective finishes, and inspecting for damage. I set reminders every few months to reassess my floors, ensuring problems are caught early. Staying proactive extends the lifespan of your flooring and keeps it looking impeccable.
Looking ahead, I believe smart home technology will play a greater role in flooring maintenance. Devices that can automatically regulate humidity or detect surface wear may become standard, making upkeep even easier. Until then, equipping yourself with these essential tools and techniques will give your floors the longevity they deserve.
Ready to elevate your maintenance game? Start by investing in a quality buffer and microfibre mop today, and see the difference it makes. Proper care today ensures your floors remain stunning for years to come.
The Hidden Lessons That Changed My Flooring Game
- One of the biggest realizations I had was that even the most durable-looking floors can fail if the subfloor isn’t properly prepared. Skipping moisture testing or ignoring uneven surfaces can lead to costly repairs later on.
- I learned firsthand that acclimating materials isn’t just a recommended step — it’s a game-changer. Allowing your flooring to adjust to the room’s climate can prevent gaps, warping, and buckling.
- Following manufacturer instructions might seem tedious, but it’s the best way to ensure your floors stay beautiful and durable over the years. Small details like expansion gaps and correct fastening make all the difference.
- Investing in quality tools and taking your time during installation can elevate your project from mediocre to professional-grade. Proper techniques keep your floors stable and looking pristine.
- Don’t overlook the importance of routine maintenance. Simple steps like buffing and monitoring humidity can extend your floors’ lifespan far beyond expectations.
My Must-Have Resources for Flooring Success
- This comprehensive guide on durable flooring installation offers step-by-step advice and industry insights that saved me from many pitfalls. It covers everything from moisture barriers to finishing touches.
- The latest baseboard trends in 2025 provide modern style ideas that complement your flooring and add a professional touch to any room. I’ve implemented several of these updates with stunning results.
- High-quality tools like the Eufy HomeVac simplify maintenance routines, making it easy to keep your floors looking their best daily. Trust me, good tools are worth the investment.
- Monitoring devices such as the ThermoPro TP55 hygrometer help maintain optimal humidity levels, preventing environmental damage and ensuring your floors stay flawless over time.
Your Next Step Towards Perfect Floors
Now that you know the secrets to durable flooring, it’s time to take action. Whether you’re planning a DIY project or hiring professionals, applying these expert tips will give you peace of mind and results that last. Remember, quality installation and ongoing care are the foundations of beauty and longevity. Don’t settle for less—your floors are worth it! Have you ever faced a flooring challenge that taught you a valuable lesson? Share your experience below and let’s learn together!