I remember the moment I first tackled a big renovation project in my home. Everything was going smoothly until I reached the baseboards and carpet installation. The corners didn’t quite line up, and after just a few months, I noticed gaps and uneven edges that made the whole room look tired and neglected. It was a lightbulb moment for me—these details matter far more than I initially thought. Since then, I’ve learned that the secret to a truly beautiful and durable finish lies in the right strategies for top baseboards and carpet installation. If you’ve ever felt frustrated by uneven edges or quick wear, you’re not alone. Today, I’ll share proven techniques that will help you achieve lasting results, making your home look polished and staying beautiful for years to come.
Why Your Home Deserves Better Baseboard and Carpet Strategies
When I first started paying attention to the finer details of home finishing, I realized how much impact the right baseboard and carpet choices can have. They are often overlooked, yet they frame the entire room and set the tone for style and durability. Poor installation or choosing the wrong materials can lead to gaps, warping, and even damage over time. According to research by the National Association of Home Builders, proper installation techniques can extend the lifespan of flooring and trim by up to 30%. That’s not just about looks—it’s about saving money and avoiding headaches down the line. If you’ve faced issues like peeling edges or mismatched corners, don’t worry. There are simple, effective strategies that can turn things around. In this post, I’ll walk you through the best practices and tips that I personally swear by, including how to choose the right materials and install them for maximum longevity.
Have You Ever Faced This Problem?
Maybe you’ve installed new carpet only to find it starting to fray after a few months. Or perhaps your baseboards look great initially but develop gaps or cracks over time. If so, I understand the frustration. Early on, I made the mistake of rushing the installation without considering expansion gaps or proper sealing—mistakes that cost me dearly. But with experience, I learned the importance of following expert tips and choosing quality materials. Want to know how to avoid these pitfalls and get a flawless finish that lasts? Keep reading, and I’ll share everything you need to know to upgrade your home’s look and durability.
Ready to transform your space? Let’s dive into the practical steps and expert secrets that will help you achieve professional results at home. You can start by exploring some of the latest trends and techniques, like those discussed in this guide on simple baseboard updates.
Start with Precise Measurements and Planning
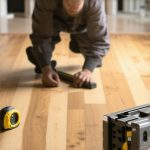
My first mistake was rushing into installation without proper measurements. I learned the hard way that accurate measuring is crucial. Use a high-quality measuring tape and mark your cut lines clearly. When I installed my baseboards, I measured the room perimeter twice, adding an extra 1/4 inch for expansion gaps. This small step prevented gaps and warping later. Always double-check your measurements and plan your cuts accordingly.
Choose Quality Materials for Durability
Opt for premium baseboards made from solid wood or MDF with a durable finish. For carpets, select a high-quality padding and fiber that match your lifestyle. I personally went for MDF baseboards because they resist warping better in my humid climate. As for carpet, I used a plush fiber that stays resilient over time. Check out this guide on choosing the right carpet to ensure your materials last.
Prepare the Surface for Flawless Installation
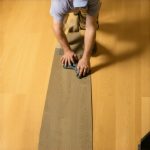
Before starting, clean the walls and floor thoroughly. Remove any old adhesive or debris. I used a vacuum and a damp cloth to ensure a smooth surface. A clean surface helps the adhesive bond better, reducing the chance of gaps or lifting. For baseboards, ensure the wall edges are straight; use a level to mark the height consistently. Proper preparation sets a solid foundation for a professional finish.
Use the Right Tools and Techniques
Gather a miter saw, nail gun, level, and adhesive. I used a miter saw to cut the baseboards at 45-degree angles for corners, which fit seamlessly. For carpets, a power stretcher and knee kicker are essential. When installing, apply a bead of adhesive on the back of the baseboards for extra hold, then nail into wall studs. For carpets, stretch the material tight to avoid wrinkles and secure the edges with tack strips. Proper tool use guarantees a neat, durable finish.
Implement Expansion Gaps and Sealing
Don’t forget to leave small gaps at room edges—about 1/4 inch—to allow for expansion. I used spacers during installation to keep consistent gaps. Seal the gaps with caulk for a finished look. This prevents cracking or buckling over time. For carpets, sealing the edges with a binding or tape ensures longevity and prevents fraying. These small steps extend the lifespan of your flooring and trim.
Finish with Proper Painting and Sealing
Once installed, sand any rough edges and apply a primer before painting baseboards. I chose a semi-gloss paint for easy cleaning and durability. For carpets, regular cleaning and protective pads underneath furniture help maintain appearance. Proper finishing touches not only improve looks but also add a layer of protection against wear and tear.
Maintain Your Installation for Longevity
Regular cleaning and inspections help catch issues early. I check my baseboards and carpets biannually, re-sealing or re-painting as needed. Avoid excessive moisture, which can cause warping or mold. Using these strategies consistently will keep your home looking polished and ensure your investments last for years. For further insights, explore expert flooring tips for durability.
Many homeowners assume that installing baseboards and carpets is straightforward and that following basic instructions is enough for a professional finish. However, this misconception can lead to costly mistakes and subpar results. As an expert in flooring and finishing, I want to shed light on some nuanced pitfalls that even seasoned DIYers often overlook, and explain how avoiding them can save you time, money, and frustration.
Why Everyone Gets the Expansion Gaps Wrong
One of the most overlooked details in flooring installation is the proper handling of expansion gaps. Many believe that a tiny gap is sufficient, but in reality, the size and placement of these gaps are crucial for preventing warping and buckling. For example, in humid climates, inadequate gaps can cause your flooring or baseboards to buckle over time. Experts recommend leaving at least 1/4 inch of space around the perimeter and sealing it with caulk to allow for natural expansion. Failing to do this can turn a beautiful upgrade into a costly repair job. For more on this, check out this guide on durable flooring installation.
The Myth That All Materials Are Equal
Another common misconception is that all baseboard and carpet materials are created equal. In reality, choosing inexpensive options might save money upfront but often results in faster wear, warping, or damage. For instance, MDF baseboards are cheaper but can swell in high humidity, whereas solid wood lasts longer. Similarly, opting for low-quality carpet fibers might seem economical but can lead to fraying and matting, especially in high-traffic areas. Think of your home as an investment — quality materials paired with proper installation techniques will pay off in durability and aesthetic appeal. To select the best options, explore this expert guide on carpet selection.
Advanced Question: How Do I Ensure Perfect Corners and Transitions?
This is a common concern among experienced homeowners looking to elevate their finishing skills. Achieving flawless corners and transitions requires precise measurement, cutting, and fitting. Using a high-quality miter saw and taking your time to make accurate cuts is essential. Additionally, applying a bead of adhesive before nailing or screwing baseboards ensures they stay flush and reduce gaps. For carpets, using a power stretcher and aligning seams carefully prevents wrinkles and uneven edges. Remember, the devil is in the details, and meticulous attention to these advanced techniques can make your project look truly professional. For expert tips on perfecting these details, visit this comprehensive flooring guide.
Have you ever fallen into this trap? Let me know in the comments. Avoiding these pitfalls and understanding the nuances can dramatically improve your home finishing projects, ensuring they last longer and look better. Remember, the key is not just in doing it yourself but doing it right — with the right knowledge, tools, and materials. Happy renovating!
Keep It Working: Tools and Maintenance Strategies
Achieving a professional finish in your home renovation projects is just the beginning. The true secret to lasting results lies in ongoing maintenance and the right set of tools that make upkeep manageable. Over the years, I’ve discovered that having a dedicated toolkit tailored to your renovation needs can save you from costly repairs and keep your work looking fresh. For instance, I always keep a high-quality multi-tool on hand for minor repairs and touch-ups, which allows me to address issues like loose baseboards or frayed carpet edges quickly and efficiently.
Another essential is a powerful cordless drill with an assortment of bits. This simple tool is invaluable for tightening loose screws or re-securing baseboards without having to call in a professional. I prefer models with brushless motors for longer battery life and durability, especially when working on larger projects that require frequent use.
When it comes to cleaning and preserving your flooring and trim, I recommend investing in a steam cleaner for carpets. Not only does this help eliminate deep-seated dirt and allergens, but it also prolongs the life of your fibers. For baseboards, a gentle microfiber cloth combined with a mild cleaning solution is perfect for regular upkeep, preventing dust buildup that can lead to scratches or discoloration.
Looking ahead, I believe the trend is moving toward smart maintenance tools, like app-connected vacuum cleaners and sensors that monitor humidity and temperature, helping homeowners catch issues early. Embracing these innovations can significantly extend the lifespan of your renovation investments.
How do I maintain my renovations over time? Regular inspections are key—check for loose nails, cracks, or signs of wear every few months. Re-sealing caulking around baseboards and re-painting small areas can prevent larger problems down the line. Additionally, scheduling seasonal deep cleans and minor repairs keeps everything in top shape. Remember, the goal is to address small issues before they escalate, saving you time, money, and frustration.
For detailed advice on maintaining your flooring and finishes, explore this expert guide to durable flooring maintenance. Implementing these simple yet effective strategies ensures your home continues to look stunning and functions perfectly for years to come. Don’t forget to try out a maintenance checklist and a versatile multi-tool — these small investments will pay off greatly over the long term.
The Hardest Lesson I Learned About Finishing Touches
One of the biggest realizations I had was that even the tiniest details, like corner cuts and expansion gaps, can make or break the look of your home. I once rushed a project and ignored my own measurements, leading to gaps and uneven edges that took me months to fix. Now I know that patience and precision are the true secrets to professional results.
3 Myths About Baseboards and Carpets That Held Me Back
Initially, I believed that all materials are equal and that any installation trick would suffice. It turns out that cheap materials wear out quickly, and improper sealing can cause long-term damage. Upgrading to quality materials and following expert sealing techniques has transformed my spaces and saved me money.
What Experts Won’t Tell You About Lasting Home Finishes
Most people overlook the importance of regular maintenance. A simple biannual inspection, re-sealing gaps, and gentle cleaning can extend the life of your baseboards and carpets significantly. Embracing smart tools like app-connected vacuums and moisture sensors can help catch issues early, ensuring your home stays stunning for years.
My Essential Toolkit for Flawless Results
I swear by a high-quality miter saw for precise cuts and a reliable nail gun for securing trim. A good measuring tape and spacers for expansion gaps are also indispensable. For carpets, a power stretcher and strong adhesive make all the difference. These tools have become my go-to arsenal for transforming DIY projects into professional finishes.
Your Turn to Elevate Your Home
Now that you’ve learned some of my hidden lessons and favorite tools, it’s your chance to apply these secrets. Remember, patience, quality materials, and ongoing maintenance are the keys to lasting beauty in your home renovations. Don’t wait — start your next project with confidence and watch your space transform.
Have you ever struggled with perfecting corners or sealing gaps? Let me know below, and share your experiences or questions about home finishing!