Have you ever finished installing new carpet or updating your baseboards only to step back and notice uneven edges, gaps, or a finish that just doesn’t look professional? I’ve been there, and let me tell you—those small imperfections can turn a beautiful room into something you’re too embarrassed to show off. I used to think that as long as I laid the carpet and nailed the baseboards in, I was done. But the truth is, the devil’s in the details. And those details make all the difference between a DIY disaster and a flawless finish that lasts for years.
Why Cutting Corners Can Cost You Big Time
When I first started tackling home upgrades, I thought rushing through the carpet and baseboard installation would save me time and money. Turns out, I was wrong. I learned this lesson the hard way after spending hours fixing uneven seams, re-gluing loose baseboards, and repainting because of sloppy edges. According to industry experts, improper installation can lead to damages that reduce your home’s value and increase maintenance costs down the road. The key to avoiding these pitfalls? Mastering expert installation strategies that guarantee a perfect finish from the start.
Is Overconfidence Your Biggest Enemy?
One mistake I made early on was ignoring the importance of precise measurements and preparation. I thought I could eyeball the cuts and nail everything in place. Spoiler alert: that approach never works. When I finally took the time to learn proper techniques—like using a good miter saw for clean cuts and applying the right adhesive—I saw immediate improvements. If you want your project to stand the test of time, investing in the right tools and techniques is non-negotiable. For more tips on expert installation, check out this comprehensive guide.
Today, I’m going to share the essential strategies I’ve picked up over the years that will help you achieve that flawless, professional look you’re aiming for. Whether you’re installing new carpet, updating your baseboards, or both, these tips will transform your project from mediocre to masterful. Ready to get started? Let’s dive into the step-by-step process that will make your next home upgrade look like it was done by a pro.
Measure Twice, Cut Once
Start by accurately measuring your room to determine the exact length of baseboards and carpet pieces needed. I remember rushing through measurements and ending up with gaps and uneven edges. To avoid this, use a reliable tape measure and mark your cuts with a pencil. Double-check your measurements before cutting to prevent costly mistakes. This careful preparation ensures that your cuts fit perfectly, reducing the need for adjustments later. For a comprehensive guide on selecting the right materials, visit this resource.
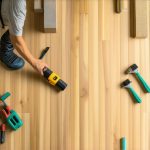
Use the Right Tools for Clean Cuts
Invest in a quality miter saw or a sharp utility knife for straight, clean cuts. I once tried to cut baseboards with scissors, which resulted in jagged edges and a frustrating finish. When I switched to a miter saw, the cuts were precise and effortless, making the installation smoother. For carpet, a high-quality carpet knife allows for smooth, even cuts, especially when trimming around corners and doorways. Proper tools make all the difference in achieving a professional look. Check out this guide for tool recommendations.
Prepare the Surface Thoroughly
Before installing, clean the area of dust, debris, and loose particles. I learned this the hard way when dust caused my baseboards to sit unevenly, creating gaps. A quick vacuum or sweep ensures a flat, stable surface, which is essential for a seamless finish. If your walls or floors are uneven, consider using shims or leveling compounds to create a smooth foundation. Proper preparation minimizes future problems and saves time during installation. For design inspiration and trend insights, browse this article.
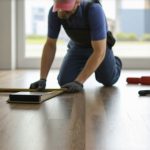
Attach Baseboards with Precision
Begin by mitering corners at 45 degrees for a tight fit. Use a nail gun or hammer and finishing nails to secure the baseboards, keeping nails slightly below the surface for easy filling. I once relied solely on nails without using adhesive, and my baseboards eventually loosened. Applying a strong construction adhesive along the back of the baseboards before nailing provides extra stability and prevents gaps. Use a level to ensure they are straight as you go. For tips on finishing, including caulking and painting, see this guide.
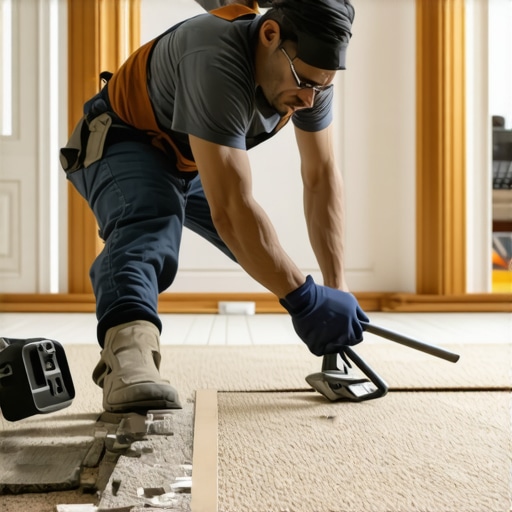
Lay the Carpet Carefully
Start by stretching the carpet across the room, securing it with tack strips along the edges. Use a knee kicker to stretch the carpet tightly, preventing wrinkles. I once ignored proper stretching, which resulted in loose, wrinkled carpet that looked unprofessional. Proper tensioning is key; it ensures durability and a sleek appearance. Trim excess carpet with a sharp knife, matching the edges to the walls and baseboards. For advanced techniques, check this expert tutorial.
Finish with Caulk and Paint
Seal gaps between baseboards and walls with paintable caulk for a clean look. I used to leave gaps unfilled, which collected dust and looked sloppy. After caulking, paint the baseboards for a uniform appearance, matching your room’s décor. Use a small brush for precise edges. This final step transforms your installation from good to stunning. For finishing touches and decorating ideas, explore this resource.
Many DIY enthusiasts believe that as long as they follow basic steps, their baseboard and carpet installation will turn out perfect. However, there are nuanced pitfalls that can undermine even the most well-intentioned projects. Let’s dig deeper into some of the most overlooked mistakes that can cost you time, money, and the professional look you desire.
Why Overconfidence Can Sabotage Your Finish
One prevalent misconception is that precise measurements and proper tools are only necessary for advanced projects. In reality, neglecting meticulous planning—even for seemingly simple installations—can lead to uneven seams, gaps, or uneven paint lines. For instance, not accounting for wall imperfections or floor irregularities can cause baseboards to sit unevenly, creating unsightly gaps that are difficult to conceal later. Industry experts emphasize that thorough preparation and measurement are the foundation of a flawless finish, regardless of your skill level. You can learn more about ensuring your project’s durability and beauty at this guide.
Common Myth: All Nails and Adhesives Are Equal
Many assume that using any type of nail or adhesive will suffice. In truth, the choice of fasteners and glues can significantly impact the longevity and appearance of your installation. For baseboards, using a high-quality nail gun with finishing nails minimizes the risk of nails protruding or causing cracks in the paint. Similarly, opting for a strong construction adhesive along with nails creates a more stable and lasting bond, especially on uneven surfaces. Skimping on quality here might save money initially but will lead to costly repairs down the line. For recommendations on the best tools and adhesives, check out this resource.
How Advanced Techniques Elevate Your Finish
For the seasoned DIYer, mastering advanced techniques makes all the difference. For example, using a brad nailer instead of a regular hammer can provide cleaner, more discreet fastenings. Similarly, applying a bead of caulk before painting the baseboards not only seals gaps but also creates a seamless transition between wall and trim. These nuanced steps require an understanding of materials and methods that go beyond the basics. Incorporating shims or leveling compounds before installation ensures your baseboards sit perfectly flush, even on uneven walls. These details contribute to a professional appearance that surpasses standard DIY efforts. Looking for more expert tips? Visit this guide.
Have you ever fallen into this trap? Let me know in the comments. Remember, paying attention to these subtle nuances can make all the difference in your home improvement projects, transforming a good result into a truly professional finish.
Once you’ve successfully installed your flooring or baseboards, the key to maintaining their pristine condition lies in using the right tools and adopting a consistent upkeep routine. In my experience, investing in quality equipment not only prolongs the life of your project but also makes future repairs and cleaning much easier.
How do I keep my flooring and baseboards in top shape over time?
The first step is regular cleaning with tools designed for your specific flooring type. For hardwood or laminate floors, I recommend using a microfiber mop paired with a gentle, pH-neutral cleaner. This combination lifts dirt without scratching the surface. Avoid harsh chemicals or abrasive brushes, which can dull the finish and cause damage over time. For carpets, a high-quality vacuum with adjustable settings is essential. I personally prefer models with multi-surface capabilities, making it easier to clean both plush areas and high-traffic spots efficiently.
Beyond cleaning, periodic inspections are crucial. Check for loose baseboards or signs of wear, and address issues early with the right repair tools. For example, I keep a set of finishing nails, a cordless nail gun, and a small hammer on hand. When I notice a loose baseboard, I use the nail gun for quick, discreet fastening—saving me time and ensuring a clean look. Remember, using a nail gun with the right-sized nails reduces wall damage and avoids the need for extensive patching later.
Tools I recommend for ongoing maintenance
One of my go-to tools is a cordless multi-tool. It’s versatile for sanding rough edges, removing old caulk, or even minor surface repairs without needing multiple devices. I often use it to smooth out imperfections before repainting or sealing gaps. Additionally, a small, detail-oriented paintbrush is invaluable for touching up scratches or chips, especially around baseboards and door frames. For larger areas, a microfiber mop with an extendable handle allows me to reach tricky spots easily.
Looking ahead, I believe the trend is moving toward smart cleaning solutions. Robotic vacuum cleaners with mapping technology are becoming more sophisticated, allowing for scheduled maintenance that keeps carpets and floors looking fresh with minimal effort. These devices can adapt to different floor types and avoid obstacles, making them perfect for busy households.
Advanced tip: Use a silicone-based sealant for long-term protection
For sealing gaps and protecting your baseboards from moisture and dirt, I highly recommend applying a silicone-based sealant. It’s more durable than paint caulk and better suited for areas prone to humidity or spills. Applying a high-quality sealant with a caulking gun ensures a smooth, professional finish that lasts for years. This simple step can save you from frequent repainting or repair work, especially in bathrooms and kitchens. For detailed application techniques, check out this expert guide.
By incorporating these tools and maintenance strategies into your routine, you’ll extend the lifespan of your flooring and baseboards while maintaining a beautiful, professional look. Try out these advanced tips, especially the use of silicone sealants, to see how they can transform your home upkeep. Remember, a little investment in quality tools now will pay off with long-term savings and stunning results.
Embarking on a home upgrade project involving carpet and baseboards can be exciting, but the real satisfaction comes from achieving a professional-looking finish. Over the years, I’ve discovered that the true secret lies in paying attention to the details that many DIYers overlook. From precise measurements to choosing the right materials, each step impacts the final look and durability of your work. In this guide, I’ll share essential insights and personal lessons learned to help you elevate your installation skills and enjoy long-lasting, stunning results.
Lessons Hidden in My Mistakes
- Measuring Is Everything: I once underestimated how small measurement errors could cause big gaps or overlaps. Double-checking and using a quality tape measure saved me headaches later.
- Don’t Skimp on Tools: Using a sharp miter saw instead of a hacksaw made my cuts cleaner and more precise, drastically improving the appearance of my baseboards.
- Preparation Is Key: Cleaning surfaces and leveling uneven floors before installation prevented future issues like gaps and loose fittings, saving time and money.
- Patience Pays Off: Rushing through the process led to misaligned edges. Taking my time with measurements, cuts, and fittings resulted in a seamless, professional look.
- Sealing Makes a Difference: Using high-quality caulk and silicone-based sealants created a clean finish and protected against moisture, especially in high-humidity areas.
Tools and Resources I Rely On
- Trustworthy Equipment: My favorite tool is a cordless brad nailer, which ensures tight, discreet fastenings without damaging the material or wall surface. I also recommend a quality miter saw for accurate, clean cuts.
- Educational Guides: I often refer to this expert guide for advanced techniques on flooring and trim installation, which helps me refine my skills.
- Material Choices: Selecting durable, paintable caulk and high-quality adhesives has made my projects more resilient and easier to finish with a polished look.
- Online Inspiration: Browsing through latest style trends keeps me inspired and updated on modern design options.
Your Turn to Make It Perfect
Now it’s your chance to apply these insights and turn your DIY project into a showcase of craftsmanship. Whether you’re installing new carpeting or updating your baseboards, remember that paying attention to the finer details will make all the difference. Don’t be afraid to experiment with advanced techniques like shims or silicone sealants—they can elevate your results and boost your confidence. Keep practicing, stay patient, and enjoy the process of transforming your home into a space you love.
What’s the biggest challenge you’ve faced in your installation projects? Share your experience below and let’s learn from each other’s journey towards perfection.
3 thoughts on “Expert Carpet & Baseboards Installation Strategies for a Flawless Finish Today”
Emily Johnson
January 3, 2026 at 11:40 amThis article hits the nail on the head about the importance of attention to detail when installing carpets and baseboards. I’ve learned from personal experience that rushing through measurements or using inferior tools can lead to frustrating results like gaps or uneven edges, which are tough to fix later. One trick I’ve found helpful is investing in a good quality miter saw and a sturdy tape measure. They might cost a bit more upfront, but they save so much time and headache during the project. Additionally, I think using shims on uneven floors really makes a difference in achieving a seamless look, especially on older homes. Has anyone else tried shims for baseboard installation? I’d love to hear if it helped improve your results or if there are other tips for handling uneven surfaces effectively.
Michael Davis
January 25, 2026 at 4:00 amI completely agree with the importance of meticulous measuring and using the right tools when tackling baseboard and carpet installation. I remember rushing through a project once and ending up with crooked edges and visible gaps, which was pretty disheartening. Since then, I’ve made it a point to invest in a good miter saw and a laser level—those gadgets really take the guesswork out of alignment and cut accuracy. One thing I’ve found that helps especially on uneven floors is using shims, as Emily mentioned, but also applying a leveling compound beforehand for larger discrepancies. Has anyone experimented with different types of adhesive for baseboards? I’ve had good luck with flexible construction glue for extra durability on older, slightly uneven walls. Curious to hear others’ experiences or tips for dealing with tricky surfaces. It’s these small details that truly make a project look professional and last for years.
Laura Bennett
January 26, 2026 at 8:30 pmI really appreciate this detailed breakdown of the installation process. I’ve learned from my own experience that taking the time to do a thorough surface prep makes a huge difference in the final look. Especially on older homes, I’ve found that smoothing out uneven floors with a leveling compound and using shims helps avoid those pesky gaps and bulges in the baseboards. I also agree that investing in quality tools like a miter saw and a good nailer pays off in precision and ease. For me, one challenge has always been working around irregular wall surfaces, but I’ve started using flexible adhesives and longer nails to compensate, which gives a much cleaner result. Has anyone tried using a contour gauge to match the wall profile? I find it really helps when fitting baseboards in tricky corners or on lopsided walls. These small adjustments really elevate the professionalism of the finish.