Have you ever poured your heart into a DIY flooring project only to be met with uneven surfaces, stubborn gaps, or a finish that just doesn’t look professional? I’ve been there. I remember a time when I thought I could wing it, only to end up with a wavy, poorly aligned floor that made my entire room look off. It was frustrating, to say the least. But that lightbulb moment changed everything for me.
Why Precise Flooring Tips Matter More Than Ever
Getting your flooring right isn’t just about aesthetics; it’s about durability, safety, and increasing your home’s value. In fact, according to the National Wood Flooring Association, improper installation can reduce a floor’s lifespan by nearly 50%. That’s a staggering figure, and it’s why I’m such a strong advocate for following expert advice. Today, I’ll share some of the most effective top flooring installation tips that can help you achieve a flawless result—whether you’re laying down carpet, hardwood, or tiles. Trust me, these insights will save you time, money, and a lot of headaches.
Is Skipping the Details Worth Risking Your Floor’s Future?
Early in my projects, I made the mistake of rushing through prep work. I skipped measuring twice and underestimated the importance of acclimating flooring materials to the room’s environment. That led to warping, gaps, and a finish that looked amateurish. It’s a common mistake, but it’s also entirely avoidable if you understand that proper planning is the foundation of a perfect installation. Want to learn how to sidestep these pitfalls? Keep reading, because I’ll guide you through each step, backed by real experience and expert insights. If you’ve ever faced that sinking feeling of a botched job, you’re not alone. Let’s fix that today.
Before diving into the step-by-step process, I recommend checking out some related tips on choosing the right carpet for your cozy space, which you can explore here. Now, let’s get into the practical strategies that will transform your flooring project from good to stunning.
Prepare Your Space Like a Pro
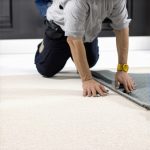
Before you even think about laying down your flooring, take the time to prepare the room thoroughly. Remove all furniture and clean the subfloor meticulously. Think of it like preparing a canvas before painting — a clean, even surface ensures your masterpiece looks perfect. I once skipped this step and ended up with stubborn dirt causing bumps under my hardwood. That mistake taught me the importance of detailed prep.
Measure Twice, Cut Once
Accurate measurements are the foundation of a flawless installation. Use a reliable tape measure and double-check dimensions. I remember my first attempt where I miscalculated the room’s width, leading to awkward cuts and waste. To avoid this, I laid out the flooring in the room to visualize placement and made precise cuts. This approach saved me both time and money.
Acclimate Your Materials Properly
Allow flooring materials to sit in the room for at least 48 hours before installation. This step helps materials adjust to the room’s humidity and temperature, preventing warping later. I once rushed this process and noticed gaps forming after a few weeks. Acclimating the flooring like this is akin to letting bread dough rest — it promotes stability and a better finish.
Use the Right Tools for Precision
Invest in quality tools such as a laser level, tapping block, and spacers. These tools help ensure straight lines and consistent gaps. I learned this the hard way when using a basic hammer, which led to uneven planks. Upgrading my toolkit made a noticeable difference in the final look.
Follow a Strategic Installation Pattern
Start in the corner furthest from the door, working your way out. Stagger the planks or tiles to create a natural, appealing pattern and improve stability. I once installed tiles randomly, resulting in a disorganized appearance. Planning your pattern ahead of time, perhaps by laying out the pieces, makes the process smoother and the result more professional.
Maintain Consistent Gaps and Seams
Use spacers to keep uniform gaps around the room edges. This accommodates expansion and contraction due to temperature changes. I overlooked this detail in my first project, and the floor developed buckles. Regularly checking the gaps during installation is like leaving room for your flooring to breathe — it prevents future issues.
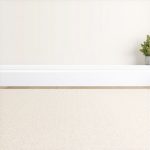
Finish with Care and Precision
Install baseboards or molding afterward to cover expansion gaps and give a polished look. Make sure to nail them securely without damaging the flooring. I once hastily nailed baseboards, cracking the paint and causing an uneven finish. Taking your time here ensures a clean, professional appearance. For tips on elevating your interior, explore this guide.
Inspect and Adjust as Needed
Once the flooring is installed, walk through the space to check for loose planks or tiles. Make minor adjustments immediately to prevent long-term problems. I learned this the hard way when a loose tile caused a trip hazard months after installation. Regular inspections keep your floor looking flawless for years to come.
Mastering these steps transforms a daunting task into a manageable project — with professional-looking results that last. For more expert insights, visit this resource.
While it’s tempting to believe that laying your own flooring is straightforward, many DIYers fall into pitfalls rooted in misconceptions. These myths can lead to costly mistakes and subpar results, even for those with good intentions. As someone who has navigated these challenges firsthand, I want to shed light on some of the most persistent misconceptions about flooring installation.
Myth 1: More Adhesive Means Better Bond
It’s a common belief that applying excessive adhesive will ensure your flooring stays put forever. However, over-adhesion can actually cause problems such as uneven surfaces and difficulty in future repairs. Modern flooring materials are designed with specific adhesive requirements, and using too much can trap moisture or cause warping. Always follow the manufacturer’s guidelines for adhesive application, and remember that less is often more.
Myth 2: Expansion Gaps Are Optional
Skimping on expansion gaps is a rookie mistake. Many assume that flooring will stay perfectly stable without space for movement, but temperature and humidity fluctuations make these gaps essential. Ignoring this detail can lead to buckling or warping in the long run. A common trap is to seal the edges tightly, thinking it looks neater, but that can trap moisture and cause damage. To avoid this, always incorporate the recommended gaps and use spacers during installation.
Myth 3: All Tools Are Created Equal
Investing in cheap, generic tools might seem like a way to save money, but it often backfires. Precise flooring installation demands quality tools like laser levels and tapping blocks. Using inferior equipment can lead to uneven seams, inconsistent gaps, and a finish that looks amateurish. Trust me, a small investment in good tools pays off with flawless results. For advanced tips, check out this guide.
What’s the Deal with Subfloor Moisture Levels?
One advanced mistake I see often is overlooking moisture testing of the subfloor. Excess moisture can cause hardwood and laminate floors to swell, warp, or develop mold. Many assume that if the surface looks dry, everything is fine, but moisture can lurk beneath. I recommend using a moisture meter and consulting industry standards, such as those from the National Wood Flooring Association. Proper moisture testing saves a lot of headaches later, especially with high-humidity climates.
Have you ever fallen into this trap? Let me know in the comments. Remember, understanding these nuances and busting these myths will make your DIY project not only successful but truly professional-looking. For more expert tips, visit this resource.
Maintaining your flooring over time is crucial to preserving its beauty and functionality. The right tools and a consistent maintenance routine can significantly extend the life of your investment. From specialized cleaning equipment to inspection techniques, I’ve learned that staying proactive is the key to avoiding costly repairs down the line.
Invest in Quality Equipment for Easy Upkeep
One of my top recommendations is to use a high-quality vacuum with adjustable settings tailored for different flooring types. For hardwood, a soft-bristled brush attachment prevents scratches, while for tile or vinyl, a more robust vacuum with strong suction helps remove debris from grout lines and textured surfaces. I personally swear by the Dyson V11 Torque Drive because its versatility and power make routine cleaning effortless, and it is gentle enough to prevent damage. Regularly using a microfiber mop with a pH-neutral cleaner also keeps surfaces shiny without buildup or streaks.

How do I maintain my floors over time?
Routine inspections are vital. Every few months, walk through your space and look for signs of wear, loose tiles, or gaps. Using a small, handheld moisture meter can help detect hidden water issues beneath the surface — a common problem especially in humid climates. Addressing issues early prevents extensive damage and costly repairs. Additionally, periodically applying protective coatings like polyurethane or sealants (for wood) can provide an extra barrier against scratches and stains. For detailed guidance on this, check out this resource.
Adopt Smart Cleaning Methods
Avoid harsh chemicals that can degrade your flooring materials. Instead, opt for gentle, manufacturer-recommended cleaners. I recommend setting a cleaning schedule that includes sweeping or vacuuming at least twice weekly, and mopping with a damp microfiber cloth once a week. For stubborn stains, a mixture of baking soda and water often does the trick without damaging the surface. Remember, consistent care is more effective than infrequent deep cleans, which can sometimes cause surface wear.
Plan for Future Trends in Floor Maintenance
The future of flooring maintenance is leaning toward smart technology. Automated vacuum robots equipped with advanced sensors can keep your floors spotless with minimal effort. I believe this trend will become standard in the next few years, making maintenance more efficient and less time-consuming. Preparing now by investing in robotic vacuums compatible with your flooring type can pay dividends in the long run. As technology advances, expect smarter, more eco-friendly cleaning solutions to emerge, helping homeowners maintain their floors sustainably.
One advanced tip I encourage you to try is to set up a regular inspection routine with a moisture meter. This small device can save you from major issues like warping or mold, especially in high-humidity areas. Staying vigilant with these tools ensures your floors stay beautiful and durable for years to come. For more expert advice, visit this resource.
What I Wish I Knew Before Laying My Floor
- My biggest mistake was rushing the preparation phase. Taking extra time to clean and level the subfloor saved me from future buckling and uneven surfaces.
- I underestimated the importance of acclimating materials. Waiting 48 hours to let the flooring adjust prevented warping and gaps.
- Investing in quality tools like a laser level and spacers made a noticeable difference in achieving professional results.
- The myth that more adhesive equals a stronger bond led me to sticky, uneven floors. Following manufacturer guidelines is key.
- Ignoring expansion gaps was costly. Planning for movement ensures your floor stays beautiful over time.
Tools and Resources That Changed My Game
- Laser Level— Precise leveling every time, saving frustration and time. I personally use the Expert Flooring Tips.
- Moisture Meter— Essential for testing subfloor moisture, especially in humid areas. I trust industry standards from the NAFA.
- Quality Adhesives and Spacers— Following the correct application methods ensures durability and a clean look. Check out this guide for more tips.
- Reliable Cleaning Equipment— A good vacuum and microfiber mop keep floors pristine, extending their lifespan. The Durable Flooring Guide offers maintenance routines.
Step Into Your Flooring Future
Embarking on a flooring project can be deeply rewarding, especially when armed with the right knowledge and tools. Remember, the most beautiful floors are built on solid prep, patience, and attention to detail. Don’t hesitate to start your renovation journey—your home deserves it. Now, tell me: Have you ever struggled with a specific step in flooring installation? Share your experience below and let’s learn together!