Ever spent hours trying to get that perfect seam only to realize the carpet edges are uneven or the baseboards look sloppy? I’ve been there. I remember the frustration of thinking I could wing it, only to end up with gaps and crooked lines that made my room look worse than before. That lightbulb moment hit me hard: proper installation strategies are everything. Without them, even the most beautiful flooring can fall flat, and the entire look of your home suffers.
Why the Right Installation Technique Matters More Than You Think
From personal experience, I can tell you that rushing through carpet or baseboards without a plan is a recipe for disaster. The details make all the difference. A flawless finish doesn’t just happen by chance—it’s the result of careful preparation, precise cuts, and understanding the materials involved. When I finally learned the right techniques, everything changed. My rooms looked professionally done, and I gained confidence in my skills.
So, today I want to share what I’ve learned about top strategies for installing carpet and baseboards. If you’re tired of uneven edges, gaps, or the dreaded visible seams, this post will guide you through the essential steps to achieve that perfect home finish you’ve been dreaming of.
Is It Really Worth the Extra Effort?
Maybe you’re skeptical. I get it. Why spend extra time on installation when it looks good enough? Well, I made this mistake early on—rushing to finish without proper measurements or tools. The result? Rework, wasted material, and a finish that looked amateurish. It’s tempting to cut corners, but trust me, the small effort you put in now pays off big time in the end. You can see the difference in how to achieve a flawless finish with the right techniques.
In this post, I’ll cover everything from the initial prep to the finishing touches, ensuring your floors and baseboards look sharp and last for years. Ready to transform your space? Let’s dive into the secrets of professional installation, so your home can truly shine with that perfect finish.
Measure and Plan Accurately
When I first started installing baseboards, I underestimated the importance of precise measurements. One time, I skipped double-checking my length calculations and ended up with a gap at a corner. To avoid this, always measure twice and mark your cuts clearly. Use a tape measure and a pencil to mark your cut lines, ensuring every piece fits snugly against the wall. Planning your layout beforehand saves time and reduces mistakes, especially when dealing with intricate corners or uneven walls.
Prepare Your Tools and Materials
Gather everything you need before you begin—saw, nail gun or hammer, level, measuring tape, and adhesive if necessary. I recommend using a miter saw for clean, precise cuts, especially at corners. For baseboards, selecting the right style and thickness can make a big difference, so check out latest trends to choose the best match for your decor. Having all tools ready prevents interruptions and keeps your workflow smooth.
Make Accurate Cuts for a Seamless Fit
Cutting baseboards or carpeting isn’t just about sawing straight lines; it’s about precision. I once tried to cut a corner piece freehand, resulting in gaps that I had to fill later. Instead, use a miter saw to cut at 45-degree angles for corners, ensuring they lock together tightly. When installing carpet, make clean, straight cuts with a utility knife and a straight edge. Remember, a tight fit is better than a loose or uneven seam, as it looks professional and lasts longer.
Install with Care and Attention
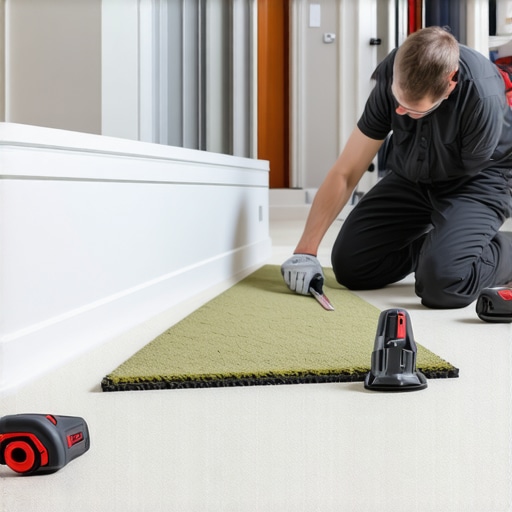
Start with the longest wall first, anchoring your baseboards or carpet edges with nails or adhesive. Use a level to check alignment continually. I once neglected to check levelness during installation, and the baseboard ended up crooked. To prevent this, periodically step back and inspect your work. For carpet, stretch it tightly using a knee kicker or power stretcher, avoiding slack that causes wrinkles. Proper tension ensures durability and a sleek appearance.
Finish and Seal for a Professional Look
After installing, fill nail holes with wood filler and sand smooth. For carpet, tuck the edges neatly into the tack strip, and trim any excess for a flush finish. I learned that applying a bead of paintable caulk along the top edge of baseboards hides tiny gaps and gives a seamless look—check out these tips for detailed guidance. Finally, clean your workspace thoroughly to reveal your flawless new flooring and trim. These steps transform a messy installation into a stunning feature that adds value and style to your home.
Many homeowners and even some professionals repeat certain beliefs about flooring and baseboard installation that can actually hinder the quality of the finished result. Let’s dig deeper into some misconceptions and reveal the nuances that can make or break your project. Have you ever fallen into this trap? Let me know in the comments.
Why Cutting Corners Can Cost You More in the Long Run
It’s a common myth that rushing through installation saves time and money. However, skipping meticulous measurements or using cheap tools often leads to gaps, uneven seams, or crooked lines. For example, many believe that a simple miter cut at 45 degrees is enough for perfect corners, but in reality, small inaccuracies compound over multiple joints. Investing in a quality miter saw and double-checking your angles can prevent these costly mistakes. For a comprehensive guide on achieving seamless results, check out these expert strategies.
Misunderstanding Material Expansion and Contraction
One often overlooked nuance is how materials behave with temperature and humidity changes. Many assume that once installed, flooring and baseboards are static, but in reality, wood and certain composites expand and contract. Failing to leave proper expansion gaps can result in buckling or cracking over time. This is especially true for wide planks or large baseboard trims. Experts recommend leaving a gap of at least 1/4 inch in critical areas, then covering it with molding or caulk for a clean finish. For advanced tips on managing material movement, explore this detailed guide.
Advanced Insight: How to Achieve a Perfect Seamless Finish
For those with a keen eye, understanding the importance of subfloor prep and seam placement can elevate your installation. For instance, aligning seams along the strongest parts of the subfloor minimizes movement and cracking. Also, staggering seams at least 6 inches apart prevents weak points. Properly sanding and sealing seams ensures they blend seamlessly, creating a professional look. According to flooring experts, paying attention to these details can significantly extend the lifespan of your floors and enhance aesthetic appeal. For more advanced tips, visit this expert resource.
In sum, understanding these hidden nuances and debunking common myths can save you time, money, and frustration. Proper planning, material knowledge, and attention to detail are the secrets of professional-looking results. So next time you start a project, remember: it’s the little things that make the biggest difference. Ready to perfect your installation? Dive into the detailed guides linked above, and don’t hesitate to seek expert advice when in doubt. Happy renovating!
Keep It Running: Tools That Make a Difference
When it comes to maintaining your flooring, carpet installation, or baseboards, having the right tools is essential for ensuring longevity and a professional appearance. I personally swear by a high-quality oscillating multi-tool. Its versatility allows me to sand, cut, and remove old caulk or adhesive with precision, saving me time and effort. The variable speed control helps me adapt to different materials, from soft carpets to rigid baseboard trim, making it indispensable for ongoing maintenance.
Another favorite is a digital laser level. Unlike traditional bubble levels, laser levels project straight lines across surfaces, ensuring your baseboards stay perfectly aligned over time. This becomes especially handy when you want to recheck or adjust installations without dismantling parts. For cleaning and upkeep, a power vacuum with HEPA filters helps prevent dust buildup that can deteriorate carpets and cause discoloration in wood flooring. Investing in these tools reduces long-term wear and keeps your home looking sharp.
How do I maintain my flooring and trim over time?
Regular inspections are crucial. Check for loose nails, gaps, or signs of damage every six months. For carpets, schedule professional deep cleaning at least once a year to remove embedded dirt and allergens. Use a gentle carpet cleaning solution, like those recommended in this guide, to preserve fibers and color vibrancy. For hardwood or laminate floors, applying a quality sealant every 2-3 years helps protect against scratches and moisture damage.
Baseboards can accumulate dust and scuffs. Regularly wiping them with a microfiber cloth and a mild cleaning solution keeps them looking fresh. When you notice paint chipping or gaps, reapply caulk and touch up with matching paint. Using a flexible putty knife makes this process easier and ensures a seamless finish. For more stylish updates, consider exploring simple baseboard upgrades that extend their lifespan and aesthetic appeal.
What’s the future of flooring maintenance and tools?
Emerging smart technology, like IoT-connected sensors, might soon monitor humidity, temperature, and wear in real-time, alerting homeowners to potential issues before they escalate. Additionally, advancements in eco-friendly, self-healing flooring materials could reduce maintenance needs significantly. Staying updated on these innovations can help you plan proactive maintenance strategies and invest in future-proof solutions for your home.
Try integrating a laser level into your next maintenance routine to ensure your baseboards stay perfectly aligned over the years. Consistent upkeep paired with the right tools will keep your floors and trim looking stunning for decades to come. For detailed advice on long-term maintenance, visit this resource.
The Hardest Lesson I Learned About Flooring and Baseboards
One of my biggest mistakes was rushing through measurements, which led to crooked seams and gaps that took hours to fix. Now I know that double-checking every measurement saves time and frustration later, ensuring a professional-looking finish that lasts.
What No One Tells You About Material Expansion
I used to think that once installed, floors and trims were set in stone. But I discovered that materials like wood expand and contract with humidity and temperature changes, so leaving proper gaps and covering them with molding can prevent buckling and cracks over time. This nuance makes all the difference in durability.
The Secret to Seamless Corners and Edges
Aligning your seams along the strongest parts of the subfloor and staggering joints by at least 6 inches can dramatically extend the life of your floors. Sanding and sealing seams with care creates a seamless, professional look that elevates your entire space, making DIY feel less daunting.
Curated Resources That Changed My Approach
- Expert Guide to Carpet and Baseboards Installation — This comprehensive resource offers step-by-step strategies that helped me achieve lasting results and avoid common pitfalls. I trust it because it’s packed with real-world tips.
- Top Tools for Flooring Perfection — A quality miter saw and laser level are game-changers, ensuring precision cuts and perfect alignment. Investing in these tools saved me hours of rework and improved my confidence.
- Latest Trends in Baseboard Design — Staying updated with trends from this source keeps my projects modern and stylish, inspiring me to experiment with new styles and finishes.
Take Action and Make It Your Own
Your home’s floors and trim can truly transform your space, but it starts with patience, preparation, and attention to detail. Whether you’re a DIY enthusiast or just starting out, embracing these insider tips will boost your results and confidence. Remember, the little things—like accurate measurements and proper sealing—are what set apart amateur from pro. Ready to give your home that flawless finish? Dive into the resources above, and don’t hesitate to share your own lessons learned below. Happy renovating!

One thought on “Top Carpet & Baseboards Installation Strategies for a Perfect Home Finish”
Brenda Martinez
January 13, 2026 at 6:31 pmReading through this detailed guide really resonated with my experience, especially about the importance of precise measurements and proper tools. I once hurried a project and ended up with gaps that took me hours to fix, so now I always double-check everything. Plus, I’ve found that using a good miter saw and laser level makes a world of difference in achieving professional-looking seams and angles. One thing I’d add is that paying attention to material behavior, like wood expansion, is crucial for long-term durability. For those doing DIY projects, what are your go-to tips for handling tricky corners or uneven walls? I’d love to hear your strategies and perhaps learn a few new tricks for perfect seams and flush finishes.