Ever spent hours installing a new floor, only to find it warped, uneven, or just plain disappointing weeks later? I’ve been there—trust me, nothing kills the joy of a home upgrade faster than discovering your efforts didn’t stand the test of time. It’s a frustrating feeling, especially when you realize that a few simple tips could have made all the difference. That lightbulb moment hit me hard when I saw a beautifully installed floor buckle under a heavy piece of furniture, and I thought, “There has to be a better way.”
Why Proper Installation Matters More Than You Think
When it comes to flooring, the devil is in the details. A flawless, durable finish isn’t just about choosing the right material; it’s about executing the installation flawlessly. Poorly installed floors can lead to squeaks, gaps, and even structural issues that cost a fortune to fix later. According to industry experts, proper installation techniques can extend the life of your floors by decades. That’s why I’m here to share some of the most effective tips I’ve learned along the way—so your floors can truly stand the test of time and look stunning for years to come.
Is Skimping on Preparation Worth It
I’ll admit, my early mistakes started right at the prep stage. I once skipped leveling the subfloor properly because I thought it was a minor step. Big mistake. The uneven surface caused my new hardwood to creak and warp within months. Now, I always make sure to thoroughly clean, level, and dry the surface before laying any flooring. It’s a small step that makes a huge difference—and I recommend checking out this guide for in-depth prep strategies.
If you’ve faced issues with uneven floors or cracks, don’t worry—you’re not alone. The good news is, with a few expert tricks, you can avoid these pitfalls and ensure your flooring remains flawless for decades. Ready to dive into the proven steps? Let’s get started!
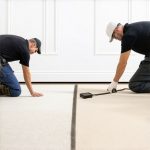
Prepare the Subfloor Carefully
Start by removing all debris, nails, and protrusions. Use a long level or straightedge to identify uneven spots. Think of this step as laying a solid foundation for a house; if the base isn’t level, everything built on top will be unstable. I once skipped this and ended up with a warped floor that creaked within months. To fix this, I used a self-leveling compound on the worst spots, which transformed my installation process and saved future headaches.
Acclimate Your Materials
Bring your flooring into the room and let it sit for 48 hours. This prevents expansion or contraction after installation. Imagine your flooring as a person adjusting to a new climate; rushing it can cause warping or gaps later. I learned this the hard way when my hardwood shrank and left gaps after a week. Proper acclimation kept my planks snug and perfect.
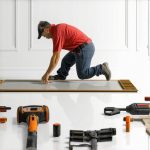
Plan Your Layout Strategically
Lay out your flooring without adhesive or nails first. Use chalk lines to mark the center and work outward symmetrically. Think of this as sketching a blueprint—you want your pattern to be balanced. I once started from the corner and ended up with awkward cuts at the end; then I switched to starting from the center, which made the final result look professional and even.
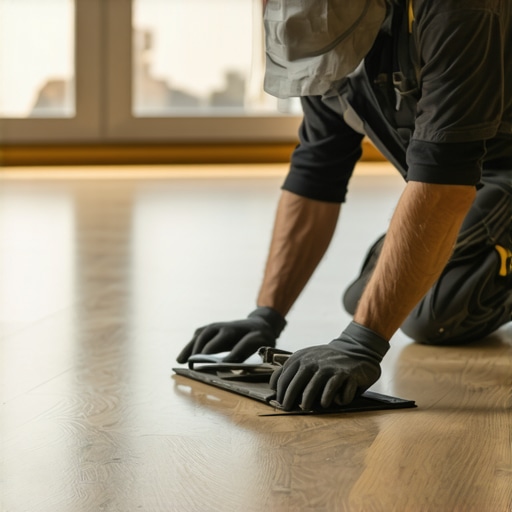
Install with Precision and Care
Secure each row tightly, ensuring tight seams. Use spacers to maintain expansion gaps around the room’s perimeter—usually 1/4 inch. This gap acts like a cushion, allowing the floor to breathe. I once ignored this and saw my floor buckle in summer heat, which was a costly lesson. Using a tapping block and a rubber mallet ensures tight joints without damaging the material.
Address Edges and Corners
Cut baseboards after the flooring is installed, not before. This prevents gaps caused by uneven cuts. When I installed my own baseboards, I found that measuring multiple times and using a miter saw gave me clean, seamless edges. Check out this guide for tips on achieving a flawless look.
Seal and Protect Your Floor
Finish with a protective coat of sealant or finish, especially for hardwood. This acts like a shield against spills and wear. I applied a polyurethane coat with a foam roller, which left a smooth, even surface that still looks like new after years. For showers or high-moisture areas, opt for waterproof sealants to prevent water damage and mold growth. You can find proven strategies in this comprehensive guide.
Many homeowners believe they can save money and time by skipping certain steps or relying on DIY methods when it comes to flooring, carpet, showers, and baseboards. But let’s dig deeper into some misconceptions that could lead to costly mistakes. For instance, a widespread myth is that all adhesives or fasteners are created equal. In reality, choosing the wrong type can cause your flooring or baseboards to warp or lift over time. Industry experts emphasize the importance of using manufacturer-recommended adhesives and techniques, which can significantly extend the durability of your installation. For advanced results, check out this guide on proper adhesive application.
Maintaining your flooring, showers, and baseboards over time requires more than just good initial installation; it demands the right tools and a proactive approach to care. Investing in quality equipment ensures your work remains durable and saves you money in the long run. For example, I swear by a high-quality pneumatic nail gun for installing baseboards—its consistent power and precision make a noticeable difference in achieving a flawless finish and reducing installation time. When it comes to sealing showers, I rely on a professional-grade silicone gun; it gives me control over application and prevents gaps that could lead to water damage. Using the right tools isn’t just about convenience; it’s about safeguarding your home’s interior over the years.
One tool I recommend highly is a moisture meter, especially for flooring and showers. It helps me verify that subfloors are properly dried before installation, which is critical for avoiding warping or mold growth. I also use a laser level to ensure every plank or tile is perfectly aligned, preventing uneven surfaces that degrade faster over time. These tools might seem like small investments, but they play a pivotal role in achieving professional results that last.
Looking ahead, I predict that technology will continue to advance in this space. Smart moisture meters and digital laser levels are becoming more affordable and user-friendly, making DIY projects more reliable than ever. Soon, I believe we’ll see even more integration, like apps that guide you step-by-step through installation and maintenance routines to maximize longevity.
How do I maintain my flooring and showers over time?
Regular cleaning with non-abrasive solutions is essential—avoiding harsh chemicals preserves sealants and finishes. For hardwood floors, I recommend reapplying a protective finish every few years; this refreshes the barrier against scratches and moisture. Showers benefit from routine inspections of grout and sealant, which should be touched up before any signs of cracking or water infiltration appear. Additionally, keeping humidity levels in check with a dehumidifier can prevent mold and warping, especially in basements or bathrooms.
Finally, I suggest setting aside time every six months to inspect and perform minor repairs. Replacing worn caulking or tightening loose baseboards can extend their lifespan significantly. For comprehensive guidance, check out this detailed article on maintaining your baseboards effectively. By using reliable tools and adopting a routine maintenance schedule, you’ll ensure your home improvements remain beautiful and functional for years to come. Don’t forget to try out a digital laser level or a moisture meter on your next project—they’re game changers for DIY enthusiasts aiming for professional results.
The Hard-Won Lessons That Changed My Approach
One of the biggest realizations I had was that rushing the prep work often leads to costly mistakes down the line. Skipping proper leveling or cleaning might seem like a time-saver initially, but it can cause buckling, gaps, or squeaks months later. I also learned that investing in quality tools like a laser level or moisture meter isn’t optional—these tools help me catch issues early and achieve professional results. Lastly, I discovered that understanding the specific requirements of each flooring type, whether hardwood, tile, or carpet, makes all the difference in durability and appearance. These lessons weren’t easy to learn, but they’ve saved me countless headaches and a lot of money in repairs.
Resources That Elevated My Skills
For anyone serious about perfecting their flooring installation, I recommend checking out this expert guide. It offers detailed strategies that go beyond the basics. I also rely heavily on my quality toolkit, including a professional-grade pneumatic nail gun and a reliable moisture meter, which have become game-changers in my projects. Lastly, don’t underestimate the value of visual aids—using a laser level has helped me keep every plank perfectly aligned, making my floors look polished and professional every time.
Your Next Step to Flawless Floors
Remember, great flooring isn’t just about choosing the right material; it’s about executing the installation with precision, patience, and the right tools. Take the time to learn and prepare—your future self will thank you when you’re walking on a beautiful, durable floor that stands the test of time. Ready to transform your home with expert flooring installation? Don’t hesitate—start today and enjoy the satisfaction of doing it right the first time.
Have you ever struggled with a particular step in flooring installation? Share your experience below—I’d love to hear your story and tips!