I remember the moment vividly—standing in my half-finished bathroom, water dripping from a poorly sealed shower base, and thinking, “Is this really going to be my peaceful retreat or just another headache?” That realization hit hard. Renovating a shower isn’t just about picking pretty tiles or shiny fixtures; it’s about creating a sanctuary that stands the test of time while fitting seamlessly into your modern lifestyle.
Why Prioritizing the Right Shower Renovation Matters Now More Than Ever
In today’s fast-paced world, having a bathroom that combines style with durability isn’t just a luxury—it’s a necessity. An outdated or improperly done shower can turn into a money pit, causing leaks, mold, and endless frustration. According to industry experts, poor installation is one of the leading causes of bathroom remodeling failures, often leading to costly repairs down the line. So, why settle for a quick fix or DIY gamble when there are proven strategies to get it right the first time?
My first mistake was rushing through the planning phase—ignoring the importance of proper waterproofing and quality materials. That oversight led to water damage and mold, issues that could have been avoided had I taken the time to understand essential principles and trusted professional guidance. To save yourself from repeating my mistake, it’s crucial to focus on key aspects like waterproofing, selecting durable materials, and proper sealing techniques.
Is Shower Renovation Actually Worth the Hype?
Some wonder if investing time and money into a professional shower upgrade truly pays off. From my experience, it absolutely does—not just in enhanced aesthetics, but in long-term savings and peace of mind. An expert approach ensures your shower is not only beautiful but functional and long-lasting. If you’re hesitant, consider how much a leak or mold issue can cost over time and how it impacts your daily comfort. Want to make the right choices? Dive into my upcoming tips that break down the essentials for ensuring your shower renovation is a true success.
Prepare Your Workspace with Precision
Start by clearing the bathroom and covering surrounding areas with drop cloths to prevent debris from spreading. Remove existing fixtures and tiles carefully, labeling plumbing connections for easy reinstallation. I once neglected to protect my vanity, which resulted in unnecessary cleanup; now I always cover it first. Ensuring a clean, organized space minimizes mistakes and speeds up the process.
Assess and Reinforce the Structure
Inspect the shower stall’s framing, drywall, and subfloor for damage or mold. Replace compromised materials before proceeding. Think of this step as laying a solid foundation; skipping it weakens the entire project. I once rushed this step and later faced leaks that required costly fixes, so thorough assessment is key. Use a level to verify that the floor and walls are even, correcting any deviations immediately.
Implement Waterproofing Like a Pro
Apply a high-quality waterproof membrane over the walls and floor, ensuring complete coverage with no gaps or bubbles. Use a waterproofing fabric for complex corners and seams, overlapping edges according to manufacturer specifications. I learned this the hard way when a poorly sealed seam led to water leaks behind the walls, causing mold. Take your time here—this step is critical for long-term durability. Consider using liquid membrane products for seamless application, especially in corners and around fixtures.
Install a Solid Shower Base or Pan
Select a base compatible with your waterproofing system, and secure it firmly to the subfloor. Use a level to confirm proper drainage slope, typically 1/4 inch per foot towards the drain. During my project, I initially installed a base without checking the slope, resulting in standing water. This mistake hampered subsequent tile work and required reinstallation. Follow manufacturer instructions meticulously, and consider temporarily placing weight on the base to test stability before proceeding.
Tile or Surface the Walls with Precision
If tiling, lay tiles on a flat surface first to prevent lippage. Use spacers for even grout lines and apply thin-set mortar evenly using a notched trowel—think of it as spreading butter evenly on toast. I once used too much mortar, which squeezed out and marred the tiles’ appearance. Press tiles firmly into the mortar, and use a level to keep rows straight. For non-tile surfaces, ensure the chosen material adheres properly and seals well against the waterproof membrane.
Seal and Finish with Care
Apply high-quality grout in the gaps, wiping excess with a damp sponge before it cures. Seal grout lines and edges with a silicone-based sealant, especially around corners and the door. I once skipped sealing, leading to water infiltration and damage. Use painter’s tape to achieve clean lines during sealing, and double-check all connections for leaks before grout curing. This step prevents water seepage and prolongs your shower’s lifespan.
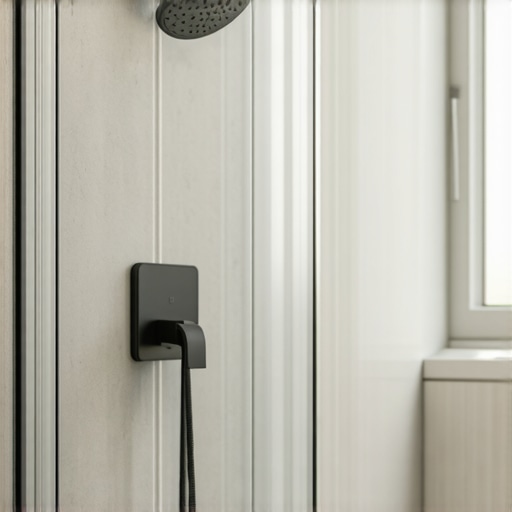
Connect Fixtures and Final Touches
Reinstall or install new fixtures, making sure to secure plumbing connections tightly. Use thread sealant or plumber’s tape on threaded fittings to prevent leaks. Test your work by running water through the system, observing for drips or leaks. When I installed my showerhead, I made sure to tighten everything and tested immediately—no surprises afterward. Finish with a thorough clean-up, removing any debris and polishing fixtures for a sleek look.Many homeowners believe that a straightforward approach guarantees flawless results when installing carpets, flooring, showers, or baseboards. However, the real expert knows there are nuanced pitfalls that can sabotage even the most well-planned projects. One common myth is that surface-level measures, like choosing trendy baseboards or fashionable tiles, are enough for a durable finish. In reality, the secret lies beneath the surface, where proper subfloor preparation and detailed attention to waterproofing can make or break your installation.
What Advanced Homeowners Still Get Wrong About Floor and Shower Installations
For example, a frequent error involves neglecting the critical role of subfloor leveling. While many assume that a level subfloor is optional or that minor irregularities won’t affect the final look, in truth, uneven surfaces create stress points that lead to cracking, warping, or even water infiltration. According to industry standards outlined in the expert flooring installation guidelines, ensuring a perfectly leveled and stable subfloor is paramount for long-lasting results. Skipping this step is a trap that often results in premature failure—think cracked tiles or grout breakdown very soon after completion. Furthermore, when installing showers or flooring, waterproofing is often underestimated. Some DIY enthusiasts believe a simple membrane is sufficient, but advanced waterproofing techniques, like liquid membrane systems, provide seamless and more reliable protection against leaks and mold. These methods are backed by research from water damage prevention studies, demonstrating that meticulous waterproofing can reduce repair costs in the long run. Lastly, misjudging expansion and contraction of materials can cause warping or gaps over time. For instance, not allowing space for wood flooring to expand inevitably leads to buckling—an oversight that professionals meticulously plan for by creating expansion joints and choosing appropriately flexible materials. For more insights on choosing materials and installation practices, explore this comprehensive guide to durable flooring from seasoned experts. Overconfidence in superficial solutions or rushing the prep stages often leads to subtle yet costly mistakes. Have you ever fallen into this trap? Let me know in the comments.Maintaining your newly renovated spaces requires the right tools that combine precision and durability. One indispensable item I personally rely on is a high-quality cordless oscillating multi-tool. Its versatile design allows me to trim excess grout, remove old adhesive, and make precise cuts in tight corners without damaging surrounding materials, streamlining my workflow significantly. For measuring, I swear by a laser distance meter—it’s incredibly accurate compared to traditional tapes and ideal for ensuring perfect levels, especially when dealing with uneven subfloors or wall surfaces. When installing baseboards, a pneumatic nail gun with adjustable pressure settings has become my go-to. It ensures quick, clean nailing without splitting the wood, guaranteeing a professional finish every time. Incorporating a moisture meter during the preparation phase is crucial—especially when working with old flooring or subflooring—to detect hidden dampness that could compromise your waterproofing or adhesion. I’ve found that investing in a quality wet/dry vacuum for debris cleanup maintains cleanliness and prevents contaminants from affecting the installation. Looking ahead, I believe the trend will shift towards smarter tools—that is, devices integrated with IoT capabilities—allowing remote monitoring of tool performance and quality control in real-time. To keep your installations flawless over time, regular inspection and maintenance of your tools are vital. Cleaning blades, recalibrating laser devices, and replacing worn-out parts extend their lifespan and ensure consistent results. Don’t overlook this step; it’s as important as selecting the right waterproof membrane or adhesive. For detailed guidance on optimal equipment choices, visit the expert resource on durable flooring installation [here](https://tilecraftsmens.com/your-guide-to-durable-flooring-installation-for-a-stylish-home). Finally, I recommend trying out a digital angle finder to fine-tune your cutting angles—this simple upgrade can vastly improve the precision of your tile or baseboard installation, reducing frustrations and rework. Remember, the foundation of a beautiful, long-lasting space isn’t just in the materials but also in how well you maintain and utilize your tools for every step of the process.
The Hardest Lessons I Learned About Shower Renovations
Patience is paramount. Rushing through waterproofing or skipping detailed prep can lead to costly repairs later. I once underestimated the importance of thorough surface assessment, which resulted in leaks and mold that could’ve been avoided with careful inspection. Taking the time to understand your materials and processes saves headaches down the road.
Trust professionals when in doubt. While DIY projects can be fulfilling, some tasks—like sealing complex corners or ensuring proper slope—benefit from expert hands. My experience taught me that investing in trained installers often yields better, long-lasting results, especially when waterproofing and drainage come into play.
Details matter more than they appear. Small touches like using high-quality sealant and checking for proper drainage every step of the way can make a huge difference. Overlooking these nuances, I learned, often leads to persistent issues that tarnish the visual appeal and durability of your shower.
Tools That Transformed My Renovation Approach
Having a laser level changed everything I thought I knew about aligning tiles and fixtures. It ensured perfect symmetry and saved me from redoing work. A quality waterproof membrane applicator made sealing corners seamless and significantly reduced leak risks. For measuring floors and walls, a moisture meter helped me catch hidden dampness that could compromise waterproofing, preventing future problems. An oscillating multi-tool proved invaluable for cleaning grout lines and making precise cuts in tight spots. For anyone serious about renovation, these tools are worth the investment—they turn a daunting task into a manageable one. To explore the best options, check out resources like this guide to durable flooring installation.
Your Turn to Transform Your Space
Embarking on a shower renovation may seem intimidating, but with the right knowledge and tools, you can create a space that’s both beautiful and resilient. Think of each step as laying the groundwork for years of enjoyment and peace of mind. Remember, every successful upgrade starts with a commitment to doing it right the first time.
Have you ever faced a surprising challenge during a bathroom remodel? Share your story below—I’d love to hear what didn’t go according to plan and how you overcame it.
,


One thought on “Essential Shower Renovation Tips for a Modern Bathroom in 13:37”
Benjamin Carter
January 14, 2026 at 4:50 pmReading this post really resonated with my own experience—failing to properly waterproof my last shower resulted in ongoing mold issues that could have been avoided with better prep. I especially agree with the importance of assessing the structure thoroughly before proceeding. What I’ve learned is that even minor overlooked details, like checking the slope of the shower pan, can cause major headaches down the line. I’ve started investing in a good laser level and moisture meter, which have made a huge difference in precision and early detection of potential problems. It’s surprising how often DIYers underestimate the significance of these tools and detailed planning. I’d be curious to hear how others handle the waterproofing stage—do you prefer liquid membranes for seamless coverage, or do you find fabric membranes more manageable? I believe that taking the time to do it right now not only saves money but also ensures peace of mind long-term. Do you think smart tools, like IoT-connected devices, will become standard in future renovation projects for maintaining quality? It’s an interesting future to consider.