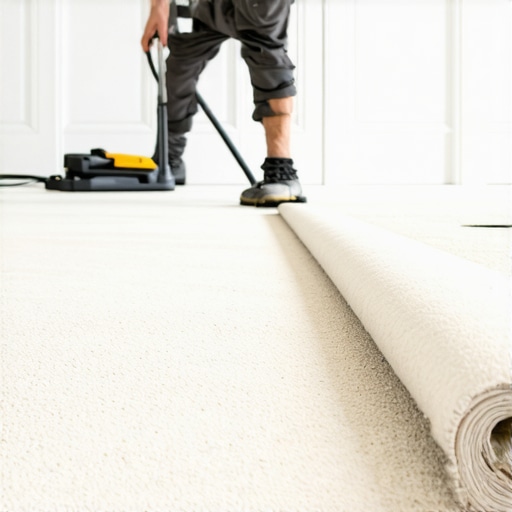
Ever bent down to stretch a freshly laid carpet, only to find the edges fraying or the seams misaligning? I remember the sinking feeling when I realized my first attempt at carpet installation was a complete mess. It was a frustrating moment that made me question whether I had what it took to achieve that flawless finish I so desperately wanted. That experience taught me a valuable lesson: even with the best intentions, beginner mistakes can sabotage your project if you’re not equipped with the right knowledge.
Now, after countless hours of research, trial, and error, I’ve discovered some tried-and-true strategies that make all the difference. Today, I want to share those insights with you. Whether you’re tackling your first carpet install or just want to improve your results, I’ll walk you through the essential steps to ensure durable, beautiful flooring that lasts.
Mastering the Art of a Flawless Carpet Installation
Before we dive into detailed techniques, let me ask: have you ever felt overwhelmed at the thought of installing your own carpet? Maybe you’re worried about uneven seams, wrinkles, or the dreaded bubbling. Trust me, I’ve been there. The key is understanding what common pitfalls to avoid and how to set yourself up for success from the start.
Early on, I made the mistake of rushing the measuring process, which led to excess material and awkward cuts. Small errors like this can snowball into bigger issues, affecting both the durability and appearance of your floor. Learning the importance of precise measurements and proper tools helped me turn a complicated job into a manageable DIY project.
If you’re serious about getting it right, I recommend checking out the comprehensive guide on [how to choose the right carpet for your space](https://tilecraftsmens.com/how-to-choose-the-right-carpet-for-a-cozy-living-space). It offers practical advice on selecting materials that suit your lifestyle, which is the first step toward a successful installation.
Now that we’ve covered the initial mindset, let’s explore the critical steps that will elevate your project from amateurish to professional-looking.
Measure Twice, Cut Once
Start by carefully measuring your room’s dimensions with a reliable tape measure. Draw a detailed plan, accounting for doorways and furniture. I once underestimated a corner, resulting in awkward cuts that wasted material. To avoid this, double-check your measurements and consider adding an extra 2 inches around edges for adjustments.
Prepare the Subfloor
Ensure the surface is clean, dry, and smooth. Sweep away debris, and repair any uneven spots with a leveling compound. Think of the subfloor as the foundation of a house—if it’s shaky, the entire installation suffers. I once ignored this step, and my carpet developed wrinkles within a week, highlighting the importance of solid groundwork.
Choose the Right Underlay
Select an underlay that provides cushioning and sound insulation. Rubber or foam underlays are common choices. This step is like choosing the right padding for a mattress—comfort and durability depend on it. I remember installing a thin underlay, only to realize it caused the carpet to wear quickly, so investing in quality pays off.
Lay Out the Carpet
Unroll the carpet in the room, allowing it to acclimate for at least a couple of hours. This prevents expansion or contraction later. Think of it as letting clothes settle before hemming. I once started trimming immediately, and the edges shifted slightly afterward, making me regret not giving it time to adjust.
Cut and Fit the Carpet
Use a sharp utility knife and a straightedge to cut the carpet to size, leaving excess for trimming. When cutting, work slowly and steadily—rushing can cause jagged edges. I once tried to cut too quickly, resulting in uneven lines, which I fixed only by carefully re-cutting. Precise cuts resemble upholstery work; patience smooths out imperfections.
Secure the Edges
Utilize double-sided carpet tape along the perimeter for initial placement, then stretch and secure the carpet with a knee kicker. This tool acts like a giant plier, helping you achieve tightness without damaging the material. I once skipped the knee kicker step, and my carpet wrinkled within days. Proper tension is crucial for a seamless look.
Seam the Sections Neatly
If your room requires multiple pieces, align the seams and use specialized seam tape and a seaming iron to fuse them seamlessly. Imagine sewing two fabric pieces together; the goal is invisibility. I learned this the hard way when a visible seam marred an otherwise perfect installation, emphasizing the importance of attention to detail at joins.
Trim and Finish
Trim excess carpet at the walls and secure the edges with finishing staples or tack strips. Install new baseboards or reattach existing ones to hide the edges for a polished appearance. Think of it as applying a frame to a picture—it’s the final touch that enhances the overall look. I once left rough edges, which disrupted the room’s aesthetic, so finishing touches truly make a difference.
Inspect and Adjust
Walk over the new carpet and check for loose areas or wrinkles. Adjust tension where needed by stretching or re-stapling. This step ensures lasting durability. My first attempt lacked this final examination, resulting in early wear, lessons learned through experience. Regular inspections prolong your carpet’s life and maintain its beauty.
Many homeowners assume certain DIY truths are absolute, but in my experience, understanding the nuanced realities can save you time and costly mistakes. For instance, when installing baseboards, the myth that a simple miter cut guarantees a perfect joint often leads to gaps and uneven seams. In reality, subtle adjustments with a file or sanding block make a significant difference. Likewise, most people overlook the importance of controlling moisture levels before flooring installation—a step that experts emphasize as crucial for longevity and avoiding warping. Overlooking this can result in uneven floors or even mold issues later on.
When it comes to showers, many believe that sealing every crack is enough, but the real secret lies in proper waterproofing techniques beneath the tiles. Skipping proper membrane installation is a common cause of leaks and water damage, which can be costly to repair. I recommend consulting trusted sources like this guide for advanced waterproofing methods.
Carpet installation also harbors its own set of myths. A frequent misconception is that stretching the carpet tightly will prevent wrinkling. However, over-stretching can damage the fibers and cause premature wear. The nuanced approach involves a balanced tension, achieved with professional tools like knee stretchers, and allowing for proper acclimation time, which many DIYers overlook. Proper measurement techniques, such as adding extra inches for adjustments, are often underestimated but prove vital for a seamless finish.
**What about advanced considerations?**
How does subfloor condition impact long-term flooring performance?** In fact, even minor imperfections or residual moisture can lead to significant issues down the line. According to industry experts, meticulous subfloor preparation not only prevents an uneven surface but also extends the life of your flooring. Ensuring the subfloor is perfectly level and dry, using moisture meters and patching tools, is an advanced step that often gets skipped by DIYers eager to move on to the visual aspects.
Remember, the key to a successful renovation lies in understanding these subtleties and avoiding the traps of common myths. Think of it as building a house: foundation matters as much as the decor. For comprehensive insights, check out our latest guide on flooring installation or explore tips for a stylish upgrade with baseboard updates. Have you ever fallen into this trap? Let me know in the comments.
Keep It Running Smoothly
Once you’ve completed your flooring or baseboard project, maintenance becomes your best friend in preserving its appearance and durability. I personally recommend investing in a high-quality cordless vacuum like the Dyson V11. Its lightweight design and strong suction make daily cleaning quick and effective, especially on carpets where deep dirt can settle and compromise fiber integrity over time. For detailed cleaning, a microfiber mop paired with a gentle wood or laminate floor cleaner ensures surfaces stay shiny without damage. Regularly inspecting your baseboards and applying a fresh coat of paint or touch-up sealant can prevent chips and maintain the aesthetic appeal, as highlighted in this guide on baseboard updates.
Essential Tools for Longevity and Scaling
To keep your flooring and accessories in prime condition, I recommend having a reliable putty knife or small chisel. These tools are perfect for gently removing scuffs or repairing minor cracks before they turn into costly replacements. When dealing with carpets, a seam roller is invaluable for pressing down seams after re-stretching or patching, ensuring they’ve fused seamlessly. Additionally, a moisture meter, like the Protimeter Surveymaster, is indispensable for checking subfloor dryness before installation or repair—preventing issues like warping or mold in the future. These tools may seem simple, but their consistent use makes a significant difference. For the best results, always follow manufacturer instructions and keep your tools clean after each use to extend their lifespan.
Trends Point Toward Smarter Maintenance
As home automation advances, expect smart sensors to play a larger role in long-term care for flooring and decor. Imagine self-monitoring systems that alert you when moisture levels change or when a certain area needs cleaning—saving you time and preventing damage. Technology like this is already emerging, and I predict that in the next few years, integrating smart maintenance systems into your flooring setup will become standard practice for homeowners seeking durability and ease of care. Meanwhile, adopting routine inspections and proactive repairs remains the most reliable approach today.
How do I maintain my flooring over time?
Establishing a regular cleaning schedule combined with scheduled inspections can significantly extend your floor’s life. For instance, sealing or recoating your baseboards and flooring every few years keeps them resistant to wear. Also, addressing issues like minor cracks or loose edges early prevents larger, more expensive problems down the line. Using a moisture meter periodically—much like in professional installations—helps catch hidden problems before they escalate, as recommended by industry experts in this technical guide. Implementing these habits now will ensure your investment remains beautiful and functional for years to come.
Try incorporating a biannual deep clean with tools like a steam mop or specialized carpet cleaner. These methods not only refresh the surface but also eliminate hidden allergens and dirt that could compromise the material’s integrity over time. Remember, proactive maintenance is key — don’t wait for visible damage before acting. If you’re interested in more advanced tips or need product recommendations, feel free to reach out via our contact page. Keep your home beautiful and durable—your future self will thank you!
What I Wish I Didn’t Overlook About Floor Prep
One of the most valuable lessons I learned was the importance of meticulous subfloor preparation. Skipping this step or rushing it often led to uneven surfaces and premature wear, no matter how perfect the install seemed initially. Investing extra time in using moisture meters and leveling compounds saved me from costly repairs later and made me realize that a solid foundation truly makes or breaks the longevity of your flooring.
Why Not All Tools Are Created Equal—My Practical Picks
I’ve found that having the right tools transforms a challenging project into an enjoyable process. My personal favorites include a quality seam roller for seamless seams and a moisture meter to prevent water-related issues. Trust me, these small investments pay off by ensuring professional results and saving you headaches down the line. For an optimized toolkit, I recommend exploring trusted sources that emphasize quality and durability in their reviews.
DIY Myths That Held Me Back—and How to Avoid Them
Early on, I believed that stretching carpets too tightly was always the safe bet, but I learned over time that excess tension can damage fibers and cause early wear. The real trick is balanced tension—thinking of it like tuning a guitar—you want just enough to keep it smooth without straining the material. Additionally, myths around seamless cuts often led me astray; patience and a good straightedge made all the difference in achieving clean lines that stand the test of time.
Where to Go from Here
If you’re eager to refine your skills or start a new project with confidence, I encourage you to explore our top resources, such as detailed guides on durable flooring installation and tips for upgrading your baseboards. These curated insights have helped me move from rookie mistakes to consistent, satisfying results—hope they inspire you as well!

One thought on “Expert Carpet Install Guides for Durable and Beautiful Floors”
Emily Johnson
February 4, 2026 at 6:20 amReading through this detailed carpet installation guide really brought back my own experience of trying to redo my living room flooring. One thing I learned the hard way was how crucial subfloor prep is; I skipped some steps initially and ended up with wrinkles that took weeks to fix. Now I make sure to level the surface, check moisture levels, and use the right tools, like a seam roller and moisture meter, just as mentioned here. These small adjustments not only saved me time but also extended the life of my carpet significantly. I’m curious, has anyone here experimented with different types of underlays? I’ve found that quality padding makes a noticeable difference in comfort and durability. Would love to hear about others’ experiences or tips on choosing the best underlay for heavy daily use, especially in high-traffic areas.