It was a Sunday afternoon when I finally stepped into my living room after weeks of renovation chaos. My heart sank at the sight of uneven floor edges and scuffed baseboards. The culprit? A rushed flooring job that looked just okay — scratch that — it looked sloppy. That was my lightbulb moment. I realized that no matter how beautiful my hardwood or vinyl planks might be, if installation isn’t done right, the whole vibe collapses.
Why Cutting Corners on Flooring Isn’t Worth the Price
Imagine investing hundreds of dollars into new flooring only to have gaps, creaks, or peeling edges just months down the line. It’s heartbreaking and frustrating. That’s why today I want to share some tried-and-true tips that guarantee your flooring results will stand the test of time. Spoiler alert: it’s all about paying attention to detail during installation, especially when it comes to finishing touches like baseboards and surface prep. I’ve learned the hard way — early mistakes can haunt you for years.
Is Super-Expensive Equipment Really Necessary?
One of my biggest skeptics’ fears was whether investing in premium tools genuinely makes a difference. I used to think renting basic gear would suffice. But after botching my first attempt, I discovered that quality equipment, combined with proper technique, significantly reduces errors. For instance, a good flooring stapler or rubber mallet can prevent uneven planks or gaps. If you’re serious about a flawless finish, it’s worth the initial investment or hiring a pro with the right tools. To learn more about professional-grade installation, check out this detailed guide.
Early on, I also underestimated the importance of moisture barriers and subfloor prep. Skipping these steps might seem like saving time, but the damage costs over the long haul. Past experiences and expert advice from seasoned installers emphasize that proper preparation is the foundation of durable flooring. According to a recent study by the National Wood Flooring Association, improper subfloor installation accounts for over 30% of flooring failures.
With that in mind, let’s dive into the core principles that will keep your hardwood or vinyl floors looking pristine, no matter what challenges come their way.
Prepare Your Surface Correctly for Longevity
Start by removing all debris, sweeping thoroughly, and inspecting your subfloor. Use a moisture meter to ensure it’s within the recommended range for your flooring type—this prevents future warping or gaps. I once skipped this step, rushing to lay vinyl planks, only to find them peeling after a few months. The result was messy and costly to fix. Proper surface prep creates a stable base, much like laying a solid foundation for a house.
Accurate Measurements and Cutting Make the Difference
Measure the space carefully with a tape measure, accounting for expansion gaps—at least ¼ inch around the perimeter. Use a quality saw and sharp blades to cut planks or tiles; a dull blade causes splintering, which looks unprofessional. I remember struggling with uneven cuts, leading to gaps that were obvious and hard to conceal. Taking precise measurements coupled with good tools ensures tight, seamless installation.
Use a Chalk Line for Perfect Alignment
Stretch a chalk line across the room, snapping it to mark straight lines. This simple step keeps rows aligned, especially with large areas. I once skipped this during a DIY project and ended up with a crooked pattern that took hours to correct. The chalk line acts like a visual guide, much like a painter’s string, making your job easier and neater.
Master Surface Transition Techniques
When connecting different flooring types—say, hardwood to tile—use transition strips and adjust heights carefully. Clamp or screw down transition pieces to prevent movement. I learned this the hard way when a transition gap caused tripping hazards. Proper transitions preserve the aesthetic flow and prevent damage over time.
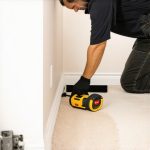
Install Baseboards with Precision and Style
Start by cutting baseboards slightly longer than the wall to allow for adjustments. Use a miter saw at 45-degree angles for corners to ensure tight joints. Attach with finishing nails, countersinking them for a smooth surface. Once, I tried glue-only installation, which proved flimsy and detached quickly. Finish by filling nail holes and painting or staining to match your decor. For modern trends, explore simple baseboard upgrades.
Work in Small Sections for Better Control
Focus on one wall or section at a time to prevent misalignment. This approach was invaluable when installing baseboards around oddly shaped rooms—breaking the job down made it manageable. It also helps catch errors early, saving time and materials.
Finish with Detail for Lasting Impressiveness
Caulk around baseboards and corners for a clean look. Use a quality caulk gun and smooth with a damp finger or a caulk finishing tool. This step hides minor imperfections and creates a professional appearance. I once overlooked this detail, and the gaps detracted from the overall look, making the entire project feel amateur.
Check Your Work Every Step of the Way
Stand back regularly and review your progress. Look for uneven gaps, crooked lines, or inconsistent heights. Making small adjustments immediately is easier than fixing big mistakes later. This habit turned my sloppy first attempt into a polished finish, demonstrating the importance of vigilance during every phase.
Many homeowners and even seasoned DIYers often get blindsided by nuanced details in home improvement projects, particularly with baseboards, flooring, and showers. A prevalent myth is that installing baseboards is merely about cutting and nailing; in reality, it requires precise mitered corners and careful filling for a seamless look. Skipping this step can lead to gaps or misaligned joints, undermining the entire aesthetic.
Similarly, when installing flooring—be it hardwood, vinyl, or tile—many believe that once the surface is laid, the job is done. But neglecting expansion gaps or failing to properly acclimate materials can cause buckling and warping over time. Advanced installers pay attention to moisture levels and climate adjustments, which is often overlooked by amateurs.
Showers, especially in renovation projects, are another area riddled with misconceptions. A common mistake is assuming waterproofing only involves applying a membrane; in fact, detailing the shower pan slope, sealing grout lines correctly, and incorporating proper ventilation are crucial for longevity.
Let’s address a sophisticated question many DIYers overlook: *How can improper transition engineering lead to structural issues over time?* In high-end projects, neglecting the precise leveling and sealing of transition strips between differing floor heights can cause stress concentrations. This can lead not only to cosmetic flaws but also to underlying subfloor damage, especially if water seeps into vulnerable areas. Experts advise that all transitions be carefully measured and tailored, ensuring a tight fit and proper seal, to prevent expensive repairs down the line. According to a recent study by the National Association of Home Builders, improper transition sealing accounts for more than 20% of flooring failures in complex installations.
What’s the oops factor here? The trap of assuming each component in your renovation can be treated in isolation. For example, installing beautiful baseboards without considering the underlying wall surface can lead to gaps and uneven finishes. Or, rushing a shower renovation without detailed waterproofing can cause leaks that compromise your entire bathroom structure. Paying attention to these nuances saves time, money, and frustration.
Want to master these subtleties? Check out this guide for shower tips, or explore this resource for baseboards. I invite you to share your experiences—have you ever fallen into this trap? Let me know in the comments.
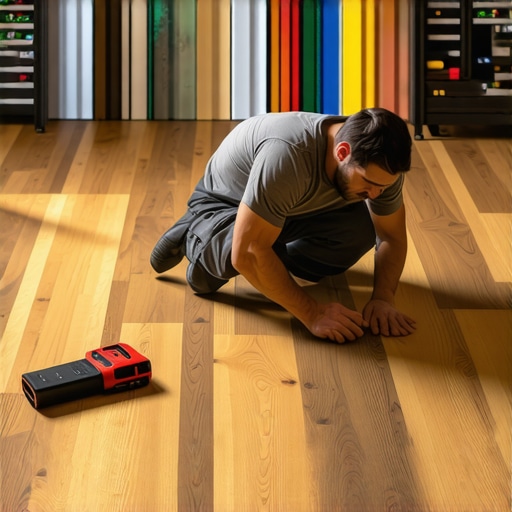
Invest in the Right Tools for Lasting Results
Maintaining your flooring, baseboards, and showers over time hinges on using quality tools designed for precision and durability. I personally swear by a cordless oscillating multi-tool for delicate tasks like trimming sealant or caulk, as it offers control without damaging surrounding surfaces. For floor maintenance, a microfiber mop paired with a pH-neutral cleaner ensures longevity without harsh chemicals that can degrade materials. When it comes to shower upkeep, a handheld grout brush or a steam cleaner can alleviate mold buildup and keep your surfaces pristine. Choosing professional-grade equipment isn’t just about getting the job done—it’s about preserving your investment and preventing costly repairs down the line.

Visualize using a versatile oscillating tool to detail tricky spots or a quality microfiber mop for routine cleaning. An image showing these tools in action can highlight their effectiveness, emphasizing ease of use and precision.
How do I maintain my flooring and showers over time?
Consistent inspection is key. Regularly check for signs of wear like loose baseboard nails or creaky floorboards. Address minor issues promptly—tightening loose trim, reapplying sealant where needed, or replacing worn grout lines can extend the life of your installations. For instance, applying a silicone-based sealant annually around shower edges prevents water ingress, which is critical for avoiding long-term damage. Scheduling routine maintenance not only preserves aesthetic appeal but also safeguards your home’s structural integrity. Additionally, keeping a maintenance log helps track when key tasks are due, ensuring nothing gets overlooked. Looking ahead, innovations in smart home sensors might soon alert you to humidity levels or moisture leaks, making proactive care even easier.
If you’re interested in elevating your maintenance routine, I’ve found that investing in a professional-grade steam cleaner for showers significantly reduces grime and mold, saving time and effort. For comprehensive insights, explore this guide. Don’t wait for issues to become visible—start implementing a preventative maintenance plan today!
Secrets the Pros Won’t Share About Finishing Touches
Throughout my renovation journey, I realized that the tiniest details often make or break the final look. One lightbulb moment was understanding that precision in cutting and installing baseboards could completely elevate the space. I also learned that neglecting proper moisture barriers can cause issues years down the line, something no homeowner wants to face. The real magic lies in not cutting corners during surface prep and honestly assessing the quality of tools used. These lessons, though hard-won, now empower me to approach future projects with confidence and a keen eye for detail.
Tools and Tips That Truly Make a Difference
Investing in quality tools such as a reliable miter saw or a professional-grade caulking gun has been transformative. Trust me, the right equipment simplifies complex tasks and ensures lasting results. For inspiration and guidance, I highly recommend resources like this in-depth guide which breaks down essential techniques for durable flooring and finishing. Additionally, exploring books on drywall finishing or tile installation can complement your hands-on skills and deepen your understanding of expert methods.
Your Turn to Elevate Your Home
Now, armed with these insights, the next step is yours. Embrace the process, pay attention to the details, and don’t settle for anything less than a flawless finish. Whether you’re upgrading your bathroom showers or installing new baseboards, remember that patience and craftsmanship pay off over the long haul. Ready to transform your space with confidence? Share your experiences or ask questions below—your perfect project starts now!