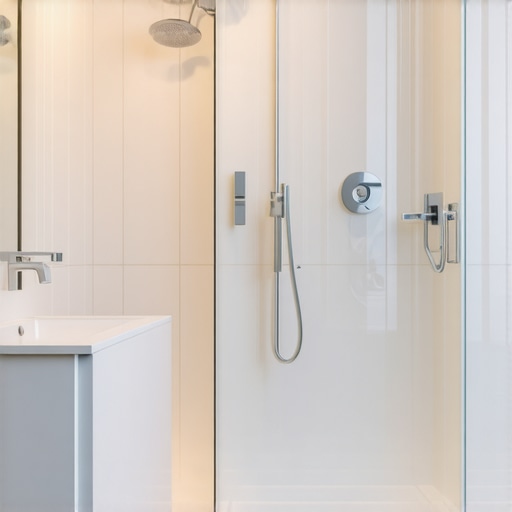
It was a typical Saturday morning when I finally took a good look at my bathroom. Instead of feeling relaxed, I felt a pang of disappointment. The mismatched baseboards, dated shower tiles, and tired-looking fixtures made the entire space feel dull and neglected. I realized that, all too often, we overlook small updates that can truly elevate our bathrooms. That lightbulb moment propelled me to dive into effective design solutions—without breaking the bank or undertaking a full remodel.
Why the Right Baseboards and Shower Designs Actually Matter
The truth is, the details matter more than many homeowners realize. Well-chosen baseboards and thoughtful shower design can transform a space from ordinary to extraordinary. They serve as the finishing touches that tie everything together, reflecting your style while also protecting your walls and floors. I’ve learned through my own experiences that focusing on these elements can dramatically boost your bathroom’s aesthetic and even its durability over time. Interestingly, a recent study highlights that aesthetic improvements in key areas like flooring and moldings can increase home value by up to 10% (source: National Home Improvement Association). So, not only do these updates enhance your daily experience, but they also serve as excellent investments.
Is It Really Worth the Effort and Cost?
At first, I was skeptical—thinking, “Is upgrading baseboards and shower design really going to make that much difference?” I made a few early mistakes, such as choosing styles that didn’t match my overall decor or opting for cheap materials that quickly fell apart. But once I invested in quality choices and professional installation, the results were undeniable. Now, I believe every homeowner should at least consider these upgrades for their next project. If you’re wondering where to start or if you’re hesitant about DIY, check out this helpful guide on simple updates to elevate your interior.
As we move forward, I’ll share some practical tips and inspiring ideas to help you choose the perfect baseboards and shower designs that fit your space, style, and budget. Ready to see your bathroom in a whole new light? Let’s dive in.
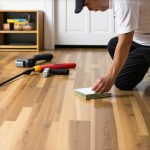
Prepare Your Workspace and Gather Materials
Before diving into installation, clear your bathroom of any obstructions, and lay down a tarp to protect surfaces. Gather high-quality baseboards, appropriate adhesive or nails, a saw for cutting, a level, and safety gear like goggles and gloves. I remember the time I realized I was missing a measuring tape mid-project—wasted time that could have been avoided with better prep. Precise measurements are crucial to ensure your baseboards fit snugly and your shower tiles align perfectly.
Measuring and Cutting Components Precisely
Measure each wall segment where the baseboards will go, adding a small allowance for miter cuts at corners. Use a miter saw or a handsaw with a reliable guide to make clean angled cuts. For the shower renovation, plan your tile layout first, measuring to minimize cuts and waste. I once attempted to cut tiles freehand, leading to uneven edges; switching to a tile cutter with guide rails made all the difference, resulting in a professional-looking finish. Think of it like tailoring – each piece must be precise for a seamless look.
Corner Joints and Transitions
When installing baseboards, use miter joints at corners for a clean appearance. Apply adhesive to the back of the baseboard and position it, then secure with nails. For transitions between different flooring heights or materials, use transition strips or shims to create a smooth transition. During my project, I found that filling gaps with wood filler and sanding smooth before painting created a more polished look, akin to fitting puzzle pieces perfectly.
Installation Technique for Flawless Results
Start from a corner and work your way around, ensuring each piece is level. Use a level or a straight edge against the top of the baseboard to verify alignment. Nail into wall studs or use construction adhesive for added stability. To prevent nail dimples, countersink nails slightly and fill the holes with wood putty, then sand smooth. During my early installs, I struggled with uneven lines; by using a chalk line as a guide, I maintained consistent height and alignment, giving the entire room a cohesive look. Think of it like laying bricks in a wall—alignment is everything.
Sealing and Finishing Touches
Once installed, apply painter’s caulk along the top edge of the baseboards and around corners to hide gaps. Sand down any uneven spots and paint or stain to match your decor. For your shower renovation, sealing grout lines is essential to prevent water seepage. I learned this the hard way when a small leak caused mold—a mistake easily avoided with proper sealing. Use a waterproof sealant on shower edges for longevity, similar to waterproofing a roof for weather resilience.
Renovating the Shower Floor and Walls
Begin with removing old tiles carefully, using a chisel and hammer to prevent damage. Prepare the surface by cleaning and leveling uneven spots. Apply a high-quality waterproof membrane before tiling to safeguard against moisture. When laying new tiles, spread thinset mortar evenly with a notched trowel, then set tiles using spacers for consistent gaps. During my first tile job, I neglected to use spacers, resulting in uneven grout lines. Learning to use spacers was a game changer, much like setting the foundation for a sturdy building. Finish with grout, sealing all joints to prevent water infiltration.
Laying Down the New Flooring
Choose suitable flooring material—vinyl, hardwood, or tile—based on your needs. Acclimate the material indoors for 48 hours before installation. For vinyl or laminate, use a tapping block to snugly fit planks together, avoiding gaps. For hardwood, leave expansion gaps along the edges. I once rushed the flooring installation and failed to leave gaps, causing buckling as the material expanded. Remember, patience and proper spacing ensure durability. Use a level and spacers during installation to maintain evenness across the surface. Think of it as laying a long, straight road—every segment needs to be aligned perfectly for a smooth drive.When tackling home renovations, many homeowners rely on popular advice that can sometimes lead them astray. It’s tempting to believe that sticking to conventional methods guarantees perfect results, but in my experience, understanding the nuanced details makes all the difference. For instance, a widespread myth suggests that uniformity is always best when installing flooring; however, subtle variations in subfloor conditions require adjustments that standard practices often overlook. Recognizing these intricacies helps prevent common pitfalls like uneven tiles or gaps that compromise both aesthetics and durability. Moreover, many assume that basic caulking suffices for waterproofing around showers, but in real-world applications, specialized sealants and proper surface preparation are crucial—missteps here can result in leaks and mold growth. To truly master installation greatness, delve into expert strategies discussed in resources like expert flooring tips or carpet selection advice. Ever fallen into one of these traps? Let me know in the comments.
Why do even seasoned DIYers miss the subtle details that elevate a renovation from so-so to stunning?
The key lies in understanding the material behaviors, environmental factors, and precise techniques that professionals master over years. For example, improper expansion gap allowances can cause hardwood floors to buckle, a mistake frequently made when homeowners overlook seasonal wood movement. Similarly, neglecting to level a subfloor thoroughly before tile installation can lead to lippage and uneven grout lines—issues that become glaring once finished. As detailed in this comprehensive guide, paying attention to these subtle nuances ensures longevity and sophistication in your projects. So, don’t settle for the ordinary—embrace the complexity that makes your renovation truly resilient and refined. Ready to elevate your next home upgrade? The detailed strategies await in the links provided.When it comes to maintaining your bathroom updates over time, having the right tools and practices makes all the difference. Personally, I rely on a high-quality cordless oscillating multi-tool, like the DEWALT DCS355D1, for precise cutting and removal tasks. Its versatility helps me tackle small repair jobs, trim baseboards, or scrape away old grout without hassle, saving time and reducing frustration. A digital moisture meter is another investment I swear by, as it allows me to monitor humidity levels and prevent mold growth before it becomes a problem—key for long-term bathroom health. I also use a NANO Tape Measure, which is compact yet incredibly accurate, ensuring every measurement is spot-on, especially when working in tight corners or awkward angles.
On the software front, I turn to specialized design apps like SketchUp to visualize improvements before committing to any purchase or demolition. Planning with digital models helps prevent costly mistakes and ensures seamless integration of new elements like modern shower enclosures or elegant flooring transitions. Looking ahead, I predict that smart home integration tools will play an increasing role, allowing homeowners to monitor humidity, ventilation, and even detect leaks remotely—making maintenance more proactive.
To keep your bathroom functioning flawlessly over time, regular inspections are vital. Check grout lines for cracks, verify that fixtures remain secure, and clean drain traps periodically. For a comprehensive approach, I recommend scheduling professional inspections annually, especially for plumbing connections, to catch issues early.
How do I maintain my bathroom upgrades and tools to ensure longevity?
Proper maintenance involves cleaning tools after each use, replacing worn-out parts promptly, and storing equipment in a dry, organized space. Applying a penetrating sealant to grout and tile surfaces every couple of years helps prevent water infiltration and staining, extending the life of your finishes. Additionally, maintaining ventilation systems reduces humidity buildup, which is critical for preventing mold and preserving both your tools and your renovation investments.
In my experience, choosing high-quality materials and investing in the right maintenance tools can dramatically improve your results. For example, using a professional-grade grout sealer—like the Miracle Sealants 511 Impregnator—significantly boosts durability, saving you money and effort. Embracing these practices and tools not only helps your bathroom look great but also ensures it remains a safe and comfortable space for years to come. Remember, consistent upkeep is the key to maximizing every dollar spent on renovation projects. If you’re curious about other expert strategies, explore detailed guides such as this.
The Hardest Lesson I Learned About Showers, Flooring, and Baseboards
One of my most valuable revelations was realizing that rushing through measurements often leads to mistakes that aren’t apparent until the final install. Accurate, multiple measurements avoid awkward cuts and gaps, saving frustration down the line. This lesson transformed my approach to every project, emphasizing patience over haste.
The Myth That Tripped Me Up and Why I Now Know Better
I used to believe that a uniform look was always best, but I found that slight variations in wall angles or subfloor levels—if accounted for—actually add charm and authenticity. Embracing these nuances ensures a more professional, lasting finish. Check out this comprehensive guide for more insights.
What No One Tells You About Choosing Materials
Deciding between different baseboard types or shower tiles isn’t just about aesthetics—it’s about durability and compatibility with your environment. I learned to prioritize moisture-resistant materials in bathrooms, which significantly reduced future repairs and maintained the space’s beauty.
Lessons Not Found in Ordinary Tutorials
Beyond the technical skills, I discovered that consistent upkeep and subtle upgrades—like sealing grout or repainting trims—extend your investment’s lifespan. Incorporating these small, regular practices keeps your bathroom part of your home’s story rather than just a project past.
Where My Expertise Meets Your Aspirations
If you’re contemplating a bathroom refresh, remember that the tiniest details—like properly fitting corners or sealing edges—make all the difference. Visit this resource for ideas that bring polish and longevity to your work.