It was a morning just like any other when I stepped into my living room and noticed a glaring flaw — a noticeable bubble in the vinyl flooring I had just installed. My stomach sank. I had followed all the online advice, watched tutorials, and even considered myself somewhat handy. Yet, here I was, facing a mistake that threatened to ruin the whole look.
That lightbulb moment made me realize something crucial: even with the best intentions, a small oversight can lead to big, costly problems down the line. If you’re about to embark on your own flooring project, you might be feeling overwhelmed or skeptical about the process. Trust me, I’ve been there.
Today, I promise to share the most effective strategies I’ve learned through personal mishaps and successes. We’ll cover how to avoid common pitfalls, ensuring your installation stands the test of time. Whether it’s choosing the right materials or mastering proper techniques, these tips will help you achieve professional-looking results without breaking the bank.
Why Cutting Corners Can Cost You More Than You Think
Skimping on preparation or rushing through steps might seem tempting when you’re eager to finish, but I’ve learned that shortcuts often lead to frustration and expense. Early on, I skipped the detailed surface assessment, assuming my subfloor was perfectly smooth. Turns out, small bumps and dips can wreak havoc on your flooring. A study by the National Wood Flooring Association emphasizes the importance of proper surface preparation, noting it as a key factor in long-lasting installations (NWFA, 2023). Realistically, taking the time to prepare your subfloor can make all the difference in achieving a flawless finish that endures.
Are you worried about making mistakes or unsure if you’re ready to start? Don’t worry. I’ll walk you through the steps to get it right, starting from the foundational prep to the final touches. But first, let’s address a common skepticism many face—the belief that affordable tools and materials can match professional quality. Spoiler: they can, if used correctly, but only if you avoid the pitfalls I was guilty of early in my DIY journey.
Preparing the Subfloor Effectively
Start by removing old flooring and thoroughly cleaning the surface. Use a level to identify bumps or dips, and sand down high spots or fill low areas with a suitable leveling compound. Remember, a smooth, even surface is essential for long-lasting results. I once rushed this step and ended up with uneven flooring that creaked every time I stepped on it, which taught me the importance of meticulous preparation.
Measuring and Planning Your Layout
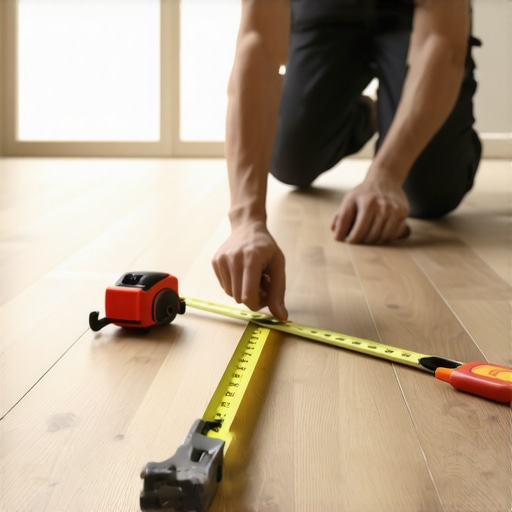
Accurately measure the room, including length, width, and the location of doorways. Draft a floor plan to determine the orientation of your planks or tiles, aiming for the most visually appealing layout. Avoid starting from the center unless symmetry is desired; instead, choose a starting wall that ensures cuts are placed where they’ll be less noticeable. Once, I miscalculated and had awkward cuts in the corner—learning to double-check measurements saved me hours later.
Installing Flooring with Precision
Begin laying the flooring from the longest, most visible wall, leaving expansion gaps of about ¼ inch along the edges. Use spacers to maintain uniform gaps; this prevents buckling as materials expand or contract. When laying hardwood planks, stagger seams by at least 6 inches to create a natural, stable pattern. I once neglected this, and the seams aligned perfectly, resulting in a less natural look and increased vulnerability. Use a rubber mallet and tapping block to snug planks together without damaging them.
Cutting Tiles or Planks
Use a carbide-tipped saw or a snap cutter for straight cuts, and a jigsaw for curves or tricky angles. Always measure twice before cutting; a single mistake can ruin several pieces. I once cut a tile too short because I misread my measurement, which delayed the project by a day and cost extra materials. Remember to wear safety glasses and mask when cutting to avoid inhaling dust.
Sealing and Finishing the Floor
Once all pieces are laid, install transition strips at doorways to cover expansion gaps. Apply a finish or sealant appropriate for your flooring type to protect against moisture and wear. Allow ample drying time before walking on the surface. I skipped sealing my hardwood once, and months later, scuffs and stains became more noticeable, reinforcing the necessity of this final step.
Transforming Baseboards Effectively
Remove old baseboards carefully using a pry bar, avoiding damage to the wall. Measure and cut new baseboards with a miter saw, ensuring tight corner joints—either butt joints with corner blocks or mitered edges. Sand the cut edges for smoothness. When attaching, use finishing nails and a nail set to countersink them into the trim. Finish with caulk along the top edge to hide gaps and paint or stain for a polished look. A personal tip: painting baseboards before installation can save time and prevent damage to your newly finished floors.
Modern Trends to Consider
If updating your space in 2025, explore the latest baseboard styles, which range from minimalist flat designs to ornate, vintage-inspired trims. Browse this guide for ideas on incorporating trendy elements that elevate your interior.
Handling Shower Installation for a Spa-Like Bathroom
Begin with accurate measurements and ensure plumbing is correctly aligned. Use a level to set the base for the shower pan, and seal joints with waterproof membranes. Tile the shower walls with a focus on waterproofing and grout sealing to prevent mold. I once neglected waterproofing, which led to leaks and costly repairs; now, I always double-check these details. Finish with elegant fixtures and accessories to create your personal spa oasis. For inspiration and detailed steps, check this resource.
While many believe that installing flooring, baseboards, or showers is straightforward with basic tools and instructions, the reality is far more intricate. A common misconception is that the primary challenge lies in materials selection, but in fact, meticulous execution of seemingly small details often determines the longevity and aesthetic appeal of your project. For instance, many overlook the importance of proper acclimation of materials—allowing flooring or baseboards to adjust to ambient humidity and temperature—which can prevent warping or gaps months down the line.
Another overlooked aspect is the precise management of expansion gaps, which many homeowners neglect, leading to buckling or cracking as materials expand and contract. This nuanced step is critical, yet it’s frequently simplified or ignored, resulting in costly repairs. Additionally, a prevalent myth is that using cheaper adhesives or fast-drying compounds won’t impact quality—however, these shortcuts can compromise the structural integrity over time, especially in high-traffic or moisture-prone areas.
Regarding showers, many assume waterproofing is solely about sealing visible joints, but expert installation demands layered waterproof membranes beneath tiles to prevent leaks—an advanced process often misunderstood or underestimated. Missteps here can cause significant water damage, mold, and costly renovations later. Dive deeper into these nuances, such as the importance of properly sealing corners and joints to avoid mold infiltration, which studies show can develop in as little as 24 to 48 hours if not correctly managed. Remember, the devil is in the details; ignoring these can undermine your entire project.
Looking for ways to elevate your craftsmanship? Explore innovative trends like modern baseboard styles, which can dramatically enhance your interior. For insights into the latest design trends, check out this guide. And if you’re tackling a shower renovation, expert tips are available here. Remember, understanding these subtle yet impactful details can save you time, money, and frustration—so never underestimate the power of the small things. Have you ever fallen into this trap? Let me know in the comments.When it comes to maintaining the quality and durability of your home renovation projects like flooring, baseboards, or showers, having the right tools is indispensable. Personally, I swear by a high-quality oscillating multi-tool, such as the Fein MultiMaster, for its versatility in trimming, sanding, and detail work. It allows me to make precise cuts in tight spaces, especially when installing baseboards or adjusting planks, saving me both time and effort. Additionally, a digital laser level has revolutionized my approach to ensuring perfectly aligned floors and wall tiles. Unlike traditional bubble levels, these laser tools project a straight line across surfaces, making it easier to spot deviations before they become costly mistakes. I recommend brands like Bosch or DeWalt for their reliability and battery life. For the more intricate aspects of waterproofing shower walls, a waterproof membrane applicator paired with a notch trowel ensures even, bubble-free layers—detailed in the expert guides available here. Keeping your tools sharp and calibrated is also crucial for maintaining precision over time. Regularly inspect and sharpen your saw blades, and replace worn-out bits to prevent jagged cuts that can compromise your project. As trends lean towards smart tools, the future looks bright for integrating digital measurement devices and IoT-enabled sensors that monitor humidity or stress levels in flooring materials. These innovations promise to extend lifespan and preempt issues before they manifest. To get started, try upgrading your measuring kit with a laser level—it’s an investment that pays off in flawless results. Remember, consistency and accuracy are the backbone of durable installations, so equip yourself accordingly and keep your tools in top shape. For comprehensive advice on choosing the right equipment for flooring installations, check out this detailed guide. Don’t underestimate the power of the right tools in transforming your DIY efforts into professional-quality results.
Lessons Learned in the Trenches of Home Renovation
One of the most profound realizations I had was that even seemingly minor oversights—like neglecting proper surface prep or rushing measurements—can spiral into costly mistakes. The urge to skip steps to save time often backfires, reminding me that patience and attention to detail are your best allies. Furthermore, I discovered that mastering the intricacies of waterproofing in showers isn’t just a technical step—it’s the cornerstone of avoiding long-term water damage. Lastly, I learned that tools matter just as much as techniques; investing in quality equipment, like a laser level, can elevate your results from good to professional. These lessons, born out of personal experience, are invaluable for anyone looking to create durable, beautiful spaces.