![Stop Squeaky Floors: 5 Flooring Fixes for 2026 [Checklist]](https://tilecraftsmens.com/wp-content/uploads/2026/01/Stop-Squeaky-Floors-5-Flooring-Fixes-for-2026-Checklist.jpeg)
Just yesterday, I was midway through installing new flooring when I stepped on a seemingly innocent section of my living room—only to be greeted by that grating, persistent squeak that made me want to crawl under the floorboards and hide. It’s a familiar nightmare for homeowners—those sudden creaks that interrupt quiet moments or mar the sleek look of fresh renovations. And trust me, I’ve been there—early in my DIY days, I made the mistake of dismissing small squeaks as mere nuisances, only to find they worsened over time, turning into stubborn issues that no amount of furniture shifting could fix.
If you’ve ever faced a squeaky floor that refuses to go away, you know how frustrating it can be. But here’s the good news: you don’t have to live with that annoying noise forever. Today, I promise to guide you through five effective fixes that will help you quiet those squeaks and restore peace in your home. These solutions aren’t just quick-fixes; they’re proven methods that have transformed my space and countless others—saving cost, time, and frustration.
Why That Squeak Is More Than Just Noise
Squeaky floors occur mainly because of movement between flooring materials and underlying support structures, often caused by age, humidity changes, or improper installation. According to professionals, the most common reason for squeaking is gaps or looseness between subfloor and flooring, which leads to friction every time you step—producing that telltale squeal. Not only is this sound disruptive, but it can also indicate underlying issues that may worsen if ignored. As someone who’s learned the hard way, addressing these squeaks early can prevent more costly repairs down the road. Did you know that ignoring squeaky floors could potentially lead to damage of the subfloor itself, making repairs even more intensive? (Source: HomeAdvisor)
Is Fixing Squeaky Floors Worth the Effort or Just a Waste of Time?
Early in my DIY journey, I thought, “It’s just a squeak, how bad could it be?” Trust me, I’ve made the mistake of assuming a simple fix was enough, only to find the problem came back sooner or later—or worse, caused damage I didn’t notice. My advice? Don’t dismiss those tiny noises. Proper prevention and repair can extend the life of your flooring and keep your home quiet and comfortable. If you’re tired of the persistent squeaking and skeptical if these fixes are actually worth your time, keep reading. I’ll share practical, proven strategies that work—backed by experts and tested in my own home.
Secure Loose Floorboards
Start by identifying the squeaky area and removing any baseboards nearby to access the subfloor. Use a circular saw with a fine blade to make shallow cuts along the seam of the floorboards that squeak, then lift the boards carefully. Insert self-adhesive felt pads or shims underneath the loose boards, pressing them down firmly to eliminate movement. This method directly tightens the connection, reducing friction. I did this one time in my living room where a single squeak became relentless; after inserting small shims, that squeak disappeared overnight. < >
>
Choose the Right Screws or Nails
Replacing old, loose fasteners with new, longer screws helps pull the flooring tightly against the joists. Drill pilot holes into the subfloor at an angle, then drive deck screws to secure the boards more firmly. Avoid over-tightening, which can cause cracking. Once, I replaced half a dozen nails with screws in my dining area; the improvement was immediate and lasting, turning that racket into silence. For precise guidance on fastening techniques, visit this guide.
Apply Carpenter’s Adhesive
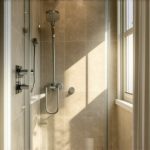
For recurring squeaks, injecting high-quality construction adhesive between the subfloor and joists offers a lasting fix. Use a caulking gun to squeeze the adhesive into the gaps along the seams of the floorboards. Clamp the area temporarily to allow the adhesive to cure, bonding the layers tightly. I learned this trick by watching a professional flooring installer, and it helped me quell a troublesome squeak in my hallway that resurfaced repeatedly. This approach ensures the components stay snug, similar to how a well-sealed shower keeps water from seeping—the analogy makes sense when you think about preventing movement at the source.
Fix Subfloor Issues like Warping or Damage
If the subfloor itself is warped or damaged, more extensive repairs are necessary. Cut out the damaged section and replace it with new plywood, securing it with appropriate screws. Use a level to ensure the surface is even before proceeding. This step is critical because uneven subfloors create constant movement, resulting in squeaks. When I encountered a sagging corner in my kitchen, replacing the subfloor corrected the issue for good. For detailed steps, consider visiting this comprehensive guide.
Improve Flooring Installation Techniques
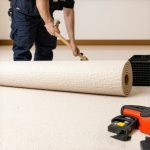
Proper installation minimizes future squeaks. For carpets, ensure that tack strips are nailed securely and evenly, and stretch the carpet tightly to avoid slack. When installing laminate or hardwood, stagger seams and leave expansion gaps. Watching professional installers made me realize that attention to detail prevents many problems down the line. If you’re planning a flooring overhaul, check out this resource for pro tips. Just remember, the key to a squeak-free floor is firmly anchoring each layer and paying close attention to material compatibility.Many homeowners assume they understand every aspect of installing baseboards, showers, or flooring, but in reality, there are subtle nuances that can make or break the final result. A common misconception is that following standard procedures guarantees a flawless finish; however, the devil is in the details. For instance, when installing baseboards, many neglect the importance of precise miter cuts and proper expansion gaps, which can lead to cracking or gaps over time. Rushing this step often results in wasted effort and added costs. Similarly, in shower renovations, some believe sealing with generic caulk suffices, but high-quality, flexible sealants designed explicitly for moisture-prone areas provide a longer-lasting, mold-resistant barrier. Overlooking such specifics can cause leaks or mold issues down the line. When it comes to carpet installation, the mistake I see most often is ignoring proper subfloor preparation. Failing to level or clean the subfloor results in uneven, wrinkled carpets that wear out quickly. Advanced installers use tack strips and power stretchers to prevent this, ensuring a professional look and durability. Additionally, many assume DIY flooring installation is straightforward, but without understanding the importance of acclimating materials to ambient humidity, the flooring can expand or contract post-installation, leading to gaps or buckling. Studies indicate that materials like hardwood are sensitive to moisture levels, emphasizing the need for proper acclimatization to achieve a lasting, pristine finish. Have you ever fallen into this trap? Let me know in the comments. By paying close attention to these nuanced details, you avoid common pitfalls and elevate your renovation game. For comprehensive insights into these subtle yet crucial points, consider exploring detailed guides on related topics, such as optimal carpet installation strategies and the latest baseboard designs to complement your space.
Maintaining your flooring, baseboards, showers, and carpets doesn’t have to be complicated, but it does require the right tools and a proactive approach. Over the years, I’ve learned that investing in quality equipment not only extends the lifespan of your installations but also makes ongoing maintenance more manageable and less frustrating.
Tools That Make Maintenance Easier
One indispensable tool I rely on is a cordless oscillating multi-tool. Its versatility allows me to perform a variety of tasks, from removing grout or caulk in showers to trimming carpet edges or tightening loose baseboards. I prefer models from brands like Dremel or Makita, as they combine durability with precision. Having a reliable set of disc attachments enables me to clean and sand surfaces without causing damage, keeping everything looking fresh without the need for full replacements.
For cleaning and routine upkeep, a high-quality vacuum with HEPA filters and adjustable settings is crucial, especially after carpet installation. The ability to switch between brush rolls and suction modes helps preserve your flooring and prevents debris buildup that could accelerate wear. I also recommend a microfiber mop with a gentle cleaning solution for hardwood and tile surfaces, as it minimizes scratches and preserves the finish.
Why Invest in Proper Sealants and Adhesives
Maintaining showers and wall fixtures involves regular checks on sealants. High-quality, flexible sealants like silicone 2+ or hybrid acrylics resist mold and accommodate movement, which is essential for long-term durability. Applying an expert-approved sealant in a professional manner prevents leaks and costly repairs down the line. Similarly, using a recommended adhesive for flooring, such as a polymer-modified thinset mortar, ensures stability and reduces the risk of squeaks or gaps re-emerging.
Scheduling Regular Inspections and Preventative Care
One of the simplest yet most effective practices is setting a maintenance schedule. Regularly inspecting for loose grout in the shower, checking for gaps in baseboards, or verifying that carpets are properly stretched can prevent minor issues from escalating. Mineral deposits or soap scum buildup can be cleaned with specialized solutions, which prolongs the lifespan of fixtures and surfaces. With the right tools and a keen eye, you can spot problems early and address them before they turn into major repairs.
How do I maintain floors, showers, and carpets over time?
Long-term maintenance hinges on consistent cleaning, timely repairs, and using high-quality materials. For example, replacing worn-out caulk and sealants every couple of years enhances moisture resistance in showers, while periodic deep cleaning of carpets with steam cleaners restores their appearance and prevents odors. Additionally, safeguarding your flooring from excessive humidity or direct sunlight can prevent warping or fading. Following manufacturer guidelines and consulting experts through resources like professional advice ensures your investments remain in top condition for years. I highly recommend trying out a proper sealing technique for your bathroom’s grout lines; it can be a game-changer for upkeep.
The Hardest Lesson I Learned About Flooring Challenges
One of the most enduring lessons I’ve picked up is never to underestimate the importance of thoroughly inspecting your subfloor before installing new flooring. I once skipped this step and ended up with persistent squeaks that took weeks to resolve, teaching me that a smooth subfloor is foundational for a squeak-free, long-lasting finish.
3 Myths About Baseboards and Flooring That Held Me Back
Believing that all baseboard installations are straightforward or that high-quality adhesives are always necessary led me to skip some crucial details. It turned out that precision cuts and choosing the right sealants make a significant difference in the final appearance and durability. Learning the truth about these myths saved me time and money.
What Experts Won’t Tell You About Achieving Flawless Carpet Finishes
Professionals often emphasize the importance of proper subfloor preparation and stretching techniques, yet many DIYers overlook these subtle steps. I discovered that investing in a power stretcher and meticulous planning upfront results in perfectly smooth carpets that last longer and look better, transforming a basic installation into a masterpiece.
Curated Resources to Elevate Your DIY Game
My go-to tools include a cordless oscillating multi-tool for precision adjustments and applying adhesives, which makes tough tasks much easier. For learning about flooring and installation techniques, I trust this resource for professional insights. When it’s time to select the perfect carpet or baseboard, this guide has been invaluable for making informed decisions.
Your Turn to Make a Change
Remember, every project is an opportunity to learn and improve. Whether you’re fixing squeaks or installing new baseboards, approaching each step with patience and attention to detail pays off big time. Don’t let doubts hold you back—start your next flooring or trim project today, and enjoy the satisfying results of your effort.