I remember stepping into my living room one evening and noticing something strange—the carpet, which was previously smooth and snug, now had unsightly ripples and wrinkles. It was a lightbulb moment for me. That frustrating, uneven carpet had become a daily eyesore, and I wondered, “Why now? What’s causing this ripple effect, and is there a reliable way to fix it?” As it turns out, many homeowners face this exact dilemma, especially as carpets age or undergo temperature fluctuations. Today, I’ll share the three secret stretching techniques that transformed my space and can do the same for yours.
Why Carpets Ripple and Why It Matters More Than Ever
The ripple effect in carpets isn’t just a cosmetic issue; it can affect safety, durability, and the overall look of your home. Carpets tend to develop ripples due to a variety of factors—improper installation, age, or environmental influences like humidity and temperature changes. In particular, the shift in climate control systems can cause the carpet backing to loosen, leading to those unsightly waves. According to flooring experts, neglecting these ripples can accelerate wear and even lead to trips or falls, especially in high-traffic areas.
If you’ve ever felt that initial spark of frustration—staring at a lumpy floor or tripping over a ripple—you’re not alone. I’ve been there. What I discovered early on was that many mistakes are easily avoidable with the right stretching techniques. For example, I once tried to fix my ripple by simply tugging at the edges, but that only made things worse. It wasn’t until I learned about proper stretching methods, like the pro double-pin technique, that I started seeing real results. For more detailed tips, check out our comprehensive [carpet installation secrets](https://tilecraftsmens.com/carpet-install-secrets-achieve-perfect-results-every-time).
Ready to learn those secrets and get your carpet looking as perfect as the day it was installed? Let’s dive into how you can achieve that tight, flawless fit and say goodbye to those pesky ripples once and for all.
Prepare the Workspace and Gather Your Tools
Start by clearing the affected area completely, removing furniture and obstacles. Wear gloves for better grip and protection. You’ll need a knee kicker, power stretcher, carpet stapler, and a utility knife. I once attempted to fix a stubborn ripple in my living room, realizing how crucial it is to have everything ready before starting. Having your tools at hand prevents pauses and mistakes.
Loosen the Carpet for Better Tension
Use a utility knife to cut a small slit or remove a section of the carpet at the edge if necessary. This relieves tension and makes stretching easier. For my own repair, I cut a small section along the wall to access the underside and loosen any embedded wrinkles.
Stretch the Carpet Using a Knee Kicker
Position the Knee Kicker Correctly
Place the base of the knee kicker about 6 inches from the edge of the rippled area, pressing firmly downward. This simulates a knee bump that pushes the carpet fibers towards the stretch. I remember feeling nervous but confident when I first used it, gently bouncing along the edge to start the tension shift.
Apply Controlled Force
Using steady pressure, give firm, controlled kicks to extend the carpet. Avoid over-stretching to prevent tears. Move gradually along the ripples, working from the edges inward. I learned through trial that patience and steady force prevent damaging the carpet.
Use a Power Stretcher for a Tight Finish
Position the power stretcher between opposing walls or surfaces. Attach the head of the stretcher to the carpet edge with staples or tacks. Slowly turn the handle to apply tension, pulling the carpet tighter. I once struggled with uneven tension but found that adjusting gradually ensures a uniform stretch.
Secure the Carpet and Finish
Reattach the carpet to its tack strips or seams. Use a carpet stapler to secure loose edges. Trim any excess with a utility knife for a clean finish. I remember how small adjustments during this step prevented future ripples, leaving my floor smooth and safe.
Verify and Repeat as Needed
Walk over the fixed area to check for additional ripples. If any remain, repeat the stretching process. Consistency is key for long-lasting results. I found that taking my time and meticulously tensioning each section kept my carpet looking professionally installed, akin to expert techniques described in our carpet installation guides.
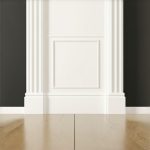
Many homeowners believe that choosing quality materials alone guarantees a flawless result in showers and flooring. However, a critical nuance often overlooked is that proper installation techniques and understanding material interactions are paramount to durability and aesthetic appeal. For instance, it’s a myth that all grout is suitable for every shower type; experts recommend specific sealants that resist mold and water penetration better, as highlighted in our shower renovation guides. Similarly, incorrect handling of baseboards can lead to gaps and warping over time, despite the trendiness of new styles, which you can explore in baseboard trends. An advanced mistake many make is underestimating the impact of environmental conditions during flooring installation; moisture levels and temperature fluctuations can cause tiles or hardwood to shift or crack later, a fact corroborated by industry studies on material expansion and contraction. Recognizing these nuances is essential for lasting results.
How can understanding material-property interactions improve installation outcomes?
This insight allows for scheduling installations during optimal conditions and selecting materials best suited to your climate, thus avoiding costly repairs. For example, I once saw a professional ignore these factors, resulting in a cracked hardwood floor after a cold snap. Don’t fall into this trap. For more comprehensive advice, see our flooring installation tips. Remember: meticulous preparation and understanding material behavior can significantly extend your investment’s lifespan. Have you ever fallen into this trap? Let me know in the comments.Maintaining your flooring, baseboards, and shower installations requires the right tools coupled with a proactive approach. My personal favorite for flooring upkeep is a high-quality floor sander, such as the Festool RTS 400, which allows me to sand minor scratches or uneven areas without damaging the surface. Pair this with a microfiber microfiber mop like the Bona Microfiber Spray Mop for routine cleaning; it effectively traps dust and debris, preserving your investment. For sealing and grout maintenance in showers, I recommend using a silicone sealant remover and a professional-grade grout pen, which make re-caulking and sealing efforts more precise and long-lasting, essential in climate fluctuation environments.
How do I maintain my flooring and installations over time?
Regular inspection is key. Schedule seasonal checks to identify issues like loose baseboards, cracked grout, or uneven flooring before they escalate. Using a laser level helps to identify subtle shifts in flooring or baseboards, guiding precise adjustments. For instance, periodically tightening mounting hardware for baseboards prevents gaps and warping—a practice highlighted in our baseboards makeover. To ensure longevity, apply protective sealants annually; for showers, this prevents mold and water damage, extending the life of your tile work and grout. Consider investing in a steam cleaner, which is safe on certain sealed surfaces and effectively removes stubborn stains without harsh chemicals. Looking ahead, I anticipate smart maintenance tools—like IoT-connected sensors—that monitor humidity and detect leaks will become standard, making upkeep even more intuitive. For now, maintaining a routine with these specific tools and inspections will keep your installations pristine and durable. I urge you to try incorporating a laser level into your regular checks—it’s an advanced but invaluable step toward flawless, lasting results. Want more expert tips on flooring or shower upkeep? Visit our comprehensive guides for detailed strategies.
Lessons Only Pro Installers Usually Keep Quiet About
One of my biggest lightbulb moments was realizing that even seasoned DIYers often overlook subtle environmental cues during installation, leading to future ripples or gaps. For example, I used to ignore humidity levels, only to find my flooring warped after a cold snap. Now I know that timing and understanding material expansion can make or break your project. Additionally, I once thought that more adhesive meant better results—I was wrong. Sometimes, less is more, especially when allowing natural movement of materials. These lessons taught me to approach each project with patience and deeper understanding, rather than just following surface-level instructions.
Tools and Resources That Revolutionized My Home Upgrades
The right tools can turn a tedious project into a satisfying transformation. My secret weapon is a portable laser level, which ensures every line is perfectly straight—saving me hours of re-adjusting. For comprehensive knowledge, I turn to industry-specific books like The Flooring Contractor’s Bible, which breaks down the nuances of materials and techniques I wouldn’t have discovered on my own. Online tutorials from trusted sources, such as detailed guides on flooring installation, give me step-by-step insights that build confidence. Investing in these resources converts an average DIY job into a professional-quality finish.
Embrace the Challenge: Your Home Deserves It
Every flooring or carpet upgrade is more than just a task—it’s an opportunity to express your care for your space and create a sanctuary you’ll love. Remember, mistakes are part of the learning journey; don’t fear them. With patience, the right tools, and a willingness to learn, you can achieve results that rival those of pros. Your home’s foundation is worth the effort, and every small victory along the way fuels your motivation. So, go ahead—start that project today and transform your environment into a true reflection of your dedication. Want more expert strategies? Check out our comprehensive flooring guides to help you succeed.