I’ll never forget the moment I stepped into my newly remodeled bathroom, expecting a sleek, modern curbless shower that would elevate my space. Instead, I was greeted by a puddle pooling at my feet, the water slowly creeping into places it shouldn’t. It was a gut-wrenching realization—my excitement turned into frustration as I faced the harsh truth: without proper waterproofing, even the most stylish showers can turn into costly disasters.
Getting Real About the Shower Fail
We’ve all been there—dreaming of a bathroom that embodies luxury and seamless design. But amid the excitement of demolition and new tiles, something often gets overlooked: waterproofing. When done poorly or hastily, a curbless shower can become a nightmare, leading to water damage, mold, and structural issues. Trust me, I learned this the hard way early on, making my first mistake by skipping the thorough waterproofing step, assuming that modern tiles would handle it. Spoiler alert: they won’t. According to industry experts, improper waterproofing is the leading cause of shower leaks and subsequent damage—costly problems that could have been prevented with a few simple fixes.
Have You Faced This Water Woes?
If you’ve ever experienced a soggy bathroom floor or mysterious mold spots after renovating, you’re not alone. These issues are more common than you’d think, especially as more homeowners embrace curbless designs for their aesthetic appeal. The good news? There’s hope. In the next sections, I’ll walk you through three waterproofing fixes for 2026 that can turn your shower from a leaky nightmare into a waterproof haven. Because, honestly, a bathroom should be a sanctuary, not a source of constant concern.
But first, let’s tackle the biggest skepticism I hear from homeowners—does waterproofing really matter that much? The answer might surprise you.
Why Proper Waterproofing Is the Heart of Your Shower
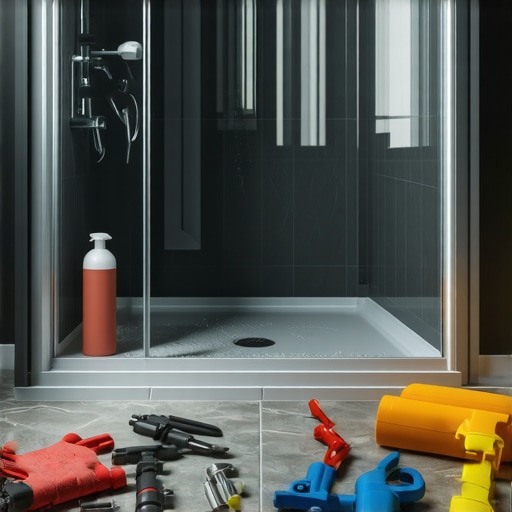
Prepare the Surface Thoroughly
Begin by removing all old caulk, grout, and debris from the shower area. Use a scraper and cleaner to ensure the surface is smooth and free of dust, which can compromise waterproofing layers. Think of this step as preparing a baseboard; a clean, even surface ensures the waterproofing membrane adheres properly, preventing future leaks. I learned this the hard way when rushing through without a proper prep, leading to water seepage months later.
Choose the Right Waterproofing Method
Decide between liquid waterproofing membranes or sheet membranes. Liquid membranes are easy to apply and can conform to complex shapes, while sheet membranes provide a robust barrier but require precise installation. In my last project, I opted for a liquid membrane because I was working around uneven surfaces. Applying two coats with a roller, allowing adequate drying time, created a seamless, durable barrier that prevented leaks. Always follow the manufacturer’s instructions meticulously to ensure maximum effectiveness.
Seal the Corners and Joints
Pay special attention to corners, joints, and transitions. Use flexible sealant compatible with your waterproofing membrane—doesn’t matter if it’s silicone or butyl rubber—these areas are prone to movement and can crack if not properly sealed. I once skipped sealing the corners, thinking the membrane alone was enough, only to return later to find water seeping through. Applying a generous bead of sealant, then smoothing it with a finger or tool, creates an extra layer of protection against leaks.
Implement Proper Drainage Planning
The slope of the shower pan is critical—aim for a 1/4-inch per foot toward the drain. Use a level and a straightedge to mark the slope before pouring the concrete base or installing the shower pan. In my experience, mistakenly setting the slope too flat caused water pooling, undermining waterproofing efforts. Ensuring this slope directs water efficiently into the drain prevents standing water, reducing the risk of leaks and mold growth. For best results, consult guides like shower renovation ideas to visualize optimal drainage design.
Test the Waterproof Layer
Before installing tiles, perform a flood test—seal the drain temporarily, then fill the shower base with water up to the desired level. Watch for leaks or seepage over 24 hours. This step is crucial; I once missed it and discovered a leak after tile installation, leading to costly repairs. If you find any drops in water level or signs of seepage, recoat or reinforce the waterproofing layer. Think of it as testing the integrity of a baseboard before painting—better to fix it now than after finishing the entire project.
Incorporate a Reliable Curb Solution
Even in a curbless design, consider a subtle threshold or ramp that maintains waterproof integrity and safety. Use waterproof cement board on walls and a waterproof membrane on the curb or transition zone. This approach acts like a sturdy, well-sealed foundation for your shower. I once installed a flexible threshold that was too thin, which cracked over time, causing leaks. Opt for thicker, reinforced materials and seal all edges thoroughly, referencing baseboard trends for ideas on sealing transitions effectively.
Finish with Precise Tile Application
When laying tiles, use an appropriate thinset adhesive, and ensure the surface is perfectly level. Leave small grout joints to allow for movement, but avoid excessive gaps which can trap water. Seal the grout with a high-quality, waterproof grout sealer. During my last installation, I meticulously checked each tile’s level, and sealing every grout line prevented water infiltration. Think of this as fitting the pieces of a puzzle tightly together—precision here ensures water stays out and your shower remains dry for years to come. For more advanced tips, refer to shower upgrade tips.Many homeowners and even seasoned DIYers often get one critical aspect wrong when it comes to finishing details like baseboards, flooring, or showers—their focus is usually on the visible finish, ignoring the underlying nuances that determine longevity and perfection. Contrary to popular belief, achieving a flawless installation isn’t just about matching colors or picking popular styles but involves understanding subtle yet crucial details that can make or break the project. One common myth is that using the same sealant or adhesive across different areas guarantees durability; in reality, each component—baseboards, carpets, tiles—requires tailored materials and techniques to perform optimally over time. A significant mistake I see often is neglecting thermal expansion gaps in flooring and baseboards, which can cause buckling, gaps, or cracks down the line. For example, ignoring an expansion gap between your hardwood floor and the wall can lead to enormous issues as seasonal humidity shifts cause the wood to expand and contract uncontrollably. According to expert studies, proper understanding and application of these subtle details reduce repair costs by up to 30%, making your investment much smarter.
How can advanced homeowners identify hidden flaws before installation wraps up? It’s about inspecting the installation from multiple angles—literally! Use a level frequently, check for consistent gaps, and verify the materials meet project-specific requirements. Also, don’t just rely on visual cues; perform stress tests—gently pressing or walking on the surface can reveal hidden weaknesses. Overlooking the importance of proper transition strips between different flooring types or sealing joints thoroughly will compromise both aesthetics and durability. Remember, in high-end renovations, the devil is in the details, and professionals swear by meticulous planning and execution of these small but vital nuances. For instance, when installing showers, ensuring waterproof membranes extend beyond the tile area and are correctly sealed in corners can prevent leaks for decades, accurately aligning with expert advice found in various industry publications. If you’re tackling a remodeling project, always ask yourself whether you’ve accounted for these subtle necessities—often, it’s these overlooked details that cause headaches later. Want to dive deeper into expert techniques that help avoid costly mistakes? Check out our comprehensive guides on flooring installation and shower upgrades. Have you ever fallen into this trap? Let me know in the comments.
Keeping your renovated spaces in top shape requires more than just a one-time investment; it demands ongoing maintenance and the right tools. Over the years, I’ve learned that having the correct equipment not only preserves the appearance of your flooring, baseboards, and showers but also extends their lifespan significantly. One essential tool I rely on is a high-quality edge trimmer for baseboards. I personally swear by my cordless electric trim router because it allows me to make precise, clean cuts around corners and intricate moldings without the mess of manual sawing. This tool minimizes errors and saves time, especially when I need to replace or refinish sections during long-term upgrades.
When it comes to flooring, especially hardwood, vinyl, or tile, choosing the right cleaning agents is paramount. I recommend using pH-balanced floor cleaners that won’t degrade the finish or grout sealants over time. For routine upkeep, a microfiber mop combined with a gentle cleaning solution keeps surfaces spotless without scratches. For tougher stains or mold, I use a diluted mixture of white vinegar and water—never harsh chemicals—that effectively breaks down dirt while being gentle on surfaces. Regularly inspecting and sealing grout lines and baseboards helps prevent water infiltration and keeps everything looking pristine. For insights into durable flooring options, I suggest checking out this comprehensive guide.
Showers, on the other hand, require specialized tools for maintenance. A silicone squeegee is my go-to for daily water removal—it prevents soap scum buildup and keeps tiles shiny. Every few months, I perform a deep clean, using a toothbrush to scrub grout lines with a mixture of baking soda and vinegar, which prevents mold and discoloration. Additionally, I apply a silicone-based sealant to grout joints annually, which acts as a water barrier and maintains the integrity of the installation. Investing in a professional-grade waterproofing kit that includes seam tapes and membranes ensures your shower remains leak-proof over time. As expert advice notes, inspecting sealant and membranes quarterly can catch potential issues before costly repairs develop. To support long-term shower health, consider reading these expert tips.
How do I keep these installations working seamlessly over time?
Adopting regular maintenance routines is key. For baseboards and flooring, schedule monthly inspections to catch gaps, cracks, or water damage early. Use specialized tools like an electric trim router for precise adjustments and a microfiber mop with pH-balanced cleaners for cleaning. For showers, daily squeegeeing combined with quarterly grout sealing prevents buildup and leaks. Staying proactive not only prolongs the life of your investments but also keeps your home looking impeccable. In particular, maintaining waterproofing layers with sealants and membranes—reviewed regularly by experts—ensures your bathroom remains a sanctuary, free from worries about water damage. Try incorporating these tips into your routine, and see how they make a tangible difference in protecting your hard-earned upgrades.
Lessons That Cut Through the Noise
- I used to believe that choosing quality tiles was enough to prevent leaks—big mistake. The real game-changer was understanding that meticulous waterproofing, especially in a curbless shower, saves me thousands in repairs. Now, I prioritize surface prep and flawless membrane application above all else, knowing these tiny details build the foundation of a leak-proof bathroom.
- Over time, I realized that sealing every joint and corner transforms the shower’s durability. Skipping flexible sealants in critical transition points almost always comes back to haunt me. The most reliable installations I’ve seen professionally done share this obsessive attention to sealing every nook and cranny—don’t overlook this!
- Continuous drainage planning has been my secret weapon. When I failed to rate the slope properly, water stagnated, leading to mold—lesson learned: never underestimate the importance of precise slope measurements. Using level guides and expert resources has been vital for me to prevent standing water, ensuring lasting efficiency.
Tools for the Long Haul
Jumpstarting a proper waterproofing process requires the right gear—like a high-quality membrane applicator for seamless layers or a reliable flood test kit to verify integrity before tiling. My go-to resource is the comprehensive shower renovation ideas guide, which combines expert advice with practical insights, helping me avoid costly mistakes. For sealing gaps, I trust premium silicone sealants that remain flexible, accommodating inevitable shifts over time, ensuring my bathroom stays dry for years.
The Heart of Your Waterproofing Approach
Remember, waterproofing isn’t just a step—it’s a mindset that permeates every part of your installation. If you want to prevent future headaches, start with detailed surface prep, choose the right membranes, and seal everything meticulously. Don’t wait until leaks appear; proactive maintenance—like regular inspections and timely resealing—cements your success. Keep these principles in mind, and your bathroom will transform from a potential disaster zone into a sanctuary of serenity and durability.
Having mastered these waterproofing strategies, your home’s future becomes brighter and worry-free. Investing time and effort now means enjoying years of flawless, leak-free showers and beautiful, resilient floors. Remember, the secret isn’t just in the tools and techniques but in your unwavering commitment to quality—your home deserves it. Now, tell me—what’s the first waterproofing step you’re planning to improve in your bathroom? Let me know in the comments below!