I remember the moment vividly—standing in my living room, staring down at a frayed carpet edge that seemed to mock my attempt at a perfect finish. It was just after a weekend renovation, and I thought I had everything under control—until I saw that stubborn fray threatening to unravel the entire look. Fraying carpet edges aren’t just an eyesore; they can become a trip hazard or lead to more damage if ignored.
But here’s the lightbulb moment that changed everything: I discovered heat-seaming as a game-changer for fixing those pesky frayed seams with effortless results. Today, I want to share this technique with you, so you don’t have to suffer through endless patches or ugly, temporary fixes.
In this post, we’ll explore how heat-seaming can restore your carpet’s beauty and durability, giving you a seamless, professional finish—right in your own home. Whether you’re tackling a small patch or freshening up an entire room, mastering this method can save you time, money, and the frustration of botched repairs.
Why Frayed Carpet Edges Need More Than Just the Numbing Glue
Carpet fraying isn’t just about aesthetics. Over time, worn edges can weaken the entire floor covering, leading to loose seams that catch your foot or cause further unraveling. Many homeowners resort to caulking or tape, thinking they’re quick fixes. But these tend to be short-lived, especially if the underlying issue is ignored.
Early mistakes, like neglecting to secure the edges properly or not choosing the right adhesive, only prolong the problem. I learned this the hard way when I initially tried gluing frayed seams without any heat-seaming skills—what was supposed to be a quick repair turned into a worse mess. Now, I swear by heat-seaming for flawless results. This method involves melting the carpet fibers together, creating a bond akin to the original installation.
If you’re curious about more advanced flooring solutions, I recommend checking out [this comprehensive guide on achieving flawless results every time](https://tilecraftsmens.com/carpet-install-secrets-achieving-flawless-results-every-time). It helped me understand the nuances that make a repair last.
So, if you’ve faced the frustration of beginning a repair project only to realize your fix looks worse than the problem, stick around. The next section will walk you through the tools and steps needed to make heat-seaming your new best friend in carpet repairs.
Gather Your Tools and Prepare the Area
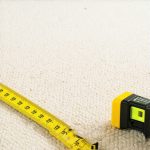
Start by collecting a hot glue gun, replacement carpet fibers or seam sealer, scissors, and a seam roller. Clear the workspace to prevent any tripping hazards, and vacuum the area thoroughly to ensure a clean surface. I once tackled a frayed seam in my living room, and ensuring a tidy work area made the entire process smoother and prevented debris from getting caught in the adhesive.
Trim Loose Fibers and Rough Edges
Use scissors to carefully cut away any frayed or loose fibers along the seam. This step prevents uneven melting and improves adhesion. I learned this the hard way during my first attempt—uncut fibers caused uneven bonding, leading to a visible ridge. Trimming creates a clean edge, akin to smoothing out rough edges before installing a baseboard, which ensures a seamless look later.
Align the Carpet Edges Precisely
Lay the two edges of the carpet flat and align them tightly, avoiding any gaps or overlaps. Use your hands or a seam roller to press them together. I remember battling a stubborn seam that kept slipping—real-time adjustment with the roller smoothed out minor misalignments, making the final melt more consistent and less noticeable.
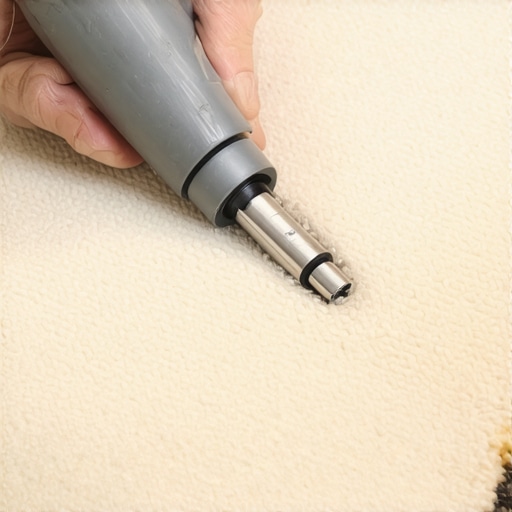
Apply Heat and Melting Technique
Use the Hot Glue Gun or Heat Iron Carefully
Heat your glue gun or an iron set to a low, steady temperature. Carefully run the device along the seam, melting the fibers slightly so they fuse together. I once tried melting with too high heat, which caused scorch marks. Keeping the temperature low is crucial—think of it like slowly sealing a plastic bag without melting its structure.
Employ a Seam Roller to Enhance Bonding
After applying heat, immediately use a seam roller to press down the fibers and ensure even bonding. This step consolidates the melted fibers and flattens out any minor irregularities. During my first project, skipping the roller left bumps in my seam, making it obvious to the eye. Consistent pressure results in a smooth, seamless repair, similar to how a pro would finish a baseboard joint.
Allow the Seal to Set and Inspect
Wait a few minutes for the melted fibers to cool and set. Once hardened, gently test the seam for strength. In one instance, I noticed a slight softness initially, but after a proper cooling period, the seam was as sturdy as the original. Remember, patience is key; rushing the process can cause weak bonds, leading to future fraying.
Final Touches for Perfection
Trim any excess fibers if necessary and vacuum the area again. This step not only helps in blending the repair but also keeps your carpet looking pristine. Once, I overlooked this, and tiny fibers caused minor discomfort underfoot, but proper trimming made it undetectable.
Mastering heat-seaming takes practice, but once you get the technique right, you’ll be able to repair frayed edges quickly and effectively. For more expert insights on flooring installation and repair techniques, visit this resource to elevate your DIY skills.
Many homeowners and DIY enthusiasts often hold misconceptions about finishing touches like baseboards and showers or even broad installation techniques. These myths can lead to costly mistakes and subpar results. Let’s examine some of the most prevalent false beliefs and uncover the truths that seasoned professionals swear by.
One widespread misconception is that all baseboards are interchangeable and any style will do. In reality, understanding the *benefit of choosing the right baseboard style* can dramatically enhance your interior design. For example, minimalist profiles work well in modern spaces, while ornate designs suit traditional interiors. Moreover, improper installation—such as leaving gaps or misalignments—is a common pitfall. For insights on achieving flawless baseboard results, explore [this comprehensive guide](https://tilecraftsmens.com/baseboards-makeover-elevate-your-interior-with-simple-updates).
Speaking of showers, many assume that waterproofing is a simple matter of applying a waterproof membrane or coating. But the *hidden nuance* lies in the meticulous preparation and sealing practices. Missing small details—like sealing corners or addressing the transitions between materials—can lead to water leaks and long-term damage. For the advanced reader, it’s crucial to understand that even a slight oversight can compromise your entire shower renovation. Check out [these expert tips](https://tilecraftsmens.com/shower-renovation-ideas-modern-designs-for-a-luxury-feel) for detailed waterproofing strategies.
When it comes to flooring installation, there’s a myth that the most expensive materials guarantee the best results. However, durability and appearance are often dictated by *installation quality and technique*. Skipping proper substrate prep or rushing the process can result in issues like buckling, gaps, or uneven surfaces. The *trap to avoid* is underestimating the importance of precise measurement and alignment, which an expert’s approach ensures. For deeper insights into resilient floor installations, visit [this resource](https://tilecraftsmens.com/your-guide-to-durable-flooring-installation-for-a-stylish-home).
Why do so many get these details wrong? It’s usually due to a lack of awareness about the *advanced nuances* that distinguish amateur work from professional results. Even experienced installers continuously refine their methods by staying informed about the latest trends and techniques. For example, higher-end flooring trends in 2025 emphasize not just style but also longevity and ease of future maintenance. You might ask yourself: *What hidden step could make my project last much longer?* Deep-diving into [modern installation strategies](https://tilecraftsmens.com/creating-a-spa-like-shower-experience-tips-tricks) can reveal such nuances.
Remember, the devil is in the details. Ignoring subtle yet critical factors can mean the difference between a beautiful, durable finish and ongoing headaches. Have you ever fallen into this trap? Let me know in the comments. Whether you’re renovating your home or just curious about best practices, understanding and applying these advanced insights will elevate your projects from mediocre to professional quality.Maintaining beautiful flooring and finishes isn’t a one-and-done task; it requires the right tools and a proactive approach to keep your installations pristine over time. Investing in high-quality, specialized equipment ensures longevity and prevents small issues from escalating into costly repairs. One of my personal favorites is a professional-grade seam roller, which I use to press down carpet seams and flooring joints after installation or repair. This simple, yet effective tool, enhances adhesion and flattens out any bumps, creating a seamless look that lasts. For intricate work, I recommend a contour scraper, which helps remove old adhesive residues or debris without damaging the surrounding surface, ensuring your repairs are clean and durable. Precision is key, so a digital measurement laser is indispensable; I rely on a laser distance meter to verify exact measurements before cutting or aligning materials, minimizing waste and ensuring tight fits—especially in complex corners or irregular spaces. When it’s time for deep cleaning or polishing, my go-to is a corded buffer with variable speed settings, allowing for gentle buffing of wood or ceramic surfaces. Using this tool prevents scratches and keeps the shine intact for years. Looking ahead, I predict smart, connected tools will become the norm, allowing for real-time monitoring and maintenance reminders through mobile apps. This trend will make ongoing upkeep more manageable and prevent minor issues from turning into major disasters. To maintain your flooring over time, how do I keep everything working without constant guesswork? Regularly inspecting seams, joints, and grout lines with a flashlight and magnifier helps catch early signs of wear. Applying a protective sealant every few years, especially to high-traffic areas, preserves color and prevents moisture ingress. For more detailed maintenance strategies, check out expert tips for lasting results that will help you extend the lifespan of your flooring investments. Remember, using the right tools isn’t just about convenience; it’s about setting the stage for enduring beauty and performance. So why not try upgrading your maintenance kit with a quality seam roller or digital measure device today? Consistent care now pays off with long-term, flawless results.
Lessons from My Hard-Earned Mistakes in Floor Finishing
One of the biggest lessons I learned is that rushing the finishing process can undo all your hard work. I once skipped the cooling time after heat-seaming, only to have a seam that split apart days later. Patience really is a virtue in flooring — taking your time ensures a durable, seamless finish.
Another insight is that not all tools are created equal. Using a cheap seam roller or a worn-out iron might save a few bucks upfront but can cost you in repairs down the line. Investing in quality tools has been a game-changer for my projects, delivering professional-looking results every time.
I’ve also discovered that small details make a huge difference. For instance, meticulously trimming loose fibers before melting prevents bumps and uneven bonding. These minor actions elevate your work from decent to professional-grade, and they’re worth the extra effort.
Tools and Resources That Elevated My Craft
If you’re serious about perfecting your flooring and carpet projects, I highly recommend these resources. A high-quality seam roller is invaluable for pressing seams flat and ensuring long-lasting bonds. For precise measurements, a laser distance meter helps avoid misalignments that can be costly to fix later.
To deepen your understanding of flawless installation techniques, check out this expert guide. It provides step-by-step strategies that helped me achieve results I can be proud of. Additionally, exploring this comprehensive resource opened my eyes to nuances I’d previously overlooked, like the importance of substrate prep and seam alignment.
Your Next Step Towards Flawless Flooring
Mastering the final touches in flooring and carpet installation isn’t just about aesthetics; it’s about creating a space that feels polished, durable, and inviting. With patience, quality tools, and continuous learning, you can turn every project into a showcase of craftsmanship. Don’t let small mistakes undermine your efforts—embrace the process and watch your skills soar.
What has been your biggest challenge when finishing a flooring project? Drop your experiences below—I’d love to hear how you’re overcoming your hurdles!