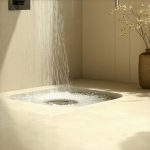
I remember the exact moment I discovered my shower was leaking—water pooling onto my bathroom floor, and the stress that followed. It was early morning, and I was about to start my day when I noticed the tiles around the shower base feeling a bit softer than usual. That sinking feeling hit me hard. Weeks later, after inspecting and some trial-and-error, I realized the culprit was a leaky drain flange—something I’d never given much thought to before.
This experience became a turning point for me, revealing how crucial proper sealing is for preventing costly water damage. If you’re like me, you probably dread dealing with hidden leaks, especially when they sneak in without obvious signs. Today, I want to share with you how I tackled this exact issue with a proven four-step process to seal drain flanges effectively, ensuring your shower stays dry and your home stays protected.
Why Sealing Drain Flanges Matters in 2026
Bathrooms are the heart of any home’s comfort, but they can also be the most frustrating when leaks develop. In recent years, advances in shower technology and materials have made installation easier, but they’ve also introduced new challenges—like ensuring every component seals perfectly. Neglecting this can lead to water seepage, mold growth, and structural damage, which can wipe out your renovation budget.
According to industry experts, improper sealing or overlooked drain flange issues account for nearly 70% of shower leaks reported today. That’s a staggering number! It highlights why understanding and properly sealing your drain flange is no longer just a DIY tip but a necessity in today’s bathroom upgrades.
If you’ve ever faced a dilemma about whether to tackle this yourself or hire a professional, you’re not alone. I initially made a critical mistake early on: I used a generic sealant that seemed enough at the time but failed within months, costing me more time and money replacing parts. The key lesson? Not all solutions are created equal, and knowledge is your best tool.
So, if you’re wondering how to approach this stubborn issue confidently, stick around. I’ll walk you through the four essential steps I discovered that can save your bathroom from future headaches—and perhaps some water damage nightmare stories. Ready? Let’s dive into the practical side of sealing drain flanges the right way.
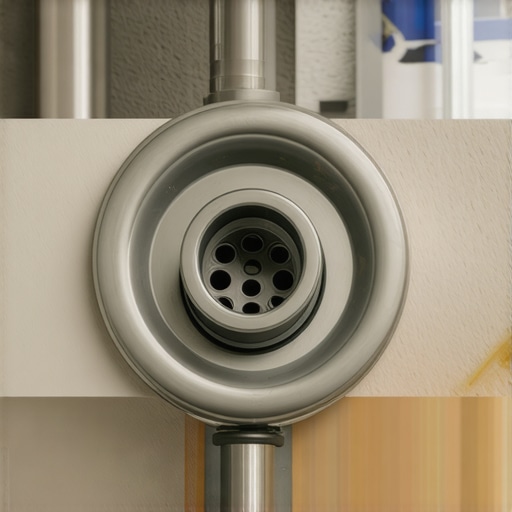
Disconnect and Prepare the Area
First, turn off the water supply and remove any standing water from the shower drain. Carefully unscrew the drain cover to expose the flange. I recall a time when I simply tore out the old sealant, only to realize later that leftover debris caused persistent leaks—so cleaning thoroughly is crucial. Use a screwdriver or pliers to detach the drain assembly if needed, ensuring you can access the flange entirely. Wearing gloves keeps things sanitary and protects against sharp edges.
Clean and Inspect the Flange
Remove all old putty, sealant, and grime using a putty knife or a wire brush. This step is vital; residual material can compromise new seals. Check for cracks or damage on the flange—minor cracks can often be sealed, but major damage might require replacing the flange. I once cracked mine during cleaning, which led me to learn the importance of gentle handling. Documentation of any damage helps to decide whether a repair or replacement is necessary.
Apply a Quality Waterproofing Sealant
Choose a high-quality, waterproof silicone or urethane sealant designed for bathrooms. Apply a continuous bead around the underside of the flange’s lip, ensuring full coverage. When I did this, I used a caulking gun to achieve a neat line—messy application can leave gaps that lead to future leaks. Be sure to smooth the sealant with a silicone spatula or your finger dipped in water for a clean, secure seal. This creates a water-tight barrier, crucial for preventing infiltration behind tile or drywall.
Secure the Drain and Finalize Seal
Reattach the drain assembly carefully, aligning everything properly—a process akin to fitting a jigsaw puzzle. Once secured, run water to check for any leaks; if water seepage appears, apply additional sealant. In my experience, double-checking for leaks immediately saves a lot of trouble down the line. If the test is successful, clean excess sealant and allow curing as per manufacturer instructions—typically 24 hours. This patience ensures long-lasting sealing, reducing the chance of future water intrusion.
Regularly inspecting and maintaining your drain flange seal, especially after heavy use or renovations, prevents water damage. For more tips on bathroom upgrades, visit our [shower renovation ideas](https://tilecraftsmens.com/shower-renovation-ideas-modern-designs-for-a-luxury-feel). Proper sealing might seem straightforward, but meticulous execution ensures your shower remains dry and durable for years to come.
When it comes to home upgrades, many homeowners rely on popular beliefs or DIY myths that can undermine the quality and longevity of their projects. Let’s dig deeper into what most people get wrong about flooring installation, baseboards, carpet, and showers, and uncover some hidden nuances that can significantly impact your results.
One widespread misconception is that matching baseboard styles with existing moldings is always straightforward. In reality, choosing modern or trending styles—like those highlighted in our [baseboard trends in 2025](https://tilecraftsmens.com/baseboard-trends-in-2025-fresh-styles-for-every-room)—can transform a room. However, many overlook the importance of precise scribing and coping techniques to ensure seamless corners, which can make or break the visual finish. Rushing this step often leads to gaps or uneven joints, and applying caulk isn’t always enough to hide these imperfections.
Another common mistake in flooring installation involves choosing the wrong underlayment. Homeowners often believe that cheap foam padding suffices, but this can lead to uneven surfaces and cause squeaks over time. For durable, smooth results, professional-grade underlays—such as foam, cork, or rubber—are essential. Referencing expert guidance, like in our [expert flooring installation tips](https://tilecraftsmens.com/expert-flooring-installation-tips-for-lasting-flawless-results-2), can help you avoid these pitfalls and enhance soundproofing and moisture resistance.
Many people assume that carpet installation is primarily about laying down the material evenly. While that’s true at a basic level, the hidden nuance is the importance of proper stretching techniques. Failing to stretch carpet adequately can lead to unsightly Bubbles or ripples, which undermine durability. Professional tools like power stretchers and techniques like the power-stretch method ensure a tight, wrinkle-free finish—see how in [carpet installation secrets](https://tilecraftsmens.com/carpet-install-secrets-achieve-perfect-results-every-time). Additionally, selecting the correct padding impacts comfort and longevity.
Now, let’s address the shower installations—the area where many misconceptions can cause significant water damage if overlooked. A frequent error is relying solely on traditional caulking around tiles and edges, believing it’s enough to waterproof. In fact, the nuanced difference lies in the use of proper waterproof membranes, especially with curbless showers, which are trendy but vulnerable without adequate waterproofing layers. As shown in [why curbless showers fail](https://tilecraftsmens.com/why-curbless-showers-fail-3-waterproofing-fixes-for-2026), neglecting comprehensive waterproofing can result in leaks and mold growth.
**What about the advanced concerns that even experienced DIYers might overlook?** Professional-grade waterproofing, precise subfloor preparation, and the right adhesive choices are critical but often underappreciated. For example, selecting the wrong adhesive for tile in a high-moisture area can lead to tiles lifting over time, a surprise many encounter after a few years. Moreover, proper planning for expansion gaps—be it in flooring or wall molding—is essential to account for seasonal movements.
All these nuances highlight that successful installation hinges on attention to detail and understanding the subtle differences that define quality work. In my experience, investing time in learning these advanced techniques—like those detailed in [expert installation tips](https://tilecraftsmens.com/expert-flooring-installation-tips-for-lasting-flawless-results)—can save you thousands and extend the life of your renovations.
Have you ever fallen into this trap? Let me know in the comments. Remember, tackling these hidden nuances can elevate your home’s aesthetics and robustness—don’t settle for average when you can achieve excellence.Maintaining your home upgrades, from flooring to showers, requires not only quality materials but also the right tools and proactive care. Over time, the longevity of your installations hinges on regular maintenance and the use of specialized equipment that ensures everything stays in optimal condition.
One of my go-to tools for flooring maintenance is a professional-grade flooring scraper. This isn’t your average utility blade; I prefer a silicon carbide scraper which effectively removes stubborn residues or small surface imperfections without damaging the wood or vinyl. This tool simplifies periodic cleaning, preventing dirt buildup that can deteriorate surfaces over months.
For ensuring meticulous grout and sealing integrity in showers, I rely on a silicone smoothing spatula. Achieving a smooth, uniform bead of sealant is crucial, especially around curbless showers or waterproof membranes. Applying sealant with precision not only enhances aesthetic appeal but also provides an effective barrier against leaks. When I first started, I used a simple caulk gun and finger method, but switching to a silicone spatula significantly improves results, reducing the risk of future water damage.
Regular inspection is key to home durability, and this includes identifying potential issues before they escalate. For this, I utilize a moisture meter—specifically, a pinless model that can scan large areas quickly. It helps detect hidden moisture behind walls or under floors, particularly important in bathroom renovation zones. Staying ahead of moisture problems prevents mold growth and structural damage, saving thousands in repairs.
In the realm of professional bathroom upgrades, waterproofing is paramount. I recommend a spray-on liquid membrane system, like RedGard, which I personally use for its ease of application and reliability. Applying multiple thin coats with a sprayer ensures even coverage, creating a seamless waterproof barrier. This is especially beneficial for detailed areas like corners or joints, where brush application might leave gaps.
Looking ahead, the trend points towards smarter maintenance solutions. Automated moisture sensors and IoT-connected leak detectors are becoming increasingly accessible, offering ongoing monitoring and alerts via smartphone. These innovations mean you can catch leaks early, reducing water damage risks and maintaining your home’s integrity.
### How do I keep my flooring and bathroom features working over time?
Implementing a disciplined maintenance routine is crucial. Regularly cleaning surfaces with gentle, appropriate cleaners, inspecting seals and grout lines, and promptly addressing small issues prolong the life of your installations. Incorporating the right tools—such as a high-quality silicone spatula for sealants or a reliable moisture meter—makes these tasks more effective.
I highly encourage you to try using a silicone smoothing spatula for your next sealant application. It might seem like a small change, but it can significantly improve your results and reduce future repairs. Remember, a little investment in preparation and proper tools now saves time, money, and headaches later. For personalized advice or professional help, don’t hesitate to contact us through [our contact page](https://tilecraftsmens.com/contact-us).
By staying proactive and equipped, you ensure that your home upgrades—whether new floors or modern showers—continue to look great and function reliably for years to come.
Lessons That Took Me Longer Than Expected
One surprising insight I gleaned was that even a small gap or overlooked debris during flange sealing can lead to persistent leaks. Patience and meticulous cleaning ahead of application are key. Another realization was that not all sealants are created equal—using a high-quality, bathroom-specific silicone saves frustration and future repairs. Lastly, I learned that testing for leaks immediately after sealing prevents costly surprises later on, saving hours of troubleshooting.
Tools and Resources That Changed My Approach
My go-to toolkit includes a silicone spatula for smooth sealant application, a moisture meter for early leak detection, and a reputable waterproofing membrane like RedGard for comprehensive protection. Additionally, the comprehensive guide on [expert installation tips](https://tilecraftsmens.com/expert-flooring-installation-tips-for-lasting-flawless-results) has been invaluable for understanding nuances beyond basic sealing. These resources have proven their worth time and again.
Your Next Step Toward Leak-Free Showers
Embarking on your sealing project with attention to detail and quality tools can vastly improve your results. Remember, sealing your drain flange isn’t just a task—it’s an investment in your home’s longevity. If you’re ready to elevate your bathroom upgrades, don’t hesitate to reach out through [our contact page](https://tilecraftsmens.com/contact-us). Your home deserves the best care, and small steps today lead to durable comfort tomorrow.