It was a typical Saturday morning when I stepped into my bathroom and was greeted not just by the smell of dampness but also by a small puddle forming around the base of my shower. My heart sank. I had just finished a major bathroom renovation and thought I had nailed the waterproofing. Turns out, I overlooked a critical detail that cost me a lot of frustration—and money. That lightbulb moment made me realize how sneaky a leaky shower pan can be and how essential waterproofing is to avoid disaster.
Why Waterproofing Your Shower Pan Should Be Your Top Priority
Waterproofing is often underestimated until the damage is undeniable. A leaking shower pan isn’t just a nuisance—it can lead to mold growth, structural damage, and costly repairs. As I learned the hard way, a small leak can silently ruin your subfloor and even compromise the foundation if neglected. According to the National Association of Home Builders, waterproofing failures are among the leading causes of home damage in bathroom renovations. Early investment in proper waterproofing techniques can save you a headache—and thousands of dollars—down the line.
Have you ever faced persistent leaks that just wouldn’t quit? Or perhaps you’re planning a tile project and worry about making mistakes that could lead to future water damage? If so, you’re not alone. Many homeowners and DIY enthusiasts stumble into these issues because waterproofing isn’t always clear-cut, and the reviews on waterproofing products can be confusing.
This is exactly why I’ve dedicated myself to understanding the most reliable waterproofing strategies. In the next sections, I’m going to walk you through three essential fixes that will help ensure your 2026 tile projects stay dry and durable from the start. Whether you’re tackling a complete shower overhaul or just want peace of mind for your existing setup, these tips are practical, affordable, and backed by expert advice.
Let’s dive into the solutions that can prevent your bathroom from turning into an underwater nightmare. Are you ready to save your home—and your sanity? Let’s get started with fixing those critical leak points before they escalate into major problems.
Prep the Area with Precision and Knowledge
Start by removing old grout, caulk, and any debris around the shower base. Use a utility knife or scraper for thorough cleaning. This clears the surface, ensuring adhesion of waterproofing materials. During my first attempt, I neglected this step, which led to early waterproofing failure. Clear, flat surfaces are essential for effective waterproofing layers.
Apply a Quality Waterproof Membrane Carefully
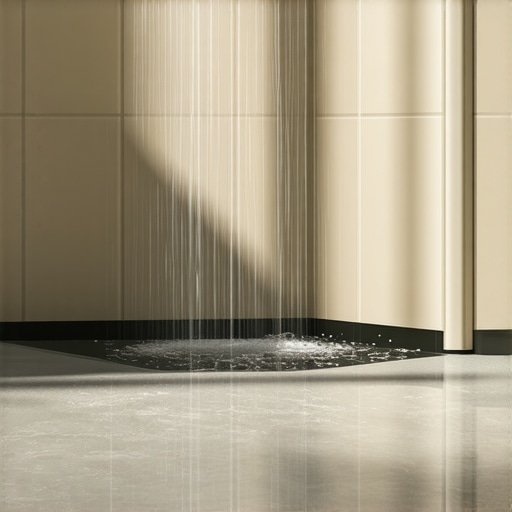
Select a high-quality liquid or sheet membrane designed for showers. For liquid membranes, pour a generous amount into a roller tray. Use a roller to spread an even coat on the shower base, walls, and corners, paying particular attention to seams and joints. When I Waterproofed my shower, I used a liquid membrane, applying three coats with a brush and roller for full coverage, making sure each layer dried thoroughly before the next. This builds a durable, seamless barrier against leaks.
Seal the Drain Flange Methodically
Remove the drain cover and inspect the flange for cracks or gaps. Apply a thick bead of silicone sealant around the flange’s perimeter, pressing it firmly into place. For added security, use a high-quality fixing ring or clamps to secure the drain, preventing movement. In my project, I triple-checked the sealant and tested for leaks by pouring water around the flange, ensuring no seepage occurred—vital for preventing leaks from the drain area.
Test Waterproofing Effectiveness Rigorously
Allow the waterproof layer to cure as per manufacturer instructions. Then, perform a water test by filling the shower with water just above the drain level and leaving it for 24 hours. Observe for any leaks or seepage. I once missed this step, only to discover a slow leak days later, which caused significant damage. A thorough test reveals weak points early, saving time and money later.
Implement Proper Slope and Drainage Techniques
Ensure your shower floor slopes a minimum of 1/4 inch per foot toward the drain. Use a level or laser guide to confirm proper pitch during installation. When I fixed a problematic shower, I added shims beneath the subfloor and measured multiple times before setting tiles, which prevented puddling. Proper slope directs water efficiently, preventing pooling and subsequent leaks.
Utilize Quality Materials and Follow Guidelines
Always select waterproofing products compatible with your shower materials. Read and follow manufacturer instructions meticulously. In my experience, ignoring small details like curing times and compatible sealants led to premature failures. Professional-grade materials combined with precise application create a reliable waterproof barrier that withstands daily use and moisture exposure.
Many homeowners assume that installing carpets, showers, flooring, or baseboards is straightforward—simply follow the instructions, and you’re set. However, this belief often leads to overlooked nuances that can compromise the entire project. Contrary to popular belief, rushing through these installations without attention to detail can cause problems that only surface months later, forcing costly repairs or replacements. One common myth is that using generic adhesives or materials suffices; in reality, selecting the right quality products and understanding their advanced applications is crucial for durability.
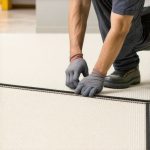
For example, in carpet installation, many neglect proper stretching techniques, leading to unsightly wrinkles and premature wear. Professional installers know that achieving a flawless, long-lasting finish requires tensioning that considers room shape, pile type, and seaming details. An improper stretch not only ruins aesthetics but also creates trip hazards, which could have been avoided with proper training. To delve into advanced techniques and avoid these pitfalls, review expert tips on carpet installation secrets.
When it comes to showers, especially waterproofing, many believe that applying sealant alone prevents leaks. While sealing is important, neglecting to prepare surfaces or overlooking shear stress points—like corners and drain flanges—can cause leaks over time. An often overlooked nuance is the importance of proper slope and drain sealing, which if misjudged, leads to water pooling and damage behind tiles. For advanced insights on waterproofing techniques that surpass basic sealants, see durable flooring installation tips.
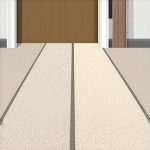
Flooring installation isn’t just about laying planks or tiles; it requires meticulous preparation. Many installers fail to acclimate materials to ambient conditions or ignore expansion gaps, which can result in buckling or gaps later. Additionally, improper substrate leveling is a common mistake that causes uneven surfaces. Remember, the true secret lies in respecting material properties and environmental factors, as highlighted in expert flooring tips.
Baseboards may seem simple: measure, cut, install. But without accounting for wall and floor irregularities, gaps will appear, undermining the entire aesthetic. Using advanced scribing tools and understanding the benefits of coped joints over mitered edges can elevate your finish from amateur to professional. To master these subtle techniques, check out flawless installation strategies.
Understanding these advanced nuances isn’t just for professionals; it empowers homeowners to recognize flaws early and communicate effectively with installers. It also helps in choosing the right products and techniques suited for your specific space, climate, and aesthetic. Remember, shortcutting these sophisticated steps often backfires, leading to costly repairs and unhappy spaces. So, the next time you plan a project, ask yourself: am I considering these hidden details?
Have you ever fallen into this trap? Let me know in the comments. For more expert guidance on homeowner upgrades, explore our contact page and start transforming your space with confidence.Maintaining your flooring, shower setups, and baseboards is crucial for ensuring their durability and preserving your home’s aesthetic appeal. Invest in the right tools and adopt regular maintenance routines to extend their lifespan and avoid costly repairs. For instance, having a quality grout sealer and a flexible silicone applicator can make routine upkeep, like sealing around tiles and baseboards, more effective and less messy. I personally recommend a handheld steam cleaner, such as the Bissell SteamShot, which safely cleans without harsh chemicals, making it ideal for bathroom fixtures and flooring. Regularly inspect these areas for signs of water penetration or wear, and address issues promptly before they escalate. Keeping a detailed maintenance schedule can help you stay ahead of potential problems, making repairs more manageable and less expensive over time. Looking ahead, advancements in smart home diagnostics and moisture sensors are poised to revolutionize how we monitor and maintain our installations, potentially alerting homeowners to leaks or damage instantly. To ensure ongoing performance, I suggest setting a quarterly reminder to reapply waterproof sealants where necessary and to check for any subtle signs of deterioration. One question I often get is, ‘How do I maintain my installations over time without professional help?’ The answer lies in proactive care—using tools like moisture meters and sealants regularly, and staying informed about the latest maintenance techniques. For example, integrating a moisture meter such as the Protimeter Surveymaster can help detect hidden leaks early, preventing water damage beneath floors and behind walls. Don’t hesitate to try implementing a monthly visual inspection routine combined with small quick fixes, like re-sealing grout lines or tightening loose baseboards, to keep everything functioning smoothly. Remember, the key to long-term success isn’t just about initial installation but consistent care—so equip yourself with reliable tools and adopt a regular maintenance habit to protect your investment.
The Hardest Lesson I Learned About Shower Waterproofing and Flooring
After my initial mistakes, I realized that meticulous surface prep and patience during application are non-negotiable. Rushing leads to overlooked seams and potential leaks. I also discovered that understanding the specific properties of materials, like the depth of sealant or curing times, can be game-changing. These lessons pushed me to dig deeper and seek out expert advice.
What I Wish I Had Known Before Starting My Renovation Journey
- I underestimated the importance of testing waterproofing layers thoroughly—early leaks are tough to fix later.
- Proper slope and drainage aren’t just suggestions; they are critical for avoiding puddles and water damage.
- Choosing high-quality materials and following manufacturer instructions can extend the life of your installation exponentially.
Guidance That Transformed My Approach to Home Upgrades
Books like your guide to durable flooring have a wealth of practical steps that bridge theory and hands-on practice. Tools such as the carpet installation secrets reveal the importance of tensioning and seam sealing. Connecting with professional tips online helped me avoid common pitfalls and create a home that’s both functional and beautiful.
Embracing the Power of Proactive Maintenance
Regular inspections and using moisture meters from trusted sources allow me to catch issues early, saving time and money. Investing in a quality sealant and smart monitoring devices ensures that small problems don’t snowball into disasters. Consistency in maintenance fosters lasting beauty and performance of my home upgrades.
Take Action and Elevate Your Home Today
There’s no substitute for doing thorough research, experimenting with trusted techniques, and maintaining your investments over time. Your home deserves the same care you give your loved ones—attention to detail and proactive fixes make all the difference. Remember, mastery comes from experience and continuous learning.
What step are you most excited to implement in your next project? Share your plan below—I’d love to hear your story!