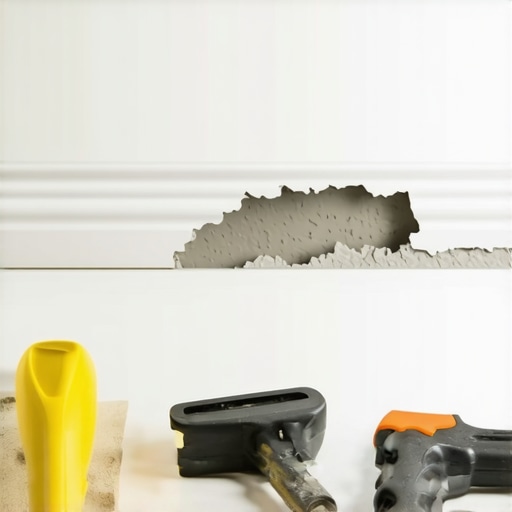
I’ll never forget the morning I stepped into my living room, only to find my baseboards peeling away like pages from an old book. It was a frustrating sight — all that effort I put into redecorating, now marred by unsightly gaps and loose trim. That moment was my lightbulb, realizing I wasn’t alone in this struggle. If your baseboards are pulling away, you’re not just dealing with a cosmetic issue — it can signal underlying problems like shifting walls or improper installation, which could worsen over time.
Getting to the Root of the Baseboard Pullaway Problem
Understanding why your baseboards are detaching is the first step to finding an effective fix. Often, it’s not just about aesthetic concerns; loose baseboards can lead to drafts, increased noise, and even water damage if left unaddressed. I’ve learned from my own mishaps that improper wall preparation or using the wrong adhesive can turn a simple repair into a recurring nightmare. A common mistake I made early on was assuming caulk alone would do the trick — but trust me, it’s not enough for a lasting seal. For reliable solutions, I turned to expert tips and real-world tricks, which you can learn about in detail on this guide.
Is Scribing Your Secret Weapon or Just Hype?
Some folks swear by wall scribing, claiming it’s the silver bullet for uneven floors and walls, while others dismiss it as unnecessary fuss. Early in my DIY journey, I made the mistake of skipping proper wall measurements, which only led to more gaps. Since then, I’ve realized that skillfully scribing your baseboards can be a game-changer, especially for older homes with imperfect wall surfaces. But is wall-scribing truly worth the effort in 2026? That’s what we’ll explore here, along with proven techniques to make your baseboard installation flawless. Ready to make your trim look professional? Let’s dive into the how-to’s that will transform your space.
Prepare Your Walls and Tools for Success
Before diving into the installation, clear the area and gather your tools—measuring tape, miter saw, level, and adhesive. Think of it as preparing your workspace for a craft project: the right setup minimizes mistakes and saves time. I once attempted a quick fix without checking the wall’s condition, only to end up trimming multiple pieces to fit uneven surfaces. Always start by inspecting your walls for cracks or moisture issues, since untreated problems will cause your baseboards to pull away again. If needed, patch and sand surfaces for a smooth, stable base.
Measure and Cut Carefully
Accurate measurements are the backbone of a seamless install. Measure wall lengths twice to avoid costly mistakes—imagine cutting your pieces an inch too short and having to start over. Use a miter saw to cut at 45-degree angles for corners, enabling tight, professional-looking joints. For odd wall corners or irregular shapes, don’t hesitate to scribe the baseboard to fit perfectly. I learned this through a messy trial with unnecessary corner gaps, which I later fixed using a scribing tool—more on that below. Remember, precise cuts save you sanding time and improve the overall appearance of your trim.
Use the Right Adhesive and Fasteners
Apply a quality construction adhesive along the back of each baseboard segment—think of it as the glue that holds everything in place. For added security, nail or screw the baseboards into wall studs using a nail gun or drill. I recommend placing fasteners about every 16 inches, making sure they’re flush with the surface to prevent bumps. To avoid misalignments, temporarily clamp pieces while the adhesive sets. Be cautious: too much glue can ooze out and require cleanup, so apply it sparingly. Proper fastening prevents gaps and keeps the trim tight against the wall, even with minor wall imperfections.
Master the Art of Scribing for Uneven Walls
Walls aren’t always perfectly straight, especially in older homes. Scribing a baseboard involves transferring wall irregularities onto the trim, allowing it to sit flush against uneven surfaces. Using a scribing tool or a custom-made jig, trace the wall’s contours onto your baseboard before cutting. Think of it like fitting a puzzle piece—cutting along the traced line ensures a perfect fit. I once had a corner where the wall bowed out, creating a noticeable gap. By scribing the matching piece, I achieved a seamless look that rivaled professional craftsmanship. For detailed guidance, check out this expert guide.
Fill, Caulk, and Finish Neatly
Once all pieces are in place, fill nail holes with wood filler and sand smooth. Apply painter’s caulk along the top and corners where gaps are inevitable, ensuring a sleek, finished look. This step is crucial—think of caulk as dressing up your work, hiding minor imperfections. I once rushed through caulking, which left visible lines that distracted from the overall quality. Use a damp finger or caulk-smoothing tool for a clean, professional edge. Finish with a coat of paint or stain to match your décor—this elevates the every detail into a polished masterpiece. Proper finishing seals the work, preventing future gaps or damage and giving your space an upgraded feel.
Maintain and Adjust as Needed
Over time, house movements or seasonal changes can cause baseboards to shift slightly. Check periodically for loose fasteners or gaps. If necessary, tighten screws or reapply adhesive to keep everything flush. Remember, a little upkeep preserves the appearance and prevents bigger issues later. When I noticed my baseboards pulling away near a doorframe, I quickly re-nailed the section, avoiding costly repairs down the line. For more tips on interior upgrades, explore this resource.When it comes to home improvements like showers, flooring, and baseboards, many homeowners follow popular myths or oversimplified advice that can lead to costly mistakes. Let’s dig deeper into these nuances that even seasoned DIYers often overlook.
One common misconception is that choosing high-end materials guarantees durability. In reality, proper installation is the real game-changer. For example, selecting premium flooring like vinyl planks won’t prevent warping if the subfloor isn’t adequately prepared. Expert tips emphasize that addressing subfloor moisture levels and leveling imperfections are critical steps often skipped by amateurs aiming for quick results. For a comprehensive guide on durable flooring installation, check out this article.
In shower renovations, many believe sealing grout lines alone is sufficient to prevent leaks. But, the less obvious pitfall is neglecting waterproofing behind the tiles. Many think that grout is waterproof, but it’s porous. The real safeguard is a vapor barrier and proper membrane installation beneath the tile. Expert experts warn that overlooking these layers can lead to hidden water damage, mold, and costly repairs. Discover more about setting up a modern shower correctly to avoid these issues.
When installing baseboards, many get tripped up by the idea that caulk alone will create a perfect seal. In truth, caulk is primarily for finishing touches, not structural gaps. The advanced error is relying solely on caulk for large gaps caused by uneven walls or imperfect cuts. Instead, expert advice advocates for scribing and using appropriate adhesive and fasteners to secure the trim, then filling only small nail holes with wood filler. This prevents gaps from reappearing as the house settles over time. For precision techniques, see this guide.
**What About Advanced Tricks for Pros?** Have you ever tried scribing baseboards for uneven walls or used specialized tools to achieve seamless corners? These nuanced techniques elevate your work from amateur to professional. For instance, professional installers often use a scribing tool to transfer wall irregularities directly onto the trim, ensuring a flush fit—something many overlook. It’s a small step that makes a big difference, especially in older homes with imperfect surfaces.
In summary, the hidden nuance is that success in home projects hinges on understanding these details—like subfloor prep, waterproofing layers, or wall irregularities—bushed aside by common beliefs. Missing these critical steps can turn a straightforward upgrade into ongoing problems. Do you find yourself falling into these traps? Let me know in the comments! For more insights on upgrades that last, explore the latest baseboard trends in 2025 or consider professional assistance for complex projects.
Keep It Working: Essential Tools and Best Practices
Achieving a durable and professional finish on home projects like flooring, showers, or baseboards extends beyond initial installation. It hinges on the right tools, meticulous maintenance, and adopting proven methods. I rely heavily on high-quality equipment to ensure my work stands the test of time, starting with a dependable pneumatic nail gun, which delivers precise, flush-fastening for trim and baseboards. The ergonomic design reduces fatigue and improves accuracy, especially during long sessions. Coupled with a fine-tooth finish saw and a compact multipurpose glue gun, these tools streamline the process and minimize mistakes. Why invest in quality tools? Because they precisely align components, reduce cleanup, and ultimately save time and money over the long run.
When it comes to flooring installations, especially hardwood or vinyl, I swear by a moisture meter. Moisture levels in subfloors or slabs can make or break the outcome; high moisture causes warping or separation. Using an accurate moisture meter from this resource helps me select the best materials and schedule installations at optimal times. For finishing touches and maintenance, I keep a high-grade caulk gun with a smooth-release trigger—perfect for clean, even bead applications that conceal gaps without excess mess. These small tools make big differences in quality outcomes.
What’s the best way to keep your home upgrades functioning smoothly?
Regular inspections and proactive maintenance are key. For example, periodically checking caulking joints around showers and baseboards prevents leaks and drafts. In flooring, I recommend uniform cleaning and gentle sanding of high-traffic areas to prevent wear and preserve finish quality. For truly resilient results, I follow a detailed maintenance schedule based on the material type. In my experience, investing in reliable tools like a laser level or a digital stud finder streamlines tasks like aligning baseboards or installing new carpet transitions—both critical to professional-looking finishes in 2026.
As trends shift, so do techniques. Digital leveling tools now integrate with mobile apps, providing real-time feedback and ensuring precise alignment instantly. I predict this trend will grow, simplifying complex tasks for homeowners and pros alike, and reducing the learning curve for advanced installations.
If you’re ready to elevate your project quality, try adopting a laser level for your next baseboard or flooring job. It drastically improves accuracy, saving time and materials. For expert tips on maintaining long-term results, explore this guide, which walks through maintaining your upgrades with professional techniques. Remember, the right tools combined with consistent upkeep are your best allies in making home improvements that last.
What I Wish I Knew Before Starting
One of the hardest lessons I learned was the importance of wall inspection and preparation. Skipping this step led to gaps and uneven joints that took hours to fix. Trust me, taking the time to patch, sand, and verify wall flatness can save you frustration—and time—later on.
Another insight was the power of proper scribing and measuring. I used to cut everything at standard angles and lengths, only to find mismatched corners and uneven gaps. Embracing scribing tools and double-checking measurements transformed my results from amateurish to professional-looking.
Secure fastening matters more than I initially thought. Nail or screw your baseboards into wall studs, and use adhesive for extra hold. This prevents shifting and future gaps, especially in older homes where walls aren’t perfectly straight.
Tools and Resources That Made the Difference
Investing in a quality miter saw with a laser guide was a game-changer for my cuts, ensuring accuracy and saving me from tedious sanding. The pro scribing tool became an essential in tackling irregular walls and corners. For measuring, a digital tape measure increased precision and reduced errors, especially in tricky spaces.
My go-to guide for mastering these techniques was this comprehensive resource. It demystified the process and provided step-by-step methods that I could follow confidently.
Your Next Step in Home Improvement
Now that you’ve seen the value of solid preparation and the right tools, it’s time to act. With patience, attention to detail, and the resources highlighted, you can elevate your home’s interior to a level that feels truly professional. Whether tackling baseboards, flooring, or shower upgrades, embracing these lessons will make your projects more durable and beautiful.
What’s the first project you’re excited to start with? Share your plans below—I’d love to hear about your home upgrade journey!