I remember the moment vividly—my brand-new shower was finally installed, and I couldn’t wait to enjoy that soothing rain-like waterfall every morning. But within weeks, I noticed a faint, persistent dampness creeping around the base. Turns out, that seemingly minor leak could have been prevented with a simple pressure test—something I overlooked early on, risking costly repairs down the line. That realization hit me hard and sparked my deep dive into proactive waterproofing methods, especially the importance of thorough pressure testing before sealing the deal.
Why Stress-Test Your Shower Pan Now to Dodge the 2026 Water Disaster
A leaking shower isn’t just an inconvenience; it’s a ticking time bomb for your home’s structural integrity. Hidden leaks can cause mold, rot, and even compromise your foundation—problems that escalate rapidly if ignored. The good news? Implementing the right pressure tests before finishing your shower can save thousands and headaches later. As homes become more sophisticated, so must our waterproofing strategies, especially with new standards expected to tighten in 2026.
Is Pressure Testing Really Worth the Hype?
Back when I first started, I thought a visual inspection was enough—how wrong I was. I thought I was being cautious, but without proper pressure testing, I left a blind spot that could have cost me dearly. The mistake? I assumed that sealing everything tightly was the end of the story. Experts now stress that pressure tests are essential to identify potential leaks early, before they turn into expensive nightmares. According to the [National Association of Home Builders](https://www.nahb.org), home leaks can cause structural damage that costs thousands if not caught in time.
Are you concerned about sneaky leaks lurking behind your shower walls? If so, you’re not alone. Many homeowners and even seasoned pros underestimate the importance of thorough pressure testing, often skipping this crucial step to save time or effort. But ignoring it can lead to devastating damage, especially as our building codes evolve and standards like the upcoming 2026 regulations emphasize durability.
In the next sections, I’ll guide you through precisely how to perform these 5 essential pressure tests. Getting this right not only protects your investment but also ensures peace of mind knowing your shower can handle the test of time—preferably beyond 2026. Curious about how to elevate your shower project? Check out tips on creating a spa-like retreat [here](https://tilecraftsmens.com/creating-a-spa-like-shower-experience-tips-tricks) or explore expert flooring ideas to complement your waterproofing efforts.
Gather Your Tools and Prepare Your Space
Start by collecting a reliable pressure tester, a hose, and a pressure gauge. Turn off the main water supply and drain any remaining water from the lines. Clear the area around your shower to ensure safety and easy access. Remember, safety first—wear gloves and eye protection as needed.
Seal the Shower Drains and Openings
Apply tape or specialized covers over the drain, soap dish, and any other openings to prevent water from escaping during testing. This step is crucial; a loose seal here can give you false readings, undermining the entire process. I learned this the hard way when my first test showed no leaks, only to find water seeping through a poorly sealed drain after completion.
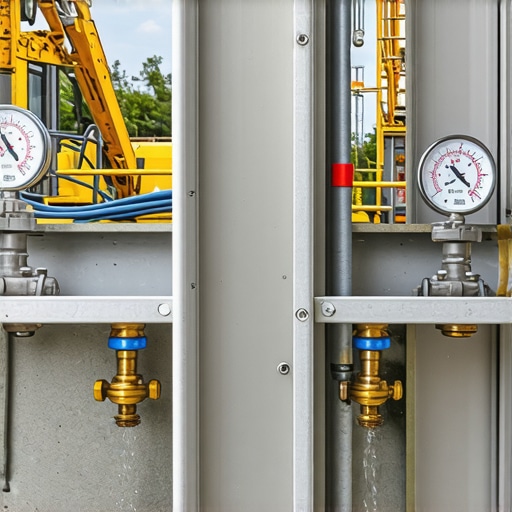
Connect the Pressure Tester and Initiate the Test
Attach the hose from your pressure pump to the spout or tested section of your shower system. Pump air gradually, watching the pressure gauge closely. Aim for the manufacturer’s recommended pressure—usually around 80 psi for residential systems. Hold the pressure steady for at least 10-15 minutes, observing for any drops. This is akin to inflating a bicycle tire; steady pressure indicates a sealed system, while drops reveal leaks.
Monitor and Interpret Results
If the pressure remains stable, your shower pan is likely secure. If it drops, locate the leaks—inspect seals around tiles, grout lines, and fittings. Use soap solution or a leak detection spray on suspect areas; bubbles indicate escape points. Think of it like spotting a crack in a windshield—small yet significant. Mark these spots for repair before proceeding to sealing or reinstallation.
Address Leaks Before Final Sealing
Once you’ve identified the leaks, repair them immediately. This could involve tightening fittings, reapplying sealant, or replacing damaged tiles. For example, I had a minor leak behind the wall that was fixed with waterproof epoxy—saving me from expensive basement damage later. Always test again after repairs to confirm the fix holds. This iterative process ensures your waterproofing is solid before you finish the installation.
Document Your Test for Future Reference
Keep a record of your pressure test results—date, pressure levels, and any issues found. This documentation can be invaluable if future problems occur. Think of it as a health report for your shower; proactive tracking keeps problems at bay. If you’re upgrading or remodeling, this step also helps ensure compliance with upcoming standards, like those set for 2026 standards.
Insider Tip: Use Proper Sealants and Techniques
Besides pressure testing, choosing high-quality sealants and adhering to best practices makes a difference. Avoid shortcuts like caulk alone; instead, consider waterproof membrane systems that last longer. As learned from experience, a well-applied waterproof membrane can be the difference between a dry shower and a soggy nightmare. For designing a shower that withstands the test of time, check out modern shower ideas.
While many homeowners focus on the visible aspects of finishing projects like baseboards, flooring, carpets, and showers, there are often overlooked nuances that can make or break the durability and aesthetics of your renovation. A frequent mistake is thinking that straightforward techniques suffice, but neglecting subtle details can lead to costly repairs over time.
For example, a widespread myth is that mitering corners perfectly is enough to ensure seamless baseboard joints. In reality, walls are rarely perfectly square. Skilled artisans prefer coping joints, which involve cutting the shape of the wall’s profile into the baseboard, allowing for a better fit that compensates for wavy or uneven walls. This simple nuance can prevent gaps that are difficult to repair later and is a technique I consistently recommend; you can learn more about such strategies by visiting [here](https://tilecraftsmens.com/stop-baseboard-gaps-why-coping-beats-miters-in-2026).
Another advanced mistake homeowners make with flooring installation involves neglecting proper moisture testing before laying down hardwood or vinyl planks. Many assume that visible dryness indicates a safe environment. However, hidden moisture vapor beneath the surface can cause warping, buckling, or mold growth, especially as standards tighten with upcoming regulations. According to the [ flooring installation experts](https://tilecraftsmens.com/expert-flooring-installation-tips-for-lasting-results-today-3), conducting in-situ moisture testing is essential and often overlooked, leading to preventable issues.
When it comes to carpets, many forget that the quality and type of underlayment significantly influence the longevity and comfort. A common misconception is that a thicker pad always means better performance. Yet, overly plush underlays can cause excessive compression and raveling of seams, particularly in high-traffic areas. Selecting the right underlayment involves understanding the room’s purpose and foot traffic, a nuance covered in comprehensive guides like [here](https://tilecraftsmens.com/how-to-choose-the-right-carpet-for-a-cozy-living-space).
In shower setups, a frequently missed detail is the slope of the shower floor. Many think that rough tilting during installation is sufficient, but subtle miscalculations can create standing water, promoting mold and tile damage. The optimal slope is approximately 1/4 inch per foot, a precision detail crucial for waterproofing success. Advanced installers use laser levels to achieve consistent slopes, aligning with the waterproofing standards outlined in [this guide](https://tilecraftsmens.com/leaky-shower-pan-3-waterproofing-fixes-for-2026-tile-projects).
Make no mistake—these hidden nuances demand both knowledge and experience to execute correctly. Overlooking them can cost you dearly, both financially and in terms of project satisfaction. Have you ever fallen into this trap? Let me know in the comments and share your experiences. Remember, mastering these finer points elevates your craftsmanship and future-proofs your upgrade projects.Maintaining your home’s flooring, baseboards, carpets, and showers requires precision tools that deliver consistent results. Over the years, I’ve refined my toolkit to include a few key items that make all the difference in both quality and efficiency. First, a high-quality moisture meter, such as the Tramex Moisture Meters, is indispensable for early detection of hidden water issues that can cause long-term damage—especially crucial before installing hardwood or vinyl flooring, ensuring standards like those detailed [here](https://tilecraftsmens.com/your-guide-to-durable-flooring-installation-for-a-stylish-home) are met. Second, a dedicated caulk smoothing tool improves sealant application around showers and baseboards, providing a flawless finish that resists cracking over time.
For measuring precise angles when fitting baseboards or repairing uneven walls, I rely on a digital angle finder like the Bosch Digital Level, which guarantees accuracy even on tricky surfaces. When it comes to cleaning, a microfiber mop paired with a gentle, pH-neutral cleanser helps maintain grout and tile surfaces without abrasive wear, extending their aesthetic appeal.
In terms of software, I recommend using HomeAdvisor’s project management tools for scheduling inspections, tracking maintenance, and managing repairs. This helps you stay organized and proactive, avoiding small issues that can escalate into costly repairs, as discussed in expert guides [here](https://tilecraftsmens.com/expert-flooring-installation-tips-for-lasting-results-today-3).
Looking ahead, I predict that home maintenance will become more integrated with smart technology, like moisture sensors that alert you immediately to leaks or excess humidity—making proactive maintenance even easier. Installing such systems now can save you significant headaches and expenses down the line.
How do I keep everything working seamlessly over time? Regularly check your grout lines, replace worn sealants, and keep a maintenance schedule tailored to your specific materials and usage patterns. For example, applying a high-quality silicone sealant with the proper technique, like the ones recommended in [here](https://tilecraftsmens.com/expert-showers-installation-tips-for-a-modern-bathroom-renovation), ensures long-lasting waterproofing around showers. Don’t forget to document your maintenance routine; it helps identify recurring issues early.
I encourage you to try using a moisture meter before your next flooring project. This small step can prevent hundreds of dollars in future repairs. For more expert tips on durable installations and maintenance strategies, visit our [contact page](https://tilecraftsmens.com/contact-us). Keeping your home in pristine condition isn’t just about tools—it’s about applying knowledge, attention, and proactive care.
The Hardest Lesson I Learned About Baseboards and Shower Waterproofing
One of my most profound realizations was that rushing through pressure testing or ignoring subtle imperfections inevitably leads to costly repairs. I once skipped a detailed moisture check before installing hardwood flooring, only to discover warping months later—an experience that taught me the value of patience and precision. Similarly, overlooking nuances in shower slope or sealant application has repeatedly emphasized that every small detail plays a crucial role in long-term durability.
Resources That Keep My Projects on Track
I’ve relied heavily on high-quality moisture meters like the Tramex for early detection of hidden water damage, ensuring my flooring stays flawless. For sealant application, I trust professional-grade silicone tools which help create airtight, waterproof seals that last for years. Additionally, guides from trusted sources like this installation guide have been invaluable in refining my techniques. Finally, consulting with specialists via their contact page ensures that complex issues become manageable and solutions are tailored to my home’s specific needs.
Your Next Step Begins Today
Remember, thoroughness in waterproofing and attention to every nuance can transform your renovation from good to exceptional. Taking proactive steps now will safeguard your home against future leaks and structural problems, especially with standards tightening in 2026. Are you ready to implement these insights and elevate your home’s resilience? Dive into the details and ask yourself: what small change can make the biggest impact in your project today?
One thought on “5 Shower Pan Pressure Tests to Prevent Costly 2026 Leaks”
Jordan Mitchell
March 12, 2026 at 9:30 pmReading through this comprehensive guide really hit home for me, especially the emphasis on pressure testing before sealing. I had a similar experience where I skipped this step and ended up dealing with a slow leak months later, which was a real headache to repair. What I learned from that mistake is how crucial it is not to rush the process, particularly with water-sensitive components like shower pans. The detail about using soap or leak detection spray to find tiny cracks is something I plan to apply next time I oversee a renovation.
I’m curious—how do others typically document their pressure tests? I’ve started keeping a simple log, but I’m wondering if there are more efficient methods or specific tools that make record-keeping easier. Also, with tighter standards coming in 2026, has anyone experienced issues with code compliance for waterproofing? Would love to hear tips on staying ahead of those regulations to avoid surprises at the final inspection.