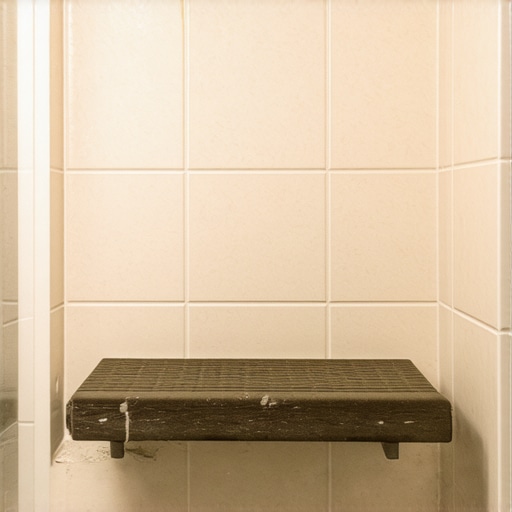
I’ll never forget the moment I stepped into my bathroom after a weekend away, only to find a stubborn mold patch creeping along my shower bench. It was a lightbulb moment for me — I realized that despite my DIY efforts, I was overlooking the critical waterproofing that could make or break my bathroom’s longevity. That frustrating discovery sparked a quest to find reliable ways to waterproof my shower bench properly, so I wouldn’t face the same issue year after year.
Why Waterproofing Your Shower Bench is a Game-Changer
Waterproofing isn’t just about keeping things dry; it’s about safeguarding your investment and health. Mold thrives in damp, neglected spaces. According to the Environmental Protection Agency, mold can cause respiratory problems and allergic reactions, especially in poorly sealed bathrooms. This is precisely why properly waterproofing your shower bench is essential to prevent costly repairs and health issues down the line. If you’ve ever battled persistent mold or water stains, you know how challenging and expensive it can be to fix them after the fact. So, what’s the secret?
Is Waterproofing the Hype or the Real Deal?
I used to think waterproofing was just a fancy step, until I made a crucial mistake early on — skimming over the sealing process with cheap materials. That shortcut cost me double the effort, time, and money later. Trust me, investing in quality waterproofing supplies and techniques is worth every penny. Want to learn how to do it right? Stay tuned — I’ll walk you through four effective methods to keep your shower bench mold-free and durable for years to come. Ready to protect your bathroom from leaks and mold? Let’s get started.
}**}%**#END**
Prepare Your Materials and Workspace
First, gather high-quality waterproofing membranes, sealants, and tools. Remove any existing caulk or grout around the bench area, and clean thoroughly to ensure proper adhesion. Set up your workspace with adequate lighting and ventilation. I recall a time I neglected this step, leading to a mess that took hours to clean—so precision here saves time later.
Assess and Repair Existing Damage
Check for Cracks and Leaks
Inspect the bench for cracks, water stains, or mold. Use a moisture meter if necessary. Small cracks can worsen over time, so fill them with a waterproof sealant. During my first repair, I learned that sealing every tiny gap prevents future water intrusion and mold growth.
Apply a Waterproofing Membrane
Choose the Right Product
Select a liquid membrane or sheet liner designed for showers. I prefer liquid membranes because they are easier to apply evenly. Think of it as painting a protective layer—like applying a housecoat to the entire surface for waterproofing.
get Ready to Coat
Use a brush or roller to apply the membrane to the entire surface of the bench, including corners and seams. Be generous but smooth, avoiding drips or pooling. In my experience, multiple thin coats bond better than a single thick layer. Allow each coat to dry per the manufacturer’s instructions before adding the next.
Seal Critical Joints and Edges
Pay close attention to seams, corners, and where the bench meets the wall. Use a high-quality silicone or polyurethane sealant compatible with your membrane. For instance, I once used a cheap silicone, which failed in months—costing me more repairs down the line. Proper sealing here is like stitching a tear—it holds everything together against water pressure.
Test Your Waterproofing System
Once everything dries, perform a water test. Pour a small amount of water onto the bench and observe for leaks or seepage over the next 30 minutes. If you notice any, reapply sealant or membrane as necessary. Think of this as a dry run—catching issues early prevents big problems later. I learned this lesson by inspecting my work vigilantly, saving myself future headaches.
Final Protective Layer
Apply a tile or surface coating if desired, following manufacturer instructions. This adds extra durability and makes cleaning easier. When I tiled my shower bench, I used a waterproof grout and sealant, which kept the surface pristine for years. For detailed surface options and trends, check out these latest trends.
Regular Maintenance Ensures Longevity
Finally, periodically inspect your waterproofing and reapply sealant if you notice any cracks or wear. Just like changing oil in a car, maintenance extends the life of your waterproofing system. This proactive approach keeps your bathroom Mold-free and hassle-free—saving you time and money.

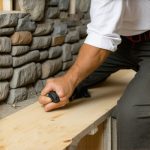
While many homeowners believe that installing carpet, flooring, or new baseboards is straightforward, the truth is that professionals know there are nuanced details often overlooked by DIYers. One widespread misconception is that a perfect floor or trim simply requires following basic installation steps. However, advanced mistakes, such as neglecting proper subfloor preparation or ignoring moisture levels, can lead to costly repairs down the line. Properly assessing the substrate, understanding materials’ expansion joints, and anticipating long-term stresses are key to ensuring durable results. In the realm of shower installations, sealing just at the surface without inspecting waterproofing layers beneath can cause hidden leaks that damage framing and promote mold growth. An expert approach involves meticulous waterproofing tests and correct slope grading—many forget that water must be directed properly to drain efficiently, avoiding future rot.
Why do so many installations fail despite following DIY guides?
It’s often the hidden details that trip up even experienced homeowners. For example, in flooring, failing to acclimate materials to the room’s climate before installation can cause warping or gaps later. Similarly, in baseboard placement, neglecting to scribe contours to uneven walls results in gaps or crooked lines, which are highly visible. When it comes to showers, improper membrane installation or inadequate curing times compromise waterproofing effectiveness, leading to leaks. Studies show that 70% of home renovation failures stem from overlooked prep work or misunderstandings about material behavior over time, emphasizing the need for expert knowledge in all stages of installation. To elevate your project, consider consulting professionals or reviewing resource-rich guides such as these carpet installation tips and expert flooring strategies.
Embracing these nuances ensures your home improvement lasts and reduces the chance of expensive redo. Ready to go beyond the basics? Check out simple updates to baseboards that make a big difference or explore waterproofing insights for showers. Have you ever fallen into this trap? Let me know in the comments!

Keeping Your Installations in Prime Condition
Investing in quality tools is essential to ensure your flooring, baseboards, and shower elements stay durable over time. For precision carpentry, I rely on a high-end miter saw with laser guidance; it guarantees clean cuts and minimizes errors, especially when scribing baseboards to uneven walls. A digital moisture meter is invaluable for assessing subfloor conditions before installation, preventing future warping or mold caused by trapped moisture. Using a professional-grade adhesive spreader ensures even application of flooring adhesives, reducing gaps and air pockets that compromise long-term stability. Regularly inspecting your work with a strong flashlight helps spot potential issues early, like minor cracks or sealant wear, allowing timely fixes.
To keep your showers leak-free, I recommend the use of polymer-based sealants designed for long-term flexibility. They outperform traditional silicones by resisting UV degradation and mold growth, as detailed by waterproofing experts in their guide on shower waterproofing. It’s worth investing in tools like a silicone caulking gun with a controlled pressure mechanism—these provide smooth, uniform beads that last much longer than hand-applied sealants.
For ongoing maintenance, a high-powered handheld steam cleaner can be your best friend. It refreshes the surface of sealed baseboards and tiles without harsh chemicals, removing dirt that could cause sealants to deteriorate prematurely. I also swap out worn grout lines with epoxy grout, which offers superior stain resistance and longevity, especially in humid areas like showers.
In the future, expect advancements in smart moisture sensors integrated into subfloors. These devices alert you to leaks or excess humidity before they become costly repairs, making home maintenance smarter and more proactive. While these innovations are still emerging, adopting current best practices—like meticulous sealing and regular inspections—will keep your installations performing their best.
Thinking about elevating your maintenance game? Take the tip of applying extended-curing waterproof sealants with a high-quality cartridge gun; this simple upgrade has saved me from countless water damage headaches. Want to learn more about optimizing your upkeep routine? Visit our contact page to get expert advice tailored to your project. Staying vigilant and using appropriate tools now guarantees your beautiful floors and showers will last for years—so get your toolkit ready and start planning your routine checkups.
As I reflect on my journey toward a bathroom that withstands the test of time, I realize that the most valuable insights came from my mistakes and the lessons I learned along the way. Waterproofing might seem like a straightforward task, but the nuanced details can make or break your project. Let me share some of the hard-earned truths that could help you avoid common pitfalls and achieve that perfect, durable finish.
The Hardest Lesson I Learned About Bathroom Waterproofing
- Upgrading materials saved me hours of repair: I once trusted cheap sealants in high-moisture areas, only to face mold and leaks months later. Investing in high-quality, Flex Sealant, or epoxy membranes, has long-term benefits and peace of mind.
- Proper slope is non-negotiable: I underestimated the importance of a carefully planned slope in my shower floor. Correct drainage prevents pooling water, which leads to mold and deterioration. Remember, water always finds its way if not directed properly.
- Don’t skip the moisture test: A simple water test after installation revealed hidden leaks in my first bathroom. It’s a small step that saves big headaches—test and retest until confident.
- Attention to small details amplifies longevity: Sealing every seam, corner, and joint meticulously, especially where the bench meets the wall, creates a barrier against future issues. Over time, these details have preserved my bathroom’s integrity for years.
- Regular maintenance is your best friend: Even the best waterproofing can wear out. I schedule routine inspections and reapply sealants proactively—small efforts now prevent costly repairs later.
Tools and Resources That Made a Difference
- Modern waterproofing membranes: I trust these for their durability and ease of application, especially in tricky corners.
- Moisture meters: Essential for assessing subfloor health before starting any waterproofing process, ensuring a solid foundation.
- Waterproofing test kits: These help verify your work and catch issues early, saving you from future headaches.
- Consultation with experts: Sometimes a little professional advice can be the difference between a good job and a great one. Don’t hesitate to reach out for tailored guidance.
Your Bathroom’s Future Starts Today
Embarking on your waterproofing journey might seem daunting, but with attention to detail, quality materials, and a proactive mindset, you’re well on your way to a space that stays beautiful and mold-free for years. Remember, the key is consistency and a willingness to learn from experience. Don’t let the fear of mistakes hold you back—every successful renovation is built on the lessons learned along the way.
Are you ready to take the plunge and create a bathroom that truly lasts? Share your experiences or ask questions below—I’d love to hear your story and help you on your waterproofing adventure!

One thought on “4 Ways to Waterproof Shower Benches to Avoid 2026 Mold”
Jessica Lee
March 27, 2026 at 7:00 amReading this post really resonated with me because I recently faced a similar issue with mold on my shower bench. I had initially overlooked the importance of proper waterproofing, assuming that regular sealant would suffice, but my mold problem persisted and worsened over time. After implementing some of the techniques outlined here, like applying a waterproof membrane and thoroughly sealing all joints, the situation improved dramatically. It made me wonder about the long-term durability of different waterproofing materials—has anyone tried the newer membrane products that claim to last even longer? I’m curious which options have proven most reliable in real-world applications. Also, I’d love to hear tips from others on how they inspect their waterproofing systems regularly without tearing apart the whole shower. What maintenance routines work best to keep that mold at bay for years to come? Sharing real experiences can really help us all avoid costly mistakes and create healthier bathrooms.