Walking down my staircase one rainy evening, I nearly slipped because of a poorly secured vinyl plank that hadn’t been properly glued. That moment was a lightbulb — I realized that a slip-proof finish isn’t just about aesthetics; it’s about safety. If you’re installing Glue 2026 Vinyl Plank on your stairs and want to avoid a potential accident, you’ve got to prioritize slip resistance from the start.
Why Your Staircase Deserves More Than Just Looks
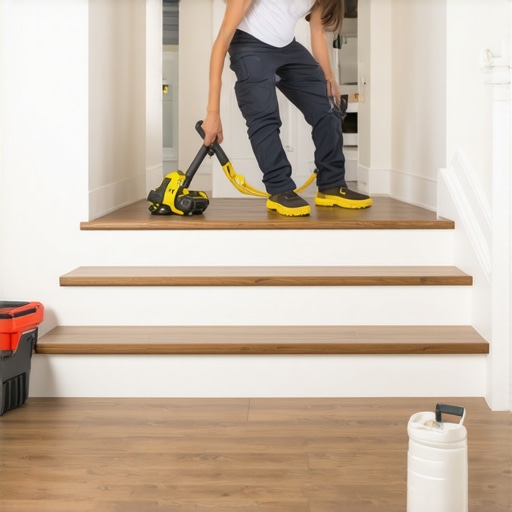
Stairs are often the focal point of a home, yet they’re also one of the most dangerous spots, especially when coated with slick vinyl planks. A slippery surface can turn a beautiful staircase into a hazard—something no homeowner wants to face. I’ve learned through my own mishaps that applying a quality, slip-resistant finish is essential for safety and peace of mind.
Many DIY enthusiasts overlook this step, rushing to finish their project, only to regret it when someone slips. According to safety experts, falls on stairs are among the leading causes of injuries at home (source: CDC). That harsh reality motivated me to find reliable solutions to make my stairs safer without sacrificing style.
Today, I’m going to share my firsthand experience and walk you through four practical steps to create a slip-proof finish on your vinyl plank stair installation. This process isn’t just about preventing slips; it’s about adding durability and confidence to your home upgrades. Are you tired of worrying about slips or accidental falls? Keep reading, because the next sections will transform your approach and make your stairs safer than ever—without breaking the bank or your patience.
Choose the Right Anti-Slip Material
Start with selecting a high-quality anti-slip coating or tape designed specifically for vinyl surfaces. During my recent stair upgrade, I opted for a textured vinyl-safe grip tape that can be easily applied over the existing vinyl planks. I made sure it was rated for high traffic areas and tested its adhesive strength on a small patch before full installation.
Prepare the Surface Thoroughly
Clean the stairs meticulously to remove dust, grease, and any residues. Use a degreasing cleaner and a stiff brush to scrupulously scrub the vinyl surface. For example, I wiped down each step with isopropyl alcohol afterward to ensure maximum adhesion of the anti-slip material. This step is crucial; any debris can cause the coating to peel or slip later.
Apply the Anti-Slip Treatment Correctly
Follow the manufacturer’s instructions precisely. Typically, this involves peeling the backing of tapes or spreading a thin, even layer of coating with a roller or brush. When I applied a textured grip tape, I aligned it carefully along the edge of each step, pressing firmly to eliminate air bubbles and ensure full contact. For coatings, I used a foam roller to achieve a uniform layer, allowing it to dry fully before walking on the stairs.
Seal Edges for Durability
To prevent peeling, especially at the edges, I used a compatible clear sealant or additional edge tape. This is similar to sealing baseboard corners—secure edges prevent dirt ingress and prolong the anti-slip’s lifespan. I applied a thin bead of sealant along the edges with a caulking gun, smoothing it out smoothly for a clean finish.
Test and Maintain the Finish
Once dry, I tested each stair by walking carefully to check grip. Regular maintenance, such as cleaning the anti-slip layer with a damp cloth, extends its effectiveness. If signs of wear appear, reapplication or touch-ups are necessary to maintain safety.
 While many homeowners focus on the aesthetic appeal of baseboards, flooring, and showers, they often overlook the nuanced details that determine long-term success. For example, a common misconception is that mitered corners are always the best choice for baseboards; in reality, coping techniques often provide a cleaner fit, especially on uneven walls, as explained in the recent trends highlighted by experts in 2025. Additionally, the belief that thicker underlayment guarantees a better flooring installation is misleading; improper installation and incorrect underlayment types can lead to squeaks and even structural damage, which detailed guides emphasize for lasting results.
A critical trap to avoid involves underestimating the importance of surface preparation in shower waterproofing. Skipping thorough cleaning or ignoring substrate imperfections can cause leaks and mold buildup months later—a mistake that even seasoned pros sometimes make. Proper sealing, membrane application, and drainage setup are essential details that elevate your project from good to professional-grade.
For those aiming for sophisticated upgrades, understanding the intricacies of shower waterproofing can make all the difference.
Why do some waterproofing methods fail over time despite proper installation?
This question reflects a common myth that once applied correctly, waterproofing systems are foolproof. In fact, environmental factors like temperature fluctuations and improper curing can compromise even the best membranes, as studies in waterproofing durability reveal. Regular maintenance and knowledge of subtle signs of wear are crucial.
Similarly, in flooring installation, advanced mistakes such as ignoring subfloor conditions or misusing expansion gaps can cause irreversible issues. The details matter—attention to moisture barriers, correct acclimation of materials, and precise measurements help prevent costly repairs later. For instance, the trend toward wider baseboards and innovative transitions requires careful scribing and sealing—techniques best learned from detailed tutorials and expert advice.
By demystifying these common pitfalls, homeowners can avoid costly mistakes and achieve flawless results. Whether upgrading a shower fixture to include modern designs or installing resilient flooring, the devil is in the details. For comprehensive strategies, I recommend exploring our guide on durable flooring installation or the latest baseboard trends that combine style with functionality, which can be found on our main page. Have you ever fallen into this trap? Let me know in the comments.
Maintaining your home’s flooring, baseboards, and shower installations is crucial to ensuring their longevity and keeping them looking pristine. Over the years, I’ve honed my toolkit and approach to routine upkeep, allowing me to address issues early before they turn into costly repairs.
My Go-To Equipment for Home Maintenance
One of the most versatile tools I rely on is an orbital sander with a set of fine-grit sandpapers. It’s perfect for refreshing dull or scratched baseboards without needing to replace them entirely. For cleaning grout lines and shower tiles, a high-pressure steam cleaner proves invaluable, effectively removing soap scum and mold without harsh chemicals. I prefer models with adjustable pressure settings, like the Wagner Power Steamer, because it adapts to different surfaces and grime levels.
When it comes to inspecting and sealing leaks in showers or detecting hidden moisture behind flooring, an infrared thermal camera has become an indispensable tool. I invested in the FLIR ONE Pro, which connects directly to my smartphone. This device helps me identify temperature variations that indicate leaks or water infiltration, saving time and preventing potential damage.
Software and Digital Resources
To keep track of maintenance schedules and project notes, I utilize Evernote. Its tagging system helps me organize tasks such as resealing grout or replacing worn anti-slip coatings on stairs. For more technical guidance, I frequently visit expert sites like this resource that provides detailed tutorials on flooring upkeep and repairs.
Optimizing Long-Term Results
Regularly inspecting your installations, especially in high-traffic areas like entryways and showers, pays dividends. Applying a protective coating every couple of years to baseboards and grout lines safeguards against moisture and dirt buildup. When reapplying sealant or anti-slip tapes, I ensure the surfaces are meticulously cleaned and dried beforehand, which improves adhesion and durability.
Future Trends in Home Maintenance
Looking ahead, I predict smart tools—like IoT-connected sensors that monitor humidity and water leaks—will become standard in home maintenance routines. These devices can alert you immediately to issues, preventing serious damage before it happens.
How can I keep my flooring and shower systems working perfectly over time?
Consistent inspections, timely reapplications of protective coatings, and leveraging the latest tech like infrared detectors or smart sensors are key steps. Don’t shy away from using advanced tools; a small investment in quality equipment like a thermal camera can save you significant repair costs down the line. I highly recommend trying out these methods to see how they can transform your home maintenance routine. For detailed tutorials, consider exploring our guide on durable flooring installation or learn about the latest baseboard trends that can elevate your interior style—click here.”} } {
{
The Hardest Lessons I Learned About Finishing Touches
- One of the toughest lessons was realizing that quick fixes in baseboard scribing or seam sealing often lead to costly repairs down the line. Taking the time to learn proper techniques, like coping instead of mitering or using advanced sealing methods, can save you frustration and money.
- Misconceptions about underlayment thickness or adhesive choices can sabotage an otherwise flawless flooring installation. The insight I wish I had early on is that surface preparation and understanding material compatibility are crucial for durability.
- In shower waterproofing, assuming that a single waterproof membrane is enough is a mistake. Regular inspections and understanding potential failure points—like niche leaks or drain seals—are vital to maintaining a leak-free environment.
- Small details, such as preventing baseboard gaps by scribing rather than mitering, dramatically improve the aesthetic and longevity of your finish. Overlooking these nuances can result in uneven edges and early separations.
- Finally, embracing tools like infrared thermal cameras for detecting hidden moisture or using smart sensors for ongoing monitoring can elevate your home maintenance routine from reactive to proactive, ensuring lasting results.
My Essential Toolkit for Flawless Finish
- High-quality coping saws and scribing tools—these enable precise cuts, especially on uneven walls or stone surfaces, as explained in our latest trends update on baseboard design in 2025.
- Sealants and edge tapes—trustworthy products that resist peeling and mold, recommended in our guide to sealing shower niches and baseboard gaps.
- Infrared thermal cameras—important for early leak detection and moisture monitoring, which can prevent extensive damage.
- Professional-grade adhesive spreaders and seam irons—ensuring clean, secure seams in carpeting or waterproofing membrane applications.
Seize the Moment and Elevate Your Home
Your home is a canvas of endless possibilities, and mastering these detailed aspects of installation can make all the difference. Whether you’re upgrading your baseboards, laying down new carpet, or detailing a shower niche, focusing on the quality of your work pays off in beauty and longevity. Remember, every detail you refine today sets the stage for a safer, more comfortable tomorrow. Dive into these expert tips, keep learning, and transform your space with confidence. Want to share your own experiences or ask for advice? Drop your comments below and let’s elevate each other’s homes together!