You know that sinking feeling when you step onto your carpet and notice it’s no longer snug against the wall or under the furniture? I experienced it myself during a recent move—my once-perfectly laid carpet was now bunched, frayed, and showcasing unsightly gaps. It struck me then how such a seemingly small detail can turn into a frustrating project if not addressed early. That lightbulb moment led me down a rabbit hole of solutions, and let me tell you, there are some surprisingly simple hacks to keep heavy furniture and tack strips from ruining your flooring.
Why Carpet Shifting is More Than Just a Minor Inconvenience
When heavy furniture like sofas, beds, or dressers start shifting or pressing against tack strips, it doesn’t just look bad. It can weaken the floor structure, cause premature wear, and even lead to tripping hazards. Early mistakes, like neglecting to secure the carpet properly or assuming that a quick glue job will hold everything in place, often make the problem worse over time. I learned the hard way that proper technique is crucial for durable results. According to a report by flooring specialists, improper handling of tack strips and heavy furniture can cut the lifespan of your carpet in half, leading to costly replacements before their time. Fortunately, with a few trusted hacks, we can reverse the damage and prevent future issues.
Is Hacky Fixing worth it, or Should I Call the Pros?
The thought of DIY repairs might make some nervous—trust me, I’ve been there. My early attempts involved inadequate adhesion and careless re-stretching, which only made things worse. But experience taught me that with the right tools and knowledge, fixing carpet shifts isn’t just doable—it’s rewarding. If you’re tired of tripping over loose edges or seeing your carpet curl around furniture, these hacks are worth trying. And for deeper issues, knowing when to consult experts can save you money and stress. For more professional advice, explore our detailed guide on carpet installation secrets.
Secure the Tack Strips Properly
Start by removing any loose tack strips using pliers, then replace them with new, securely nailed or screwed-in strips. Use a level to ensure they sit flush against the subfloor. This prevents movement when furniture is placed. I once replaced a wobbly tack strip in my living room, which immediately stopped the carpet from shifting around. For best results, use corrosion-resistant nails or screws to avoid future rusting issues.
Correctly Stretch the Carpet
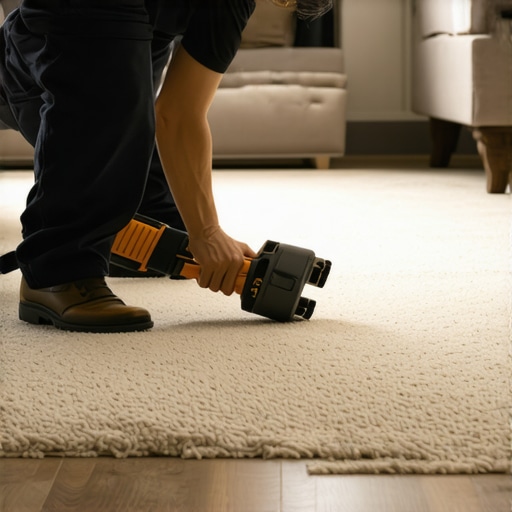
Use a power stretcher to pull the carpet tight, working from the center towards the edges. Attach the carpet to the tack strips as you go, ensuring no wrinkles or bubbles remain. I remember the first time I used a power stretcher—initially awkward, but after some practice, the carpet laid out like a professional job. Proper stretching maintains tension and minimizes future shifting, especially under heavy furniture.
Add Buffer Zones for Heavy Furniture
Place furniture pads or coasters under heavy pieces to distribute weight evenly. For larger items like beds or sofas, consider installing additional carpet anchors or securing brackets that lock furniture in place. I once drilled small brackets into the floor beneath my sofa, which kept it from creeping and damaging the carpet fibers over time. This step is crucial to prevent furniture-induced wear and shifting.
Reinforce Edges and High-Traffic Areas
Apply a high-quality carpet adhesive or tape along edges or traffic zones to lock down loose areas. Consult the instructions carefully—using too much can create stiff patches, while too little might not hold. During my last project, I used double-sided tape along the doorways, which held the carpet firmly until I finished the job. Reinforcing these zones helps maintain a neat appearance over time.
Implement Ongoing Maintenance Checks
Regularly inspect the edges and under heavy furniture, adjusting or reapplying adhesive if needed. Monitor for signs of loosening, wrinkles, or gaps. Every few months, I reposition furniture pads and re-stretch small sections to ensure the carpet stays tight and secure. This proactive approach extends the lifespan of your installation and keeps your floors looking fresh.
Consult Professional Tips for Flawless Results
If these steps seem overwhelming, consider reviewing expert advice on carpet installation secrets or reaching out to professionals for guidance. Proper execution of these techniques is key to avoiding costly repairs later. Remember, the more precise your initial installation, the less you’ll need to troubleshoot down the road. For ongoing updates and detailed insights, explore our comprehensive flooring tips.When people think about flooring and bathroom upgrades, they often focus on the visible elements—choosing the right color, style, or material. However, beneath the surface lie nuanced details that many overlook, leading to costly mistakes down the line. One common misconception is that following standard ‘industry practices’ guarantees a perfect finish. In reality, subtle differences in technique can significantly impact durability and aesthetic appeal. For instance, many assume that caulking alone suffices for sealing shower niches, but expert installers know that proper waterproofing membranes are essential to prevent leaks and mold. Overlooking these details is a classic trap that can cause long-term damage, even if the bathroom looks flawless initially. A study from the National Association of Home Builders emphasizes that attention to detail during installation processes reduces warranty claims and enhances long-term satisfaction. Therefore, mastering these nuanced techniques—like precise back-cut mitering of baseboards, understanding proper tile slope in showers, or ensuring tight carpet seams—can elevate your projects from average to professional quality. Remember, small overlooked steps—such as using the right adhesive or checking for level surfaces—are often the difference between a durable, beautiful finish and a recurring repair headache. Don’t fall into the trap of superficial fixes; investing time in understanding these advanced nuances ensures lasting results. For example, when installing baseboards over uneven floors, a simple caulk isn’t enough. Instead, techniques like scribing and sanding can create a seamless look that withstands movement over time. Want more insider tips on perfecting your installation? Check out our comprehensive guide on durable flooring installation, or learn about baseboard transformation tricks. Remember, mastering these nuances takes your project from ‘good enough’ to exceptional. Have you ever fallen into this trap? Let me know in the comments.Maintaining your flooring, whether it’s carpet, tile, or baseboards, requires using the right tools and adopting effective methods. Over the years, I’ve found that investing in high-quality equipment not only simplifies the process but also ensures long-lasting results. For instance, when stretching a carpet, I rely heavily on a power stretcher, such as the Roberts 10-284 Power Stretcher, which provides the leverage and tension needed for a professional finish. This tool significantly reduces wrinkles and bubbles, and I personally appreciate how its adjustable head adapts to different room sizes, making the job more efficient. For managing around baseboards, a good oscillating multi-tool like the Fein Multimaster allows for clean cuts without damaging the trim or drywall, especially when scribing or making precise adjustments. Sacrificial blades ensure longevity and cleaner cuts, which I’ve used to perfect miters and scribe lines.
In terms of sealing showers or fixing grout, I swear by high-quality silicone and epoxy-based products. For sealing niches and corners, I prefer to use a 100% silicone sealant like GE Silicone II because of its flexibility and durability against moisture and temperature changes. Applying it with a detail-oriented caulking gun, such as the Wagner Control Pro 150 Power Gun, helps achieve smooth, professional seals. This level of precision minimizes future leaks and mold buildup, as outlined in expert waterproofing guides.
For long-term results, regular inspections are key. I recommend creating a maintenance schedule that includes checking for loose baseboards, ensuring the strategic placement of furniture pads, and reapplying adhesive in high-traffic zones. Over time, this proactive approach prevents small issues from escalating into costly repairs. Additionally, some tools—like a laser level—are invaluable for maintaining consistency in baseboard height or tile installation. In my experience, integrating these tools into your routine can transform a DIY project into a durable, professional-looking finish.
Looking ahead, the trend of smart home integration is shaping how we maintain flooring. Automated sensors and moisture detectors are becoming more affordable and can alert homeowners to leaks or high humidity levels that threaten your floor’s integrity. Moreover, advancements in eco-friendly, long-lasting sealants and adhesives are making it easier to achieve sustainable, crack-resistant finishes.
If you haven’t tried scribing your baseboards to uneven walls recently, I highly recommend giving it a shot. Using a compass scribing tool, for example, allows you to create a perfect fit even on wavy surfaces. This simple step significantly enhances the aesthetic and durability of your installation. For more detailed guidance, visit our comprehensive baseboard upgrade guide. Remember, choosing the right tools and techniques is crucial if you aim for flawless results that stand the test of time.
Lessons That Changed My Approach to Flooring and Finishes
One of the most valuable lessons I learned is that attention to detail during the initial installation stage saves countless headaches later. Small missteps, like neglecting proper tension when stretching a carpet or skipping waterproofing steps in shower niches, can lead to costly repairs. I realized that taking the extra time to scribe baseboards to uneven walls or double-checking waterproof seals makes all the difference. Patience and precision at each step transformed my projects from amateurish to professional-looking. Additionally, I discovered that understanding the nuances of tools—like knowing when to use an oscillating multi-tool for scribing or a power stretcher for carpets—empowers any DIY enthusiast to achieve stellar results. These insights underscore that mastery comes from embracing the details that many overlook, turning routine installations into durable works of art.
Tools and Resources That Made the Difference in My Work
Over the years, I’ve curated a personal toolkit that streamlines my flooring, shower, and baseboard projects. The expert carpet installation guide helped me perfect stretching and seam techniques, ensuring a tight, professional finish. My trusted laser level from Bosch has been indispensable for aligning baseboards and tiles accurately. For waterproofing showers, I swear by high-quality silicone like GE Silicone II and a professional-grade caulking gun to seal corners properly, preventing leaks. Additionally, investing in a good oscillating multi-tool has allowed precise scribing and trim work, especially on uneven surfaces. These tools not only save time but also elevate the quality of my work—turning small DIY projects into lasting home improvements. For ongoing learning, I often browse industry-specific blogs and tutorials, which keep me updated on trends like modern baseboard designs and high-performance sealants. Check out our baseboard upgrade ideas for inspiration that pairs perfectly with your improvements.
Now It’s Your Turn to Elevate Your Home
Embarking on your own flooring, shower, or baseboard project might seem daunting, but with the right mindset and tools, you can achieve results that last. Remember, the small details—like proper tensioning, meticulous waterproofing, and precise scribing—are what set apart a professional finish from a quick fix. Taking these extra steps not only enhances your home’s aesthetics but also prolongs the life of your investment. So, why wait? Start planning your project today, armed with the knowledge that mastery is within your reach. Your space deserves that perfect touch—make it happen!
Have you ever struggled with achieving a seamless baseboard scribe or a watertight shower niche? Share your experiences below—I’d love to hear what worked or what challenged you on your journey!