I remember the moment clearly: I was gliding across my newly installed vinyl plank flooring when I suddenly felt a strange, hollow movement beneath my feet. That unsettling sensation was the first sign something was wrong—my floor was telegraphing, revealing imperfections in the subfloor beneath. It was a lightbulb moment for me—those visible ripples and waves weren’t just cosmetic; they were a warning sign of underlying issues that, if ignored, could cost me a lot more than just aesthetic appeal.
Why Telegraphed Vinyl Floors Can Turn Into Bankruptcy in Disguise
When I first started tackling flooring projects, I thought a perfect surface was a matter of selecting the right planks and laying them down carefully. Turns out, it’s more about what’s underneath. Vinyl plank telegraphing isn’t just about uneven flooring—it’s a sign of deeper subfloor problems that can compromise your entire home’s foundation. If you notice your vinyl floor showing ripples, waves, or dips after installation, chances are you have a subfloor that needs fixing. Ignoring these signs can lead to costly repairs down the line, including complete replacement of your flooring. According to industry experts, improper subfloor preparation is one of the leading causes of vinyl plank issues, including telegraphing (source: https://tilecraftsmens.com/your-guide-to-durable-flooring-installation-for-a-stylish-home). So, today, I’ll guide you through the four essential fixes to stop that unwanted movement and restore your floor’s integrity. Are you tired of feeling every bump and ripple underfoot? If you’ve faced this problem, you’re not alone—and the good news is, solutions exist to fix this once and for all.
Is Fixing Subfloor Issues Worth the Hype? You Bet.
Early in my journey, I made the mistake of focusing only on surface repairs—like re-stretching carpet or sanding down uneven planks—thinking the problem was just in the visible layer. That was a costly error. I learned that addressing the root cause—the subfloor—is crucial. Without proper fixes, the problem will just reappear, wasting time and money. If you’re skeptical about whether fixing the subfloor is necessary, consider this: a stable, level foundation not only improves the lifespan of your flooring but also enhances your home’s overall value and safety. For more in-depth strategies, you might want to check out tips on achieving flawless flooring [here](https://tilecraftsmens.com/transform-your-home-expert-flooring-installation-tips-for-2025). Now that you know why ignoring subfloor problems can be detrimental, let’s dive into exactly how to tackle these issues with practical, proven fixes.
Check the Foundation: Assess the Subfloor
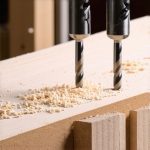
Start by removing a section of your vinyl flooring to expose the subfloor. Use a circular saw with a fine blade, acting like a giant cookie cutter, to cut carefully along the edge of the chosen area. Lift the section and inspect for moisture, sagging, or uneven patches. If you find soft spots or water damage, these are signs of underlying issues that must be addressed before proceeding. Remember, a good foundation is like a sturdy base for a cake—without it, everything collapses.
Level the Ground: Prepare the Subfloor
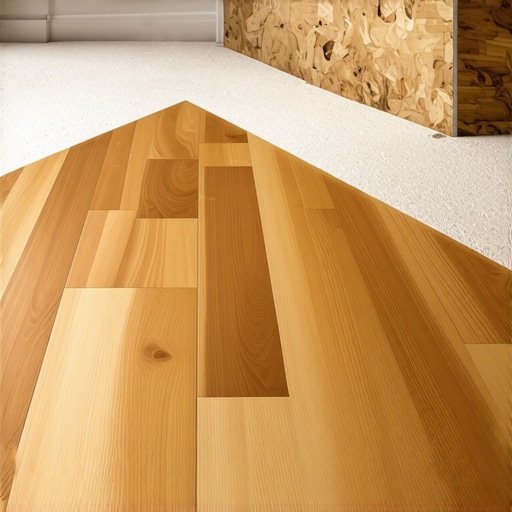
Next, assess the flatness of your subfloor using a long straightedge or a level. If it shows ripples or dips, you’ll need to sand down high spots or fill low areas with a self-leveling compound. Mixing the compound is straightforward—combine it with water according to the manufacturer’s instructions, and pour over the uneven spots, spreading it smoothly with a trowel. Think of it as smoothing out wrinkles in a bedsheet to create a perfect surface. I once had to re-surface a kitchen subfloor, which involved some messy sanding and patching, but the result was a perfectly flat floor that eliminated rippling.
Secure Loose Areas: Fixing the Subfloor
If you discover loose sections, drill pilot holes into the subfloor and secure the loosened areas with corrosion-resistant screws. Use a power drill, driving screws every 12 inches to lock everything firmly in place. This step is akin to tightening loose shingles on a roof—preventing future leaks or movement. Avoid over-tightening, which can cause cracking. I remember tightening a wobbling section in my basement, noticing how the entire floor became noticeably steadier afterward.
Address Moisture and Damage: Seal and Repair
Moisture is a silent enemy. Seal any water damage or mold with a primer or specialized waterproofing paint. For larger damaged sections, cut out the damaged part, and replace it with a new piece of plywood or oriented strand board (OSB). Cut the replacement to fit snugly, then secure with screws and sealing compound. Think of it as patching a leak in a boat; the key is a water-tight seal to prevent future issues. This process ensures your subfloor remains dry and stable, safeguarding your vinyl flooring from telegraphing problems down the line.
Reinstall and Test
Once the subfloor is repaired and level, lay down a smooth, clean underlayment designed for vinyl flooring. Reinstall your vinyl planks carefully, ensuring each piece clicks into place without tension. Walk across the new surface to test for ripples or movement. A firm, even floor indicates success. Remember, patience at this stage prevents future headaches—rushing can reintroduce problems. My last project involved meticulous leveling and careful re-laying, resulting in a flawlessly smooth floor that felt like a professional job.
Many homeowners and even seasoned contractors often get tripped up by nuanced details in renovation projects, especially when it comes to showers, carpet installation, baseboards, and flooring. Let’s uncover some of the most overlooked pitfalls and advanced mistakes that can undermine your efforts. For instance, a frequent myth is that choosing high-end materials alone guarantees a perfect finish. In reality, the expertise in installation techniques makes all the difference. For example, improperly sealed shower niches can lead to leaks that water over time exploits, causing mold and structural damage—an issue easily avoided with proper waterproofing steps, such as those outlined in [our shower waterproofing guide](https://tilecraftsmens.com/shower-renovation-ideas-modern-designs-for-a-luxury-feel).
Another common misconception revolves around carpet installation. Many assume that thicker padding always means better comfort, but in fact, excessive padding can cause seams to shift or wear unevenly. Skilled installers know the optimal pad thickness and the importance of proper stretching. You can discover professional secrets for flawless carpet results at [this link](https://tilecraftsmens.com/carpet-install-secrets-achieving-flawless-results-every-time).
When it comes to baseboards, a typical error is neglecting wall irregularities. Homeowners often miter cuts based solely on wall edges, but walls are rarely perfectly straight. The advanced technique involves scribing and coping to ensure a tight fit that looks professionally finished. For insights into designing and executing these details, visit [our baseboard trends in 2025](https://tilecraftsmens.com/baseboard-trends-in-2025-fresh-styles-for-every-room).
Flooring installation bears its own set of nuanced challenges. For example, many installers overlook proper subfloor preparation, leading to telegraphing issues discussed previously. Yet, even with a perfect subfloor, the order of operations matters: acclimating materials, correct expansion gaps, and precise nailing patterns prevent future buckling or gaps. For the most sophisticated strategies, check [our expert flooring tips](https://tilecraftsmens.com/transform-your-home-expert-flooring-installation-tips-for-2025).
Have you ever fallen into this trap? Let me know in the comments. Remember, mastery lies in the details—so invest in understanding these hidden nuances to ensure your renovation projects stand the test of time, avoid costly mistakes, and look stunning for years to come.Maintaining your flooring, showers, and baseboards requires the right tools and a proactive approach to avoid costly repairs down the line. One of my favorite investments is a high-quality moisture meter like the Protimeter Aquant, which helps me monitor subfloor conditions regularly, preventing hidden water damage that leads to telegraphing or mold. For flooring installations, I rely on a laminate floor roller—such as the Roberts 10-16—because it ensures even pressure distribution, reducing gaps and uneven surfaces during placement. When it comes to trimming and fitting materials, a precision scribing tool like the Bosch GT150 is invaluable; it allows me to create tight, custom fits around uneven walls or irregular surfaces, especially when installing baseboards or shower niches. Regularly inspecting caulking and grout lines with a good flashlight ensures early detection of leaks or cracks, saving you from larger issues like water damage or mold growth. Digital leveling tools have also become essential for me; tools like the Johnson Level & Tool ALH20 help verify the flatness of subfloors before installation, making sure I avoid the pitfalls of telegraphing issues. As we look to the future, advancements in smart technology—like Wi-Fi-enabled moisture sensors—will further streamline maintenance, alerting you immediately to changes that could compromise your home’s integrity. To keep your projects working smoothly over time, I recommend integrating these tools into your regular maintenance routine, checking moisture levels quarterly and verifying the flatness of subfloors before laying down new layers. How do I maintain my flooring and installations over time? By committedly using precise measuring and monitoring equipment—without these, small problems become big disasters. For instance, my tip is to regularly re-scan the subfloor with a moisture meter, especially in areas prone to humidity fluctuations. You can learn more about advanced installation techniques and the importance of proper maintenance in our [expert flooring tips](https://tilecraftsmens.com/transform-your-home-expert-flooring-installation-tips-for-a-stylish-home). Incorporating these practices will help ensure your floors and fixtures remain durable and beautiful for years to come. Want to elevate your maintenance game? Start by investing in a quality moisture meter and check your subfloor conditions this week—you’ll be surprised at the peace of mind it brings.
Learning the Hard Way: Hidden Pitfalls Nearly Everyone Misses
One of the most eye-opening lessons I encountered was realizing how small oversights during installation can snowball into major issues down the line, especially with showers and flooring. For example, rushing through moisture barrier application or neglecting proper subfloor prep often leads to mildew, warping, or telegraphing beneath the surface, which becomes a nightmare to fix after the fact. Another lesson I learned is that high-quality materials alone won’t save you—expert technique and meticulous measurements are crucial for flawless results. Lastly, I discovered that maintaining an ongoing awareness of subtle signals, like tiny gaps or uneven edges, can prevent costly repairs before they happen, saving both money and peace of mind.