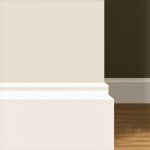
It was a lazy Saturday morning when I finally noticed the damp patch on my bathroom floor — right beneath the glass shower door. At first, I thought it was just leftover water from the shower, but the streaks of mold and the sour smell told a different story. That lightbulb moment hit me hard: my shower’s gasket was definitely not sealing properly anymore, and water was sneaking out wherever it could. I realized I wasn’t alone in this frustrating situation; many homeowners face the nightly drip, drip, drip of leaking shower doors that seem impossible to fix.
Why Fixing Leaks Matters More Than You Think
Leaky shower doors aren’t just a minor annoyance. Over time, they can cause significant damage, including water stains, mold growth, and even structural deterioration. Plus, a constant leak can boost your water bill and turn your bathroom into a slip hazard. That’s why I dedicated myself to uncovering pro-level solutions—so I wouldn’t have to call in professional help every time a gasket failed. Today, I want to share the top four gasket hacks I’ve learned that can help you seal up leaks effectively and keep your bathroom dry and safe.
Is DIY Gasket Fixing Worth the Hype?
Honestly, I used to believe only professionals could handle such repairs. My early mistake? Ignoring small issues until they became big disasters. Once, I attempted a quick fix with generic gasket tape, only to find the leak worsened months later. But after some research and trial, I discovered that with the right hacks, even a non-expert like me could make lasting repairs. If you’ve ever felt overwhelmed by sealing gaps or worried about causing more damage, don’t worry—these tips are designed to be straightforward and effective. Want to learn more about making your bathroom installations last? You might find my tips on [expert flooring installation](https://tilecraftsmens.com/expert-flooring-installation-tips-for-lasting-results-in-0915) helpful. Let’s dive into the first hack to reinforce your shower’s defenses.
Remove and Inspect the Old Gasket
Start by carefully peeling back the existing gasket using a utility knife or putty knife, being gentle to avoid damaging the glass or framing. Once removed, clean the area thoroughly with a mixture of vinegar and water to eliminate mold, soap scum, and old adhesive residues. Inspect for any cracks or damage to the surrounding frame or glass—if you notice significant deterioration, consider replacing the entire frame or seeking professional advice.
Choose the Right Replacement Gasket and Materials
Select a gasket that matches your shower’s specifications—measure the width and thickness accurately. Opt for a high-quality, waterproof, and mold-resistant silicone sealant, which offers flexibility and durability. For optimal results, avoid cheap, generic options that may degrade quickly or fail to seal effectively. Remember, the right materials are your first line of defense against leaks.
Prepare the Surface Properly
Before installation, ensure the surface is dry, free of dust and old adhesive. Use a lint-free cloth to wipe the entire area. Applying a primer designed for glass or metal can improve adhesion, especially on non-porous surfaces. Skipping this step may result in poor bonding and eventual leaks, which can be frustrating to fix later.
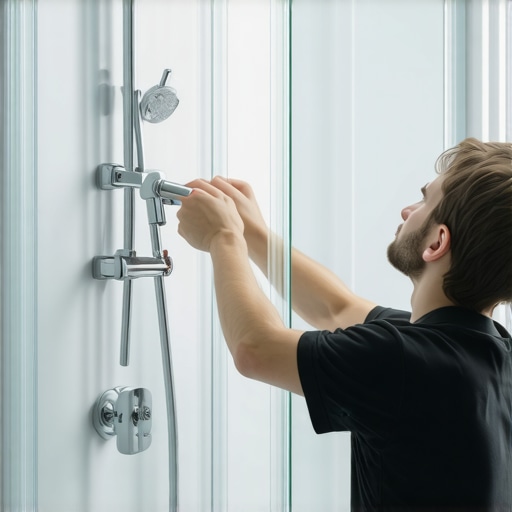
Applying the Sealant for a Tight Fit
Place the new gasket in the frame, pressing firmly into place. Use a caulking gun with a high-quality silicone to apply an even bead along the edges where the gasket contacts the frame and glass. Think of this as laying a waterproof barrier—be meticulous to avoid gaps or air bubbles. Smooth out the bead with a caulk finishing tool or your finger dipped in soapy water for a clean, professional look. During my last fix, I found that working slowly and checking for any gaps as I went made all the difference in achieving a leak-proof seal.
Seal Inside and Outside Edges
Focus on sealing all edges thoroughly—inside corners and along the frame—to prevent water from seeping into seams. Pay special attention to areas where water tends to pool or drip, such as shower door hinges or side edges. Use painter’s tape temporarily if needed for neatness, but remove it before the sealant cures. This detailed step ensures your gasket will stand up to daily use without letting water escape.
Final Checks and Maintenance Tips
After the sealant cures—usually 24 hours—test your repair by running water gently around the gasket. Look for any signs of leaks or gaps. If you notice issues, reapply sealant to problematic areas. For ongoing maintenance, regularly inspect the gasket and re-seal as needed—preferably every 1-2 years—to keep your shower leak-free. Personal experience taught me that proactive checks save time, money, and prevent mold growth in the long run.
Many homeowners assume that basic knowledge is enough for successful shower, carpet, and flooring projects, but in reality, there’s a lot of nuance often overlooked. For instance, a common misconception is that simply sealing a shower is sufficient to prevent leaks. In truth, the precise application of waterproofing layers, proper slope creation, and thorough surface prep are critical—skipping any step can lead to costly water damage. When it comes to carpet installation, many believe that stretching alone guarantees a wrinkle-free finish. However, the order of operations, quality of tack strips, and subfloor conditions play a decisive role. For flooring, a prevalent mistake is underestimating subfloor preparation. As expert installers warn, uneven or unstable subfloors cause failures like gaps, buckling, and squeaks over time. Before starting, examine the subfloor for moisture and adhesion issues, because hidden flaws can sabotage your effort down the line.
A nuanced point that surprises many is the importance of room climate control during installation. Excessive humidity during installation may cause materials to expand or contract, resulting in gaps or buckling later. For instance, when installing hardwood or cork flooring, stability is achieved only if the environment’s humidity is kept within recommended ranges—typically 35-55%. Experts recommend using humidifiers or dehumidifiers accordingly. An insightful study by the National Wood Flooring Association emphasizes that climate management is essential for longevity, yet many DIYers neglect this step, risking warranty voids or future repairs.
Curious about how to prevent common pitfalls in your next project? Learn the secrets to flawless results by exploring guides on [expert flooring installation](https://tilecraftsmens.com/transform-your-home-expert-flooring-installation-tips-for-2025). Moreover, remember that detailed surface prep, understanding material behavior, and attentive waterproofing are fundamental—more than just tick-the-box steps. Also, don’t forget the importance of correct seam placement and joint strategies, especially for carpets and vinyl planks, which can develop frays or gaps if installed poorly. For advanced insights into seamless carpet joins, visit my post on [carpet install secrets](https://tilecraftsmens.com/carpet-install-secrets-achieving-flawless-results-every-time).
Finally, maintain an eye for emerging trends like hidden waterproofing techniques and innovative materials, which significantly improve project durability. You might be surprised how small adjustments—like using the right pre-treatment or sealant—can extend your installation’s lifespan. For example, considering a quick upgrade on your waterproofing approach might save you thousands in repairs later. In summary, mastering these nuanced details ensures your renovation not only looks good initially but withstands the test of time. Have you ever fallen into this trap? Let me know in the comments.
Maintaining your home improvements is as crucial as the installation process itself. Having the right tools and a disciplined maintenance routine ensures your carefully crafted floors, baseboards, and showers stay in prime condition for years. I personally swear by some specific equipment and software that streamline upkeep and help me catch small issues before they snowball into costly repairs.
Invest in Precision Tools for Longevity
For example, a high-quality digital moisture meter, like the Tramex MMS2, is indispensable for monitoring subfloor and framing moisture levels, especially before installing flooring or during maintenance. Tracking moisture content prevents wood warping or mold growth, which often sneaks in when levels fluctuate. For sealing gaps around baseboards or shower niches, I prefer a professional-grade caulking gun such as the Max Pro Gun. Its smooth trigger action reduces hand fatigue and ensures even application, which is vital for leak-proof sealing.
Leverage Software for Scheduling and Documentation
Using project management tools like Trello or specialized maintenance apps helps organize inspection schedules for sealing, stain touch-ups, or re-caulkings. Documenting these tasks creates a maintenance timeline, prolonging your installations’ lifespan. Remember, a consistent schedule of inspecting grout lines or baseboards can spot early signs of damage, making repairs simple and less invasive. This approach is recommended by industry experts, including the professionals at Tile Craftsmen.
Prepare for Future Repairs with Quality Equipment
Having a flexible, refillable spray bottle with mold-resistant cleaning solution allows quick cleanup of mold or soap scum around shower seals. Similarly, a grout scrub brush with stiff nylon bristles is perfect for routine cleaning without damaging surfaces. For large areas, a cordless oscillating tool fitted with multi-purpose sanding pads facilitates touch-up sanding of baseboards or drywall after minor repairs, keeping everything looking pristine. These tools aren’t just for initial installation—they’re essential for ongoing maintenance.
Trending Trends in Maintenance Gear
Looking ahead, smart home devices will increasingly play a role. Wireless sensors embedded in flooring or walls can alert homeowners to rising humidity or dampness, signaling the need for intervention—but this technology is still evolving. Nonetheless, pairing traditional tools with these innovations will provide comprehensive oversight, ensuring home features remain durable over time. Industry leaders like Tile Craftsmen suggest staying abreast of these developments.
How do I keep my flooring and fixtures performing well over time?
Consistent, proactive maintenance is key. Regular cleaning with appropriate products, inspecting seals and grout, and reapplying sealant or caulk as needed help prevent minor issues from escalating. Scheduling seasonal checks—especially after periods of high humidity or heavy use—can extend the lifespan of your installations. Remember, a well-maintained home not only looks better but retains its value and functionality longer.
If you’re ready to take your maintenance routine to the next level, try using a moisture meter before re-sealing your shower or replacing baseboards. This small step can save you from future headaches and ensure your investments last. For more detailed insights, check out this guide.
By integrating quality tools and a disciplined maintenance plan, you maximize your home’s durability and beauty. Don’t wait until small issues become disasters—start implementing these strategies today!
The Hardest Lesson I Learned About Shower and Floor Magic
One of the most valuable lessons I internalized is that even small overlooked details—like surface prep or the right sealant—can make or break your project’s longevity. I used to rush through these steps, thinking they were minor, but failures taught me that patience and precision are crucial for long-lasting results.
3 Myths About Shower and Flooring Success That Held Me Back
Initially, I believed that a quick fix with sealant would last forever or that picking the cheapest materials was enough. These misconceptions led to recurring leaks and rework. Real expertise comes from understanding material compatibility, proper installation techniques, and ongoing maintenance.
What Experts Won’t Tell You About Installing with Confidence
Most pros know that environmental conditions, like room humidity, dramatically affect installation outcomes—yet, this fact is often overlooked by DIYers. Managing climate during and after installation ensures your surfaces stay solid and leak-proof for years.
Curated Resources to Elevate Your Home Upgrades
My go-to toolbox includes a high-quality digital moisture meter, essential for assessing subfloor and framing conditions—trust me, it saves headaches later. For sealing gaps effectively, I recommend the Max Pro gun for even application, ensuring no water sneaks through. Dive into expert tips with guides like these flooring installation insights to see what truly works. For keeping track of maintenance routines, apps like Trello help me stay organized and proactive, which is critical for long-term success.
Your Next Step to Home Confidence
Tackling these projects with awareness of behind-the-scenes details transforms an ordinary renovation into a lasting masterpiece. Now, it’s your turn: What’s the most complex part of your shower or flooring project that you’re eager to master? Share your story below—I love hearing about your home journeys!