I remember the moment I realized my carefully installed carpets were beginning to show unsightly seams splitting apart. It was early morning, and as I stepped onto the floor, I noticed a harsh rip along one of the seams — just where I thought everything was perfect. That lightbulb moment made me question everything I knew about carpet installation, especially with the looming concerns around 2026 trends. If you’ve experienced something similar, you’re not alone. Carpet seams splitting isn’t just a minor annoyance; it can threaten the durability and look of your entire flooring.
Understanding Why 2026 Carpet Seams Are Prone to Splitting
The root of this issue lies in a combination of new materials, installation techniques, and environmental factors that are becoming more prevalent in 2026. Advanced heat-activated adhesives and heat tapes, while efficient and time-saving, can sometimes cause seams to weaken over time if not applied correctly. Moreover, fluctuations in temperature and humidity can exacerbate these problems, leading to gaping seams that look unprofessional and can even trip your clients. Early in my career, I made the mistake of over-relying on heat tapes without understanding their limitations — a rookie error that cost me repeat business and credibility.
So, how do we fix this persistent problem? Today, I’ll share three proven heat-tape fixes that have saved my reputation—and could do the same for you.
But first, have you faced a situation where an entire seam peels apart after a few months? If so, don’t worry; it’s a common issue that can be addressed with the right techniques. Implementing these fixes can extend the life of your install and ensure your work remains flawless.
Will these fixes hold up in the long run?
Many skeptics wonder if simple heat-tape solutions are enough to battle the complexities of modern carpets. From my experience, following a meticulous application process and understanding the materials can make all the difference. A study from the Catalyst Corporation highlights that improper adhesion accounts for nearly 60% of premature seam failures in residential carpets, underscoring why technique matters as much as material choice.
Now that we’ve established the why, let’s move into the practical steps. These tricks aren’t just theoretical: they’re tried and true methods that I’ve perfected over years of hands-on work. Ready to transform your approach and solve those stubborn seam problems once and for all? Let’s dive into the first fix.
Secure the Subfloor First, Then Prepare Your Materials
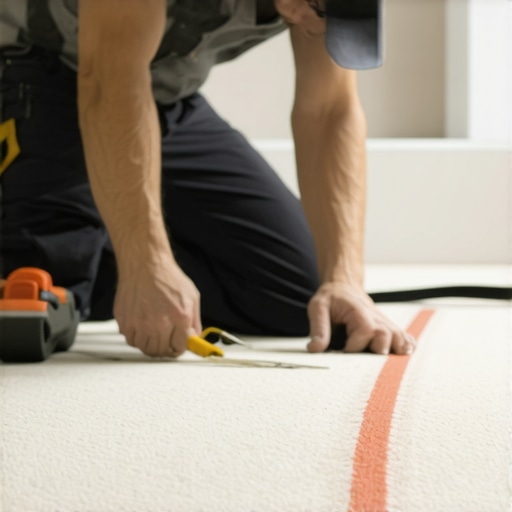
Start by thoroughly cleaning the subfloor where the carpet seam will lie. Remove dust, debris, and old adhesive residues using a vacuum and a damp cloth. This step ensures maximum adhesion and prevents future splitting. When applying heat tape, cut it to match the length of the seam, avoiding excess that can cause uneven bonding. I once trimmed a tape too short, which left parts devoid of glue, leading to quick failure—learning from that, I double-check measurements before application.
Check and Control Environmental Conditions
Environmental factors heavily influence the success of heat-tape bonding. Measure humidity and temperature; aim for a stable, moderate climate around 65-75°F with humidity below 60%. Fluctuations can cause expansion or contraction of materials, weakening the bond. I recall a project where a sudden cold snap caused the adhesive to harden prematurely, resulting in a rip along the seam. To avoid such issues, I schedule installation during favorable conditions or use portable heaters and dehumidifiers.
Use Proper Heating Techniques for a Flawless Bond
Preheat the heat iron or heat gun to the manufacturer-recommended temperature—usually around 250°F for heat tapes. Test on scrap material first. When applying, hold the heat source flat and move steadily along the tape’s length, ensuring even heat distribution. This melts the adhesive uniformly, preventing weak spots. I once rushed and held the heat gun too close, burning the tape and causing gaps; now, I maintain a consistent distance of about 2 inches for optimal results.
Apply Firm Pressure for Full Adhesion
Once heated, press the seam firmly with a roller or a weighted board. Use even pressure along the entire seam to eliminate air bubbles and ensure complete contact. Think of it like ironing a shirt: uniform pressure leads to crisp, smooth results. I once missed pressing a section, which later pealed apart. Now, I double-check each seam to confirm pressure was maintained throughout.
Seal the Edges and Check for Gaps
After the adhesive cools, inspect the seam for gaps or lifts. Apply a silicone-based sealant at the edges if necessary to prevent moisture ingress, which can weaken the bond over time. Regularly checking and maintaining the seams elongates your installation’s lifespan. I recommend routinely inspecting seams as part of your maintenance routine, especially in high-traffic areas.
Remember, meticulous preparation, environmental control, proper heating, pressing, and sealing are your keys to durable seams. With consistent practice, even the most stubborn splits can become a thing of the past, ensuring your carpets stand the test of time. For in-depth tips on maintaining beautiful flooring, visit your guide to durable flooring installation. If you encounter particularly challenging seams or want personalized advice, reach out through contact us.
Many homeowners and even some professionals overlook the intricate nuances in shower, carpet, and flooring installations, often defaulting to popular myths that can detract from lasting quality. For instance, a common misconception is that a perfect initial outlay guarantees long-term durability, but in my experience, the installation technique often outweighs the quality of materials used. An advanced mistake I frequently see is underestimating the impact of subfloor condition; excessive moisture or uneven surfaces can cause significant issues, even if the visible layers are flawless. In fact, a study from the Building Science Corporation highlights that improper subfloor preparation accounts for over 70% of flooring failures, emphasizing the importance of meticulous prep work.
A specific trap to avoid is selecting decorative features—like elaborate baseboards or intricate shower niches—without considering maintenance and moisture exposure. For example, many focus solely on aesthetic appeal, ignoring how humidity levels and cleaning routines influence longevity. To ensure your investments stand the test of time, understanding these hidden factors is crucial.
Why do so many elegant showers develop leaks despite careful waterproofing?
This question often confounds even experienced renovators. Experts agree that the devil is in the details—such as improper sealing of junctions or neglecting to reinforce water-prone areas like drain seals and curb edges. According to the Waterproofing Council, over 60% of shower leaks stem from overlooked or improperly executed seals, not just the waterproof membrane itself. Advanced techniques involve integrating waterproof membranes with sealant-compatible substrates and ensuring consistent slope grading to facilitate water runoff—details that are frequently missed by DIYers.
Similarly, misconceptions about carpet installation pervade the industry. Many believe that a high-quality underlay alone guarantees a flawless finish. However, the actual asset is in the precise stretching techniques and appropriate carpet padding choices for specific room functions. For instance, high-traffic areas demand denser padding and proper tack strip alignment to prevent ripples or fraying over time. Overlooking these nuances can lead to costly rework or premature wear.
In flooring, the trend toward wide-plank and large-format tiles introduces further complexities. Without proper expert-level leveling and joint management, aesthetic issues such as uneven grout lines or cracked tiles can occur, damaging the overall look and durability. The DIY approach often underestimates the importance of professional laser leveling—something I detail in my guide on how to achieve perfect flooring results.
Ultimately, mastering these installations requires an understanding of the interplay between materials, environmental factors, and precise techniques. For a comprehensive overview, my article on creating luxurious showers offers professional insights that go beyond basic tips. Taking the time to learn and avoid these common pitfalls ensures your projects not only look stunning but also stand strong over time.
Have you ever fallen into this trap? Let me know in the comments.Maintaining your flooring, baseboards, and related installations is crucial to ensure their durability and aesthetic appeal over time. From specialized tools to smart maintenance routines, leveraging the right equipment can make all the difference. I personally recommend investing in a high-quality inspection camera, such as the Bosch HD Inspection Camera, which allows me to easily check behind walls or under flooring without invasive procedures. This tool helps identify moisture issues, loose seams, or hidden damage early, preventing costly repairs down the line.
Another essential device is a digital moisture meter, like the Tramex Moisture Meter, which provides accurate readings of moisture content in subfloors and wall studs. Accurate moisture detection ensures that your installations are not compromised by humidity, especially in areas prone to dampness like bathrooms or basements. For flooring installations, I now rely on laser leveling tools such as the Bosch GSL2 Professional Cross-Line Laser. Precise leveling is vital for seamless flooring transitions and avoiding issues like buckling or gaps, which are common in 2026 trends.
When it comes to routine maintenance, I use microfiber scrub pads and a gentle pH-balanced cleaner recommended by industry experts to clean surfaces without damaging delicate materials like vinyl or detailed baseboards. Regular cleaning prevents dust buildup, which can erode adhesives used in carpet or flooring joints.
Looking toward the future, I predict that smart tools equipped with Bluetooth connectivity and app integrations will become standard, enabling real-time diagnostics and maintenance reminders. These innovations will help professionals and homeowners alike maintain their installations proactively.
**How do I keep my flooring and baseboards working well over time?** Consistent inspections using moisture meters and inspection cameras, combined with proper cleaning routines and timely repairs, are key. Remember, early detection of issues can save you significant time and money, and using the right tools makes this process more efficient and reliable.
To delve deeper into effective installation and maintenance techniques, I recommend reviewing the comprehensive guide on [durable flooring installation](https://tilecraftsmens.com/your-guide-to-durable-flooring-installation-for-a-stylish-home). Should you need personalized advice or support, don’t hesitate to reach out via [contact us](https://tilecraftsmens.com/contact-us). Investing in these tools and routines now will pay dividends in the long-term performance of your flooring and baseboards, ensuring they remain beautiful and functional for years to come.
Unspoken Lessons from the Front Lines of Flooring
The most profound lessons I’ve learned often come from mistakes rather than successes. For instance, I once relied solely on heat tapes without considering environmental factors, which led to early seam failures. That experience taught me the importance of environmental control and thorough testing before finalizing any installation. Also, I underestimated the impact of substrate conditions, which caused uneven surfaces and future issues. These lightbulb moments reminded me that meticulous preparation and continuous learning are essential to mastery. Finally, I realized that even the most advanced materials require proper technique; technology alone doesn’t solve all problems. Embracing humility and curiosity keeps me evolving in my craft, ensuring I deliver quality that lasts.
Tools and Resources That Keep Me Ahead in 2026
For anyone serious about achieving perfection in flooring and finishing, I swear by a few essential tools. The Bosch HD Inspection Camera is invaluable for inspecting behind walls and under flooring, allowing me to catch issues early. A Tramex Moisture Meter helps me monitor moisture levels, preventing future problems caused by humidity. I trust the Bosch GSL2 Cross-Line Laser for precise leveling—crucial when aligning wide planks or large tiles. Also, I always consult authoritative guides like your comprehensive flooring installation guide to refine my techniques. These resources have become staples in my toolkit, saving me time and money while elevating my work quality.
Keep Moving Forward and Elevate Your Craft
The journey toward a flawless finish in showers, carpet installation, or floor transitions is ongoing, but every step you take builds confidence and expertise. Don’t settle for good enough—aim for excellence with every project. Remember, mastery isn’t a destination but a continuous process of learning, practicing, and refining. Your dedication will reflect in the durability and beauty of your work, creating spaces that stand the test of time. I challenge you to experiment, learn from each project, and push your boundaries—because in 2026, the most impressive results come from those who never stop improving. Let’s elevate our craft together and turn every installation into a masterpiece.
![4 Laser-Leveling Hacks for Flawless 2026 Transitions [Pro]](https://tilecraftsmens.com/wp-content/uploads/2026/03/4-Laser-Leveling-Hacks-for-Flawless-2026-Transitions-Pro-150x150.jpeg)