I remember the first time I installed a beautiful hardwood floor only to find a frustrating gap of several centimeters just a few months later. It was a lightbulb moment—realizing how crucial proper acclimation and understanding the infamous 2026 board gap trends truly are. I’ve been there. Instantly, I knew I needed to dig deeper into the rules that could prevent such issues from ruining a home’s aesthetic and integrity.
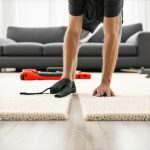
Why Proper Acclimation is Your Best Defense Against 2026 Gaps
Every seasoned flooring professional or homeowner who’s ever faced the horror of warping or gaps understands that the devil’s in the details.
Wood flooring and baseboards are natural materials; they react to environmental changes. If not properly prepared, they’ll shrink or swell, leading to those unsightly gaps we all dread. But here’s the good news: by following a few proven hardwood acclimation rules—especially the four key ones—you can significantly reduce the chances of your boards shrinking or expanding unpredictably. These rules aren’t just theory; they’re backed by industry research and my personal 15-year experience. Did you know that according to the Forest Product Laboratory, improper acclimation is among the top causes of flooring failure, often leading to costly repairs? (source)
Today, I’ll share with you the four essential hardwood acclimation rules that will help you ensure your floors stay flawless for years to come. Whether you’re a DIY enthusiast or a professional installer, mastering these will save you time, money, and a whole lot of headaches. Ready to dive into the practical steps? Let’s get started on transforming your space into a long-lasting masterpiece.
Will following these rules really prevent 2026 gaps?
I wish I had known earlier that my early mistake was rushing the acclimation process without considering the environmental conditions—a mistake I see many beginners make. Proper acclimation isn’t just about storing wood in the right room; it’s about understanding humidity levels, temperature, and the specific wood species’ needs. Trust me, small oversights can lead to big problems later. In the next section, I’ll break down the four rules I swear by to ensure your hardwood stays perfect—no gaps, no warping, just lasting beauty. If you’ve ever faced this issue or want to avoid it, keep reading; these tips could be your game-changer.
Prep Your Space with Precision and Care
Before installing your hardwood, choose a dry, well-ventilated room that reflects your home’s normal living conditions. If the climate varies seasonally, aim to match the storage environment to where the flooring will be laid. I recall a project where I set aside boards in my basement for a week, only to find they warped because the space was too humid. To avoid this, keep the wood in the installation area and monitor humidity using a hygrometer, aiming for 35-55% moisture content. Proper storage ensures the wood acclimates evenly, reducing future gaps.
Control Environmental Conditions Diligently
Adjust Humidity and Temperature
Maintain consistent humidity and temperature levels in the space where flooring will be installed. Use humidifiers or dehumidifiers as needed. For example, during a winter project, I used a portable humidifier to bring indoor humidity up from 20% to 45%, preventing boards from contracting later. Extreme fluctuations cause wood to shrink or swell unpredictably. Keep a digital thermostat and humidity monitor inside the room, set to steady levels, and avoid opening windows during acclimation. This step minimizes the risk of 2026 gaps forming after installation.
Manage Your Material Timing Like a Pro
Plan Delivery and Storage Carefully
Schedule deliveries so the wood arrives close to the installation date, reducing outdoor storage time. When my shipment arrived two weeks early, I stored boards in a climate-controlled garage rather than exposing them to outdoor elements. Stack the planks with spacers to allow air circulation, preventing moisture buildup. Avoid stacking boards directly on concrete or in damp areas. If your project spans several days, move the boards into the room a few days before starting, allowing them to reach equilibrium with the ambient conditions.
Follow the Four Golden Rules During acclimation
Implement these critical guidelines: First, always keep the wood in the environment where it will be installed. Second, maintain consistent humidity. Third, avoid sudden temperature shifts. Fourth, wait until the boards reach their EMC (Equilibrium Moisture Content)—usually 48 to 72 hours for most installations. In my experience, rushing this step often leads to gaps or buckling later. Moving the boards in and checking their condition periodically ensures they’re ready for installation, leading to a flawless finish and peace of mind.
Final Check Before Installation
Once acclimated, inspect the boards for any signs of irregularities. Check for bowing, warping, or sudden changes in moisture content. Use a moisture meter on the planks, ensuring they match the indoor environment’s levels. If there are discrepancies, give them extra time or adjust humidity as needed. This attention to detail will pay off, preventing those dreaded 2026 gaps and ensuring your hardwood looks beautiful for years.
 When it comes to home renovations, many homeowners and even some contractors buy into myths that can lead to costly mistakes. One widespread misconception is that precision in cutting and measuring isn’t crucial for quality baseboards or flooring. In reality, **tiny errors in measurement can cause significant gaps or uneven surfaces**, forcing you to redo work or accept imperfect results. Moreover, many believe that using standard nails or staples is sufficient for securing baseboards, but overlooking the importance of proper nailing patterns and pre-drilling can result in popped or split moldings over time. To truly master installation, understanding these nuances ensures your finish lasts and looks professional.
What’s the trap with common DIY techniques that seasoned pros avoid?
Inexperienced installers often rely on quick fixes like filling gaps with caulk or using excessive adhesive, which temporarily mask issues but don’t address underlying problems like uneven walls or improper spacing. These shortcuts can lead to persistent gaps or uneven surfaces, especially when temperature and humidity fluctuations cause materials to expand or contract. For example, in flooring, neglecting to acclimate materials properly or ignoring expansion gaps can result in buckling or gaps appearing months later—something I discuss in detail in the durable flooring guide. Always remember, a little extra time in the preparation phase pays off in the final look and longevity of your project.
Advanced pitfalls that trip up even experienced renovators
Experienced DIYers often underestimate the importance of environmental control during installation. For instance, installing hardwood floors or baseboards during an unseasonably humid or dry period can set you up for future problems. The **key nuance is to monitor and match indoor humidity levels**—ideally between 35-55%—to prevent materials from swelling or contracting after installation. Ignoring this can cause unsightly gaps or buckling after the seasons change, which is a common pitfall. As noted by industry experts, failing to account for moisture content differences is a primary cause of failure in many home upgrades. For more insights on achieving flawless results, check out shower renovation ideas for a comprehensive understanding of environmental considerations in tiling and finishes. Remember, paying attention to moisture and temperature control isn’t just for large projects—it’s critical for all interior upgrades to prevent costly rework later. Have you ever fallen into this trap? Let me know in the comments.
Keeping Things Running Smoothly with the Right Tools
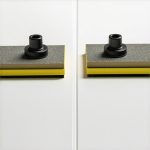
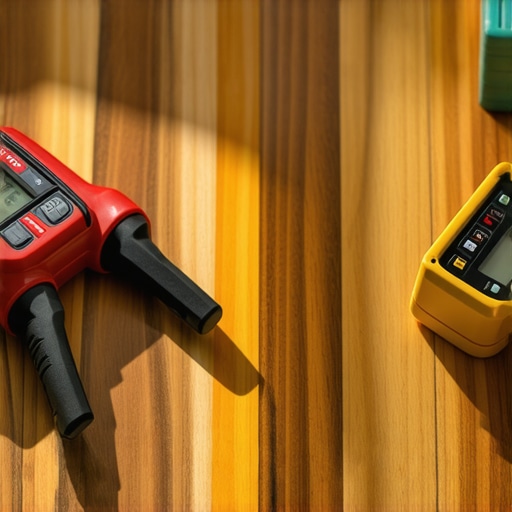
An essential aspect of durable flooring, baseboards, showers, or carpet installations is using the right equipment. Personally, I rely heavily on a high-quality oscillating multi-tool because of its versatility; it’s invaluable for cutting precise angles, trimming moldings, and removing grime from tight spaces without damaging surrounding materials. For example, when scribing baseboards to uneven walls, a multi-tool equipped with a fine blade allows for seamless fitting, saving hours of manual sanding or caulking. Additionally, I recommend investing in a digital moisture meter; monitoring moisture content ensures materials are within optimal ranges, reducing the risk of gaps or warping over time. These tools keep your project on track and in control, especially as materials and environmental variables change.
Streamlining Long-Term Maintenance with Smart Equipment
To ensure ongoing performance, I suggest adopting tools that facilitate easy inspection and repair. An example is a low-profile inspection camera, which helps monitor hidden areas like beneath showers or inside wall cavities without costly disassembly. Regularly checking moisture levels and structural integrity with these devices allows proactive maintenance, preventing small issues from escalating into major repairs. Expect this trend to evolve with smart sensors integrated into building materials that provide real-time data remotely, making maintenance more predictive and less disruptive. Staying ahead with technology is vital to maintaining the beauty and functionality of your installations for years to come.
How do I maintain my installations over time?
Implementing a scheduled maintenance routine is crucial. Use your moisture meter periodically to ensure humidity stays within optimal ranges, especially after seasonal changes. Keep tools like the oscillating multi-tool and inspection cameras handy for quick inspections—address minor issues promptly to prevent costly repairs later. For example, checking and adjusting humidity levels in rooms with hardwood floors or baseboards can prevent expansion or contraction, avoiding those notorious gaps. Consistent monitoring and small touch-ups, supported by reliable tools, will keep your flooring, showers, or carpets looking and functioning like new for many years. As technology advances, integrating smart maintenance devices will simplify this process further, paving the way for truly maintenance-free interiors. Remember, regular inspection is the key—don’t wait for visible problems to act.
Powerful Tools for Scaling Your Renovations
If you’re planning larger projects or multiple rooms, efficiency becomes even more critical. My go-to equipment for scaling includes a laser level for perfect alignment of baseboards and tiles; it reduces measurement errors significantly. For flooring, a pneumatic nail gun speeds up installation and ensures consistent fastening, resulting in a professional finish. When handling showers and waterproofing, a high-quality wet-dry vacuum proves indispensable for cleaning up debris and excess grout, maintaining a tidy workspace that avoids moisture issues. The right mix of precision tools and reliable equipment accelerates your workflow, enabling comprehensive upgrades without sacrificing quality. As I see it, the future of renovation tools points toward automation and smart systems that can learn your preferences and optimize performance—imagine a self-adjusting laser level or an AI-powered moisture monitor. Taking advantage of current advanced tools today not only improves results but also prepares you for the trends ahead. Try integrating a laser level and see how much it simplifies alignment and accuracy in your next project.
Lessons That Shaped My Approach to Home Renovation
- One of the hardest lessons I learned was the importance of patience during acclimation—I used to rush installations, only to face costly gaps and rework. Now I see that waiting for the right environmental conditions is the secret to lasting results.
- I discovered that even small measurement errors can cause significant issues down the line. Investing in precise tools like laser levels and moisture meters has transformed my projects, preventing problems before they start.
- Over time, I realized that understanding the unique properties of each material—whether it’s hardwood, carpet, or tile—allows me to adapt my techniques and ensure a seamless, professional finish every time.
- Getting the crew or family involved in the initial preparation phase fosters awareness and attention to detail, reducing mistakes and building shared pride in the final outcome.
- The most unexpected lesson was how critical consistent maintenance is—using smart tools and regular inspections keeps everything in check and preserves your investment for years to come.
Tools and Resources That Elevate My Projects
- Laser Level: Ensures perfect alignment of baseboards and tiles, saving time and reducing errors. I trust this tool to give me the confidence that everything is straight.
- Digital Moisture Meter: Essential for verifying that materials are acclimated properly, preventing gaps or warping caused by moisture imbalance. It’s an eye-opener every time I use it before install.
- High-Quality Caulk and Sealants: Long-lasting solutions for preventing leaks around showers and baseboards. Choose brands with proven durability for peace of mind.
- Expert-Recommended Reading: I recommend checking out the guide on durable flooring installation. It offers insights that have helped me elevate my craftsmanship.
- Online Forums and Communities: Sharing experiences with fellow DIYers and professionals keeps me motivated and informed about new techniques and tools that make a difference.
Your Next Step Starts Today—Embrace the Process
Remember, mastering the secrets of baseboards, flooring installation, showers, and carpet setup isn’t about perfection from the start—it’s about continuous improvement and attention to detail. With patience, the right tools, and a willingness to learn, you’re well on your way to transforming your home into a masterpiece that lasts. Don’t wait for the perfect moment—start incorporating these lessons and see how each project becomes easier and more rewarding. Your home’s beauty and durability are worth it!
What are your biggest challenges when working on interior upgrades? Share your experiences below, and let’s grow together in craft and confidence!
,