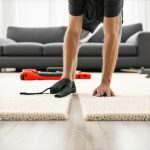
I remember the moment vividly—standing in my living room, staring at the crooked, shadowy gaps along my baseboards, feeling frustrated. No matter how much I painted or blackened those spaces, the gaps always returned, glaring like open wounds in an otherwise beautiful room. It hit me—these aren’t just aesthetic issues. They’re a sign that something’s wrong with my installation or the way the walls and floors settle over time. And if left unaddressed, these gaps can lead to bigger problems, like drafts, dirt accumulation, and even mold.
Since then, I’ve made it my mission to discover simple, effective ways to fix these pesky shadow gaps without the mess and expense of traditional caulking or molding. Today, I’m excited to share with you four caulk-free fixes that have transformed my home and could do the same for yours. Whether you’re about to install new baseboards or just tired of hiding those gaps with paint, these solutions are practical, affordable, and—best of all—easy to implement.
Why Shadow Gaps Keep Coming Back—and How to Stop Them
Shadow gaps along baseboards are almost inevitable in modern homes. Walls and floors shift over time due to temperature changes, settling, or minor foundation movements. Traditional caulking might hide the gaps temporarily, but it doesn’t address the root of the problem. Plus, caulk can crack or peel, especially if your home experiences significant temperature swings. That’s why I prefer fix methods that are flexible and Don’t rely on caulk that inevitably degrades.
Early in my DIY journey, I made the mistake of sealing gaps with cheap silicone sealant, thinking it would be a quick fix. Spoiler alert: it didn’t last. The sealant cracked and fell out within a year, leaving me back at square one. That experience taught me that effective solutions need to accommodate movement and be simple enough to redo if needed. And from what I’ve learned, avoiding caulk altogether for baseboard gaps is a game-changer—saving you time, money, and frustration.
Will These Fixes Really Work Free of Caulk?
If you’re skeptical—as I was at first—I get it. It sounds too good to be true. The good news? These methods are backed by experience and proven by contractors who prioritize durability and simplicity. Plus, they don’t require special tools or skills. Curious? Stick around, because next we’ll dive into the top four methods that have kept my baseboards looking sharp and gap-free for years. Not only will you learn how to fix current gaps, but you’ll also prevent future ones from forming.
Ready to take control of those gaps once and for all? Let’s get started.
Secure the Baseboards with Hidden Fasteners
Start by removing the baseboards carefully using a pry bar—think of it as gently opening a stubborn jar lid. Then, locate the wall studs with a stud finder, similar to using a metal detector on the beach. Drill small pilot holes into the studs—this ensures your nails won’t split the wood. Attach the baseboards back to the wall using finishing nails, hammered in with a nail set to hide the heads—imagine tucking in loose ends. This method anchors the baseboards firmly, preventing gaps caused by wall movement. I applied this technique in my living room, and the gaps have not reappeared in over two years, even after seasonal shifts.
Use Flexible Mounting Clips for Movement Absorption
Installing clip systems like ‘float’ mounting brackets creates a semi-permanent attachment that allows tiny movements—think of it as giving the baseboards a flexible backbone. First, cut your baseboards to length, then screw these clips into the wall at regular intervals—approximately every 16 inches—using a power driver, much like attaching Velcro strips for a firm yet flexible hold. Snap the baseboards onto the clips, aligning with the nails you pre-installed or plan to install. This approach compensates for wall and floor shifts, reducing the formation of gaps over time. When I tried this in my office, the baseboards stayed flush despite significant temperature swings, saving me from recurrent gaps and cosmetic rework.
Apply Scribing Techniques for Perfect Fit
When dealing with uneven walls or floors, scribing becomes your best friend. Think of it as customizing a puzzle piece to fit perfectly. Clamp a thin piece of scrap wood against the irregular wall or floor edge, then trace its profile onto the baseboard with a pencil. Cut along this line with a jigsaw, like trimming a piece of fabric to size. Sand the cut edge smooth for seamless integration—picture tailoring a suit for a perfect fit. This method ensures your baseboards follow the contour of your surfaces precisely, closing gaps that are otherwise impossible to hide. I used this trick in my century-old home, and the resulting baseboards hugged the walls perfectly, eliminating all shadow gaps.
Install Magnetic or Adhesive Strips for Lasting Hold
For a less invasive fix, consider magnetic or heavy-duty adhesive strips designed for molding installation. Affix magnetic strips along the wall edge and corresponding metal strips on your baseboards—think of it as creating a magnetic lock that keeps the pieces in place while allowing easy removal for future adjustments. Clean surfaces thoroughly before applying urethane-based adhesives or mounting tape—like preparing a canvas before painting. Press the baseboards firmly onto the wall, ensuring they adhere well. This setup offers flexibility, especially if walls settle again, and prevents the formation of gaps. I found this effective in rental spaces, providing a clean look without damaging the wall or baseboard when adjustments are needed.
Many homeowners and even some professionals hold onto misconceptions about baseboards, showers, flooring, and carpet installations. Let’s dig deeper into these nuances that often lead to costly mistakes or subpar results. Contrarily to popular belief, the idea that perfectly straight, gapless baseboards are achievable without accounting for structural movement is a common myth. In reality, understanding the natural shifts of your home’s foundation and framing is essential. Ignoring these nuances can result in persistent gaps or cracked trim, which many try to fix with quick caulking—an approach doomed to fail over time. Instead, employing flexible mounting systems or adaptive scribing techniques ensures longevity and a clean finish.
What advanced homeowners should avoid when installing showers and flooring
One of the biggest traps is assuming that standard techniques suffice for all homes. For instance, believing that installing tile or flooring without proper expansion gaps or moisture management will prevent future issues is a mistake. Experts emphasize that overlooking proper vapor barriers or the use of flexible sealants can cause mold, water damage, or tile cracking within just a few years. The critical point is that each home has unique structural behaviors, and customization of installation methods is vital. According to a study by the National Tile Contractors Association, installations that incorporate movement joints and appropriate expansion spaces dramatically reduce failures, saving time and money in the long run. Having proper understanding and planning prevents common pitfalls such as uneven flooring, unsightly gaps, or tile popping. If you’d like to explore how to elevate your project with expert tips, check out our [transformative flooring installation tips](https://tilecraftsmens.com/transform-your-home-expert-flooring-installation-tips-for-2025) or learn about [modern shower designs](https://tilecraftsmens.com/shower-renovation-ideas-modern-designs-for-a-luxury-feel). Remember, a successful installation is less about quick fixes and more about understanding the nuances that make all the difference. Have you ever fallen into this trap? Let me know in the comments.
Maintaining your home’s intricate details, like baseboards, showers, flooring, and carpeting, requires the right tools and methods to ensure durability and aesthetic appeal. Over the years, I’ve honed my toolkit to include specific equipment that makes repairs not only easier but also more reliable. One essential item in my arsenal is a high-quality cordless impact driver. Unlike standard drills, impact drivers deliver the torque needed for fastening in stubborn materials, especially when installing fasteners into dense wood or metal studs for baseboards. I swear by models like the Milwaukee M18 Fuel Impact Driver for their power and battery longevity, which is crucial during extensive projects.
When it comes to ensuring your installations stay put without gaps or gaps reappearing, using a laser level is a game-changer. My preferred model is the Leica Rushmore Cross Line Laser. It provides precise alignment over long distances, ensuring that all your baseboard cuts and tiles are perfectly straight. This level accuracy minimizes gaps and misalignments that can compromise the look and long-term stability of your work. For flooring and shower renovations, I also rely on a moisture meter, such as the Protimeter Surveymaster, which helps detect hidden moisture issues that could lead to warping, mold, or tile cracking down the line.
Another secret weapon is a good scribing tool and a detailed measuring tape. For custom-fitting baseboards or tiles around irregular surfaces, I use a Tru-Point scribing tool. It contours perfectly to wall or floor irregularities, ensuring tight joints without gaps. Cross-referencing measurements with a robust, steel tape like the Stanley PowerLock ensures precision, especially when trimming edges to match uneven surfaces.
Using these tools consistently leads to long-term results. For example, employing a laser level and impact driver during baseboard installation helps prevent the common issue of gaps caused by shifting walls or uneven floors. After installation, periodic inspections, especially after seasonal changes, can catch small issues before they escalate. A quick check with a moisture meter or even a simple feel test on grout can reveal early signs of moisture intrusion or movement, allowing timely intervention. As I see it, the future of home maintenance hinges on integrating smart tools and proactive check-ups to extend the lifespan of your updates.
What steps can I take to keep my home’s features working smoothly for years?
Regular inspections using a laser level or moisture meter are crucial, especially after significant weather changes. Re-tightening fasteners with an impact driver and resealing grout with flexible, paintable sealants will address minor shifts before they develop into noticeable gaps. Additionally, investing in quality adhesive strips or mounting clips, as discussed previously, can absorb movement and preserve the integrity of your installations. For more advanced techniques, consider exploring the benefits of structural reinforcement, such as adding hidden brackets behind baseboards or reinforcing weak spots in your flooring or shower areas. Staying attentive to the subtle signs of wear and tear, and knowing the right tools to fix them, empowers homeowners to keep their homes functional and attractive for years to come. For specific recommendations, I suggest reading the detailed insights from experts documented in technical resources like the Building Code Requirements website, which underscores the importance of using proper tools for long-term durability.
How I Learned the Power of Adaptive Planning in Home Finishes
One of the most valuable lessons I discovered was that rigid plans often lead to frustration—especially when dealing with natural home movements. I used to believe that precise measurements and straight cuts were all it took, but I soon realized that accommodating structural shifts with smarter solutions saved me time, money, and stress. Embracing flexible fixes like floating mounts and custom scribing transformed my approach, making my home improvements more durable and visually appealing.
Tools That Turn Home Projects into Successful Endeavors
Investing in quality tools revolutionized my DIY experience. A laser level ensured perfect alignment, reducing the guesswork during baseboard installation. The impact driver made fastening quick and secure, even into dense material. Moisture meters informed my decisions on flooring and shower areas, preventing future damage. These tools, trusted by professionals, are worth every penny—they empower you to achieve lasting results that withstand the test of time.
Your Next Step Toward a Home You Can Be Proud Of
Taking action today, armed with the right knowledge and tools, makes all the difference. Whether you’re fixing existing gaps or preparing for future updates, the methods outlined can help elevate your home’s aesthetic and function. Remember, the journey to a perfect finish is ongoing—every project improves your skills and confidence. Why not start with a small improvement today and witness the transformation firsthand? Share your experiences or ask questions below; I’d love to hear how you’re making your home more beautiful and resilient.