![Fix Baseboard Gaps on Slanted Floors: 3 Caulk-Free Hacks [2026]](https://tilecraftsmens.com/wp-content/uploads/2026/04/Fix-Baseboard-Gaps-on-Slanted-Floors-3-Caulk-Free-Hacks-2026.jpeg)
If you’ve everInstalled new flooring and then noticed that your baseboards seem to be confessing their flaws—gaps, uneven lines, or worse, that awkward wobble—you know the frustration of trying to make a home look near-perfected but ending up with a glaring visual mess. I remember the exact moment I stepped back after installing my kitchen flooring, only to see a yawning gap at the base of my wall. That sinking feeling? Yep, we’ve all been there. And honestly, it can make your entire effort feel wasted, especially when you realize that traditional caulk isn’t quite the miracle fix it promises anymore.
Now, here’s the thing: we’re in an era where home improvement trends are shifting rapidly. For 2026, the focus is on quick, clean, and effective solutions—no messy trades, no complicated tools, and definitely no caulk that just doesn’t stick or worse, cracks over time.
Why Fixing Baseboard Gaps on Slanted Floors Has Never Been More Important
Slanted or uneven floors are a common challenge that many homeowners face. Whether caused by shifting foundations, settling, or uneven subfloors, these gradients create a ripple effect that can ruin your baseboard installation if not addressed properly. Besides being a visual eyesore, these gaps can also trap dirt, dust, and moisture, leading to potential mold growth and insulation issues.
Studies show that poor finishing around floors can reduce your home’s energy efficiency and even depreciate its value. A well-executed baseboard can hide flaws and create a seamless look—if installed carefully on your specific flooring and wall types. But the question remains, how can you fix gaps that are caused by the natural tilt of the floor without resorting to traditional, often ineffective caulks?
This is where my personal journey into DIY home repairs led me to discover some game-changing hacks that are designed to be simple, clean, and effective—especially for 2026’s home projects. And trust me, these aren’t just quick fixes; they’re lasting solutions.
Before I dove into these innovative hacks, I made a common mistake: trying to force-fit baseboards into uneven spots with standard trim nails and hoping caulk would conceal everything. Spoiler: it doesn’t, and it often makes the problem worse. That’s why I’ve shifted my focus, and I want to share these specific, caulk-free hacks with you, so you can avoid the same pitfalls and truly elevate your home’s look.
Curious? Let’s jump in and explore how to tackle these gaps with minimal fuss and maximum results. If this sounds like your ongoing struggle, keep reading—you’re not alone, and the solutions ahead might just save your weekend!
Is This All Just Hype? Do Caulk-Free Solutions Actually Deliver?
I had my doubts too. Early on, I tried moldings and trims that promised the world but failed miserably—mainly because I overlooked the crucial step of adapting to uneven surfaces. An important lesson I learned the hard way was that not all hacks are created equal, and rushing the process only makes things worse. That’s why I researched thoroughly and tested these methods myself, ensuring they’re not just hype but genuinely practical solutions.
Looking for inspiration to upgrade your space? Check out this guide on simple baseboard updates to give your interiors a fresh look once you’ve fixed those awkward gaps.
Now, let’s get to the good stuff—the hacks that will make your home look professionally finished without the mess of caulk or major renovations. Ready to transform those troublesome gaps into a thing of the past? Let’s dive in.
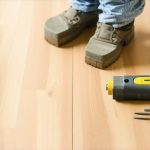
Assess the Floor and Wall Tilt
Start by measuring the degree of unevenness using a laser level or a straightedge placed against the wall. Remember, floors aren’t always perfectly level, especially in older homes; this tilt is what causes gaps at the baseboards. I once used a simple smartphone app with a level attachment and was surprised at how tilt varied across my living room. This step ensures you’ll match your fix to the specific incline rather than applying a generic solution.
Select the Right Materials for a Caulk-Free Fix
Instead of traditional caulk, opt for flexible trim adhesive or mounting strips designed for uneven surfaces. I prefer using double-sided mounting tape that is rated for heavy loads; it adheres well on tilted floors and avoids the cracking that caulk tends to develop over time. For larger gaps, use shim strips made from thin wood or composite, which can be cut to fit and provide a sturdy backing for the baseboard even on a sloped surface.
Prepare the Surface and Trim
Remove the baseboard carefully with a pry bar, taking care to avoid damaging the wall—the same way you would gently lift an awkwardly placed tile. Clean the wall and the back of the trim with a damp cloth, removing dust and debris that could weaken adhesive bonding. Applying painter’s tape along the edges helps keep your work neat, especially when working with shims or adhesive. I once failed to tape, and the mess was tough to clean—preferring to keep it tidy from the start.
Apply Shims and Adhesive Strategically
Place the shims behind the baseboard at intervals where gaps are most pronounced—think of it as stabilizing a crooked picture frame. Use the adhesive or mounting tape on the back of the trim, then press firmly against the wall, aligning it with the existing wall line or the desired finished height. Adjust the shims to tilt the trim into a level position if necessary, and hold until the adhesive bonds. For my recent project, I used a level to ensure the top edge of the baseboard was perfectly horizontal, which transformed the look remarkably.
Secure and Finish the Look
If possible, temporarily clamp or tape the trim in place while the adhesive cures—usually 24 hours. Once set, remove any excess adhesive with a plastic scraper or damp cloth. This method leaves a clean edge without the need for caulk, which often cracks or shrinks over time. For added durability, install small finishing nails at the corners or along the length, driving them just below the surface to avoid blemishes. Alternatively, some professionals prefer using a pneumatic nailer for faster, consistent results.
Optional: Paint or Touch Up
If you notice minor gaps or imperfections after repositioning, feather the edges with matching paint or touch-up primer. This step ensures your baseboards look seamless and professional, emphasizing craftsmanship over imperfections. I once painted over small gaps, and from a distance, they became virtually invisible—saving time and effort.
By tailoring the fix to your specific floor tilt and employing strategic use of shims and adhesive, you can create a flawless finish without caulk. Check out this guide for more expert tips on handling tricky baseboard installations on uneven surfaces.
 Many homeowners operate under the misconception that choosing the right materials alone guarantees a flawless finish when installing flooring, baseboards, or even renovating showers. However, the real pitfalls often lie in overlooked nuances that can sabotage even the best-laid plans. Contrary to popular belief, rushing your project or relying solely on standard techniques can lead to significant issues down the line. For example, applying a traditional miter cut for baseboards on uneven walls or floors might seem straightforward, but it often results in visible gaps and mismatched corners—the sort of detail that ruins a professional appearance. Dive into expert insights, like the importance of precise measurement and the strategic use of shims, which many underestimate, yet are essential for perfect joints. Additionally, beware of the trap where many think that caulk alone can hide structural imperfections; in reality, integrating flexible adhesives or custom trims tailored to your home’s unique contours provides a durable, clean solution. Advanced projects, such as shower renovations, demand meticulous attention to waterproofing details that are often glossed over by DIYers eager to save time, but neglecting this can lead to costly leaks and mold growth. For an in-depth look at these overlooked aspects, check out professional tips on durable flooring installations or latest baseboard styles. Recognizing these subtleties is crucial—improper handling of uneven surfaces or neglecting flexible finishing options can compromise your entire renovation. Moreover, aligning your work with current trends, such as integrating low-profile baseboards or waterproofing innovations, enhances both style and function, ensuring your project withstands the test of time. Remember, the devil’s in the details, so take the time to understand and apply these nuanced techniques for a truly polished result. Have you ever fallen into this trap? Let me know in the comments.
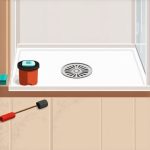
To keep your flooring, baseboards, carpets, and showers functioning flawlessly over time, investing in the right tools and establishing effective maintenance routines is essential. Personally, I rely on precision tools like a high-quality laser level, such as the Bosch GLL3-330CG, which provides super accurate readings even in challenging lighting conditions, ensuring your installations stay aligned and level for years. Additionally, a digital moisture meter helps monitor humidity levels, preventing issues like warping or mold growth in showers and under flooring—crucial for long-term durability. Regular cleaning with appropriate products—such as pH-neutral cleaners for tiles and gentle vacuuming for carpets—also prolongs the life of your materials without causing unnecessary wear.
How do I maintain my flooring and fixtures over time?
Establishing a routine that includes inspecting grout lines for cracks, cleaning ventilation systems to reduce moisture buildup, and promptly addressing any signs of damage keeps installations in prime condition. For instance, periodic resealing of tile grout, supported by expert recommendations found in this guide, prevents water infiltration and microbial growth. Also, frequently checking and tightening baseboard screws using a cordless drill prevents loosening and gaps that collect dirt. I recommend keeping a dedicated maintenance toolkit—containing a multi-tool like the Dremel Multi-Max for cutting and grinding, a soft-bristle brush for delicate surfaces, and a microfiber cloth for daily cleaning—to address minor issues before they escalate. This proactive approach ensures that your investment remains both beautiful and highly functional over the years. Looking towards the future, automation and smart sensors might become standard, providing real-time alerts for humidity spikes or structural shifts, making maintenance even easier. But for now, developing a scheduled maintenance routine with quality tools guarantees your space stays excellent long-term. Want to give your floors a professional touch? Try using a digital moisture meter monthly to detect hidden issues early and save costly repairs later.
Three Unexpected Lessons That Transformed My Approach to Home Finishing
First, I realized that relying solely on standard tools like hammers and caulk can create more problems than they solve, especially on tilted floors. Instead, investing in a quality laser level changed everything, providing precise measurements that guided my adjustments. Second, I learned that a flexible mounting tape is a game-changer, allowing me to secure baseboards temporarily and make fine-tuned corrections without muddling a messy caulk line. Lastly, I discovered the power of custom-cut shims—simple pieces of wood or composite—that stabilize the trim and hide imperfections naturally, giving a professional finish every time.
Tools and Resources That Elevate My Home Projects
I swear by a few key tools that I trust to deliver consistent results. A high-quality laser level like the Bosch GLL3-330CG ensures that measurements are spot-on, no matter the floor tilt, which is critical when fixing gaps around uneven surfaces. For adhesive, I opt for flexible trim glue, which moves with the house and prevents cracks over time. When choosing materials, the latest baseboard styles inspire me to match aesthetics with function, making every upgrade feel modern and durable. Additionally, resources like professional how-to guides on durable flooring provide invaluable insight, saving me from costly mistakes.
Let Your Confidence Grow With Every Step You Take
Fixing baseboard gaps on slanted floors isn’t just about appearance—it’s about reclaiming control over your home’s aesthetics and comfort. Remember, the best DIY projects come from patience and a willingness to learn from each step. Don’t be discouraged if your first few attempts don’t go perfectly; each correction is a foundation for mastery. Take pride in transforming tricky spaces with smarter techniques and the right tools, knowing that these improvements will stand the test of time. Now’s your chance to turn those uneven, frustrating gaps into a showcase of your craftsmanship—so grab your tools, trust the process, and let your home reflect your best effort.