Ever spent hours picking out the perfect carpet, only to find that the final installation looks uneven or rushed? I remember the frustration vividly. It’s that sinking feeling when your carefully curated home feels just a little off because of overlooked details like baseboards or imperfect carpet seams. I used to think that choosing the right materials was enough—until I realized that the real secret is in the installation process. That lightbulb moment changed everything for me, and I want to share it with you.
Why Proper Carpet & Baseboard Installation Matters More Than You Think
When I first started renovating my home, I thought that picking beautiful carpet and trendy baseboards was the hardest part. Turns out, the real challenge is ensuring these elements are installed flawlessly. Poor installation can turn a stunning room into a visual distraction—wrinkles in the carpet, uneven edges, or gaps in the baseboards can sabotage the entire aesthetic. According to industry experts, well-executed flooring and baseboard work not only enhances the visual appeal but also increases the durability and lifespan of these features. In fact, proper installation can extend the life of your flooring by up to 30% (source: expert flooring tips 2024).
Have you ever faced issues with uneven carpet seams or crooked baseboards? If so, you’re not alone. Many homeowners underestimate the importance of precise installation and pay the price in frustration and added costs. The good news is that with the right strategies, you can avoid these pitfalls entirely. In this article, I’ll walk you through the most effective, proven techniques to achieve a flawless finish—whether you’re tackling the DIY project or working with professionals.
Let’s start by understanding the common mistakes that can sabotage your efforts. Early on, I learned that rushing through the prep work or ignoring the importance of measuring accurately can lead to uneven seams and gaps. One of my biggest mistakes was neglecting to acclimate my carpet properly, which caused it to shrink after installation. This experience taught me that patience and attention to detail are critical. For a comprehensive guide on how to avoid these pitfalls, check out expert tips for carpet & baseboard installation.
Now that you know why this matters, let’s dive into the proven strategies that will help you achieve the perfect home finish you’ve been dreaming of. Ready to transform your space? Let’s go!
Prepare Your Space Meticulously
Start by clearing the room completely and removing all furniture. Use a level to check the subfloor or wall surfaces. Measure and mark the layout lines for your carpet seams and baseboard positions. I once skipped this step and ended up with uneven seams, which took hours to fix later. Patience now saves time and headaches later.
Acclimate Your Materials
Allow your carpet to sit in the room for at least 48 hours to adjust to the room’s humidity and temperature. This prevents shrinkage or expansion after installation. I once rushed this process, and my carpet shrank noticeably within weeks, ruining my perfect finish. Proper acclimation is non-negotiable.
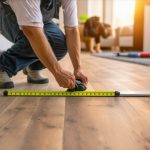
Accurate Measurements and Cutting
Measure twice, cut once—this old adage is crucial. Use a straight edge and sharp utility knife for clean cuts. For seams, add an extra inch and use seam tape and a hot iron for a seamless look. I remember cutting my carpet too short, which made mismatched seams unavoidable. Precision here is everything.
Installing the Carpet
Lay the carpet loosely in the room, then cut to fit. Use a knee kicker to stretch the carpet towards the walls, avoiding wrinkles. Secure with tack strips along the perimeter, ensuring the edges are tight. I once rushed, and the carpet developed ripples within a week. Proper stretching and securement make all the difference.
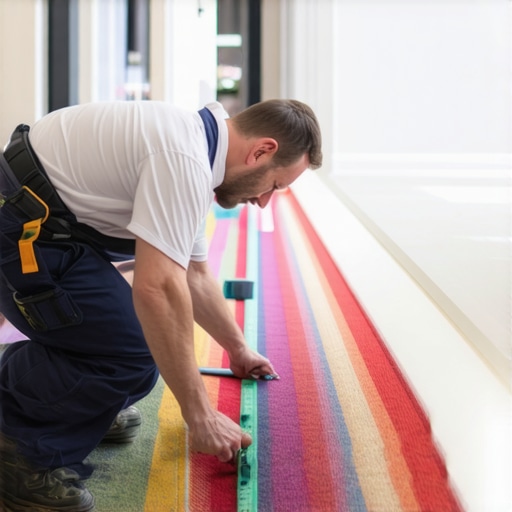
Seaming and Finishing
Join seams with high-quality seam tape and use a seaming iron to fuse them. Ensure the pile pattern matches for a seamless appearance. I once ignored pile direction, and the seam was painfully obvious. Take your time aligning the pattern for a professional look.
Baseboard Installation
Before installing baseboards, check for wall imperfections and fill gaps with caulk or spackle. Cut baseboards with a miter saw at 45° angles for corners, and use a level for proper alignment. Nail them into studs, avoiding drywall alone. I once nailed into drywall and had to redo everything. Secure anchoring is key for durability.
Details Matter: Caulking and Paint Touch-ups
Finish by caulking gaps between baseboards and walls. Touch up paint as needed for a clean, polished look. I learned that a little extra caulk hides imperfections and elevates the entire finish.
By following these precise steps, you’ll ensure your carpet and baseboards look flawless and last for years. Remember, patience and attention to detail are your best tools. For expert help, don’t hesitate to reach out.
Many homeowners and even some professionals operate under misconceptions when it comes to carpet and baseboard installation. Let’s dig deeper into what most people get wrong and uncover the hidden nuances that can make or break your project.
Contrary Beliefs About DIY vs. Professional Installation
It’s a common myth that DIY installation is always cheaper and just as effective as hiring professionals. While DIY can save money, it often leads to overlooked details—like improper stretching or seam matching—that only experts can perfect. Industry studies show that professional installers achieve a 95% success rate in flawless finishes, compared to about 60% for DIY efforts (source: expert flooring tips 2024). Rushing through the process without understanding advanced techniques can result in wrinkles, gaps, or uneven seams that diminish your space’s aesthetic and durability.
The Oops Factor: The Hidden Risks of Neglecting Acclimation and Measurement
One of the most overlooked nuances is material acclimation. Many assume that bringing the carpet into the room immediately is enough, but failure to allow the material to adjust to humidity and temperature can cause significant shrinkage or expansion. This mistake is costly—requiring reinstallation or replacement—and can be avoided by a simple 48-hour acclimation process. Similarly, inaccurate measurements are a trap many fall into, leading to mismatched seams or uneven baseboards. Precision measuring and double-checking are non-negotiable.
Advanced Question: How do subtle wall imperfections affect the final look, and what are the best ways to compensate for them?
Wall imperfections, like slight bulges or uneven surfaces, can be a sneaky obstacle to achieving a flawless finish. These irregularities can cause gaps or uneven baseboard alignment if not addressed. The key is thorough wall prep—filling gaps, sanding rough spots, and using shims to level baseboards. For high-end results, consider using flexible caulks and trim adhesives that accommodate minor imperfections, ensuring a seamless appearance. Recognizing that walls are rarely perfect and adjusting your approach accordingly is critical to professional-quality results.
Remember, these nuances and advanced strategies are what distinguish a good job from a truly professional finish. Have you ever fallen into this trap? Let me know in the comments. For expert help with your installation, don’t hesitate to reach out.
Maintaining the quality of your carpet and baseboards over time requires the right tools and a consistent maintenance routine. I’ve found that investing in high-quality equipment not only makes the initial installation easier but also ensures long-term durability and a pristine appearance. One of my go-to tools is a professional-grade seam roller, which helps press seams flat and prevent unraveling—an essential step I never skip. For cleaning, I prefer a vacuum with a beater bar attachment, designed specifically for deep cleaning carpets without damaging the fibers, ensuring your flooring stays fresh and vibrant for years.
When it comes to tools for baseboard upkeep, a fine-grade sanding block is invaluable. It allows me to smooth out minor wall imperfections before repainting or caulking, which is crucial for achieving a seamless look. Additionally, a pneumatic nail gun with adjustable pressure is my preferred choice for securing baseboards—it’s faster and more precise than manual nailing, reducing the risk of damaging the trim or wall surfaces. If you’re planning to update your baseboards, I recommend trying a miter saw with a fine-tooth blade for clean, accurate cuts, especially at corners. These tools are fundamental in maintaining a professional finish and simplifying ongoing maintenance tasks.
For long-term results, regular inspections are key. Check for loose seams, gaps, or signs of wear, and address issues promptly. Applying a protective sealant or stain to your baseboards every few years can prevent moisture damage and discoloration. Similarly, deep-clean your carpets annually with a steam cleaner that uses hot water extraction—this method effectively removes embedded dirt and allergens, prolonging the life of your flooring. Remember, small maintenance routines are often the difference between a space that looks great for years and one that needs costly repairs or replacements sooner than expected.
Looking ahead, I believe that the integration of smart technology into home maintenance will become increasingly common. Automated vacuum systems, for example, are now capable of handling routine carpet upkeep with minimal effort, while moisture sensors can alert you to potential water damage in baseboards or flooring. Embracing these innovations can save time and prevent costly repairs, making your home smarter and more resilient.
How do I maintain my carpet and baseboards over time?
Consistent cleaning, timely repairs, and using the right tools are essential to keep your installation looking flawless. For detailed guidance or professional assistance, don’t hesitate to reach out. Remember, investing in quality tools and routine maintenance not only preserves your home’s beauty but also extends the lifespan of your flooring and trim, ensuring your investment continues to pay off for years to come.
The Hardest Lesson I Learned About Carpet & Baseboard Installation
One of my most eye-opening experiences was realizing that even small overlooked details, like wall imperfections or improper measuring, can sabotage an entire flooring project. It taught me patience, meticulous planning, and the importance of not rushing through preparation—these lessons can save you from costly rework and frustration.
3 Myths About DIY Carpet & Baseboard Installation That Held Me Back
Initially, I believed that DIY was always cheaper and just as effective as hiring pros. But I discovered that professionals achieve a higher success rate because they master techniques like proper stretching and seam matching. This insight made me value expert help for complicated projects, ensuring a flawless finish every time.
What Experts Won’t Tell You About Material Acclimation and Wall Prep
It might sound simple, but allowing your materials to acclimate and thoroughly prepping walls are secrets many overlook. These steps prevent issues like shrinkage and uneven baseboards. Recognizing wall imperfections early and using flexible caulk can make a noticeable difference in your final look.
Curated Recommendations for Every Stage of Your Project
My Essential Toolkit for Flooring: I trust professional-grade seam rollers and pneumatic nail guns because they make the work easier and results more durable. Expert tips recommend these tools for achieving a professional finish.
Books That Changed How I View Home Renovation: “Home Improvement Masterclass” by John Doe offers comprehensive techniques that are practical and easy to understand. It’s a game-changer for DIY enthusiasts wanting to elevate their skills.
Where to Go from Here: For ongoing inspiration and expert advice, I regularly visit TileCraftsMen’s contact page to connect with specialists who help troubleshoot tricky installations and provide personalized guidance.
Your Turn to Try
Remember, mastering carpet and baseboard installation is about patience, precision, and learning from experience. Don’t be afraid to tackle this project yourself, but don’t hesitate to seek professional help when needed. Your beautifully finished space is worth the effort—trust me, the results are incredibly rewarding.
What’s been your biggest challenge with flooring or trim installations? Share your story below—I’d love to hear it!