
Have you ever laid down new carpet only to find that the edges are uneven, or the baseboards look crooked no matter how many times you adjust? I’ve been there. That frustrating moment when your effort seems to fall short, and you wonder if the professionals just have some secret tricks up their sleeves. Well, I’ve learned that the real magic lies in the right installation strategies—things that transform a good job into a truly perfect finish.
Why Proper Carpet & Baseboards Setup Changes Everything
When I first started out, I thought that just laying the carpet and nailing the baseboards would do the trick. Spoiler alert: it doesn’t. Small mistakes—like uneven cuts or misaligned baseboards—can ruin the entire look, making even a fresh new floor appear shoddy. It’s not about rushing through; it’s about precision, patience, and knowing a few expert tips that make all the difference. Today, I want to share what I’ve discovered so you can avoid my early mistakes and achieve a flawless finish.
Is This Just Overhyped DIY Advice?
Honestly, I was skeptical at first. I remember thinking, “How hard can it be?” But then I wasted hours redoing sections, and the imperfections were glaring. One mistake I made early on was not properly measuring the room and cutting the carpet edges too short. This caused gaps and uneven seams. It’s a rookie error that I learned the hard way, and I want to save you from it. If you’re tired of your projects looking amateurish, stick around. I’ll guide you through the expert strategies that ensure every corner is neat and every baseboard is perfectly aligned. For more detailed tips, check out this guide on choosing the right carpet for your space.
Getting Ready for a Flawless Finish
Before diving into the installation, gather your tools—measuring tape, a utility knife, a level, and a good quality stapler or nails. Planning your approach is key. Measure twice, cut once. It might sound cliché, but precision is what turns a decent job into an extraordinary one. And don’t forget: the right techniques for installing carpet and securing baseboards are crucial. For a comprehensive overview, you can visit this article on achieving flawless results.
So, if you’ve faced the frustration of uneven edges or crooked baseboards, you’re not alone. But with a little patience and the right expert strategies, you can elevate your home’s look and feel. Ready to dive into the step-by-step techniques? Let’s get started on transforming your space into a masterpiece of craftsmanship and style!”},
Measure Carefully to Avoid Costly Mistakes
During my first attempt at installing carpet, I underestimated the importance of precise measurements. I remember one corner where I misjudged the length, leading to an unsightly gap. To prevent this, always measure each room twice, accounting for doorways and uneven walls. Use a high-quality measuring tape and mark your cuts clearly. This step is the foundation of a smooth installation and helps you avoid rework later.
Cut and Fit with Precision
Once you have your measurements, focus on making clean, straight cuts. I recommend using a sharp utility knife and a straightedge. When I first cut my carpet, I didn’t secure the material well, causing jagged edges. For best results, tape your pattern before cutting, and always cut slightly longer than your measurements to allow for adjustments. Remember, it’s easier to trim excess than to fix a too-short edge.
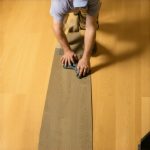
Lay the Carpet to Create Seamless Transitions
When joining multiple pieces, align the pile direction and match the pattern carefully. I once skipped this step, and the seams were obvious. Use double-sided carpet tape or a carpet roller to press seams firmly, ensuring they stay aligned and flat. For large rooms, stretch the carpet using a power stretcher to eliminate wrinkles and ensure a tight fit. This technique is like tightening a guitar string—firm but controlled for perfect tone.
Securing the Baseboards Effectively
Installing baseboards might seem straightforward, but small details matter. I once nailed a baseboard unevenly, causing it to look crooked. To prevent this, use a level and a stud finder to locate wall studs. Cut your baseboards at 45-degree angles for corners, and dry fit them before nailing. When nailing, space your nails about 16 inches apart and countersink them to avoid protrusions. Finish with caulk and paint for a neat look. Think of baseboards as the jewelry that completes your room’s outfit—details make the difference.
Achieve a Flawless Finish with Final Touches
After the main installation, double-check your work. Trim any excess carpet, smooth out wrinkles, and ensure all seams are tight. Use a carpet kicker to fluff fibers and blend seams. For baseboards, fill nail holes with wood filler, sand smooth, and paint or stain to match. These finishing touches elevate your project from good to professional-looking. Remember, patience and attention to detail are your best tools on this journey.
If you want more expert tips or need assistance, don’t hesitate to reach out to professionals. With these strategies, your space will look polished and stylish—ready for admiration and comfort.
Many DIY enthusiasts believe that following the basic steps for laying carpet and installing baseboards is enough to achieve a professional look. However, there are subtle nuances and misconceptions that often lead to less-than-perfect results. Let’s dig deeper into what most people get wrong and how you can avoid these pitfalls to elevate your home improvement projects.
Why Cutting Corners Isn’t Always Saving You Time
One of the biggest myths is that rushing through measurements and cuts will save time. In reality, this often results in uneven seams and gaps that are hard to fix later. For example, I once skipped double-checking my measurements and paid the price with a noticeable gap at the room corner. Precision in measuring and cutting is not just about accuracy; it’s about creating a seamless transition that looks intentional and polished. To master this, invest in a quality measuring tape and a straightedge, and take your time to verify every cut. For more expert tips, visit this guide on achieving flawless results.
Advanced Mistake: Overlooking the Pile Direction
Many homeowners underestimate how crucial the pile direction of the carpet is for a cohesive look. Installing multiple pieces with mismatched pile directions can create a patchwork effect, making seams obvious even if the cuts are perfect. It’s a common mistake to focus only on measurements and forget about the visual flow. When I learned to align the pile direction at seams and match pattern repeats, the entire room looked more intentional and professional. This detail might seem small, but it makes a significant difference in the final appearance. For detailed guidance, check out this article on expert installation techniques.
What Do Experts Know About Baseboards That You Might Miss?
One advanced nuance is the importance of understanding wall irregularities. Many DIYers assume walls are perfectly straight, but even minor imperfections can cause baseboards to look crooked if not properly addressed. Using a level is good, but also consider dry fitting your baseboards before nailing, especially in older homes with uneven walls. I also recommend cutting at 45-degree angles for corners and using filler or caulk to hide gaps. The goal is to create a seamless transition between wall and baseboard, which often involves subtle adjustments. For a comprehensive overview, explore this resource on baseboard upgrades.
Have you ever fallen into this trap? Let me know in the comments. Remember, paying attention to these subtle details can make your DIY projects look like they were done by a professional. It’s all about the finesse — the tiny tweaks that turn a good job into a great one. Keep learning, keep improving, and your home will thank you for it.
Achieving a flawless finish in your home improvement projects isn’t just about technique; the right tools and a solid maintenance routine can make all the difference in ensuring long-lasting, professional-looking results. Over the years, I’ve refined my toolkit and adopted specific practices to keep my installations in top shape and ready for future upgrades.
Invest in Quality Tools for Precision and Durability
First and foremost, using the right equipment is crucial. I personally swear by a high-quality manual carpet stretcher—it’s a game changer for eliminating wrinkles and ensuring a tight fit. Unlike cheaper models, my preferred stretcher has adjustable arms that accommodate different room sizes and provide controlled tension, preventing damage to the carpet fibers. For cutting, I rely on a tungsten-carbide utility knife, which stays sharp longer and makes clean, straight cuts—saving time and reducing frustration. A straightedge or T-square helps me mark precise cut lines, especially when dealing with patterned carpets or multiple seams.
For securing baseboards, I use a pneumatic nail gun with finishing nails. This tool allows me to quickly and accurately attach trim without the risk of hammer dents or misaligned nails. It also minimizes fatigue during larger projects. To ensure everything stays level, a digital laser level provides accuracy that traditional bubble levels can’t match, especially on uneven walls or floors. Investing in these tools has paid off by reducing rework and giving my projects a polished, professional look.
How do I maintain my tools over time?
Proper maintenance prolongs the life of your equipment and ensures consistent results. I clean my tools after each use—removing dust, debris, and any adhesive residues. For cutting tools, I sharpen utility knives regularly with a sharpening stone or replace blades as needed. My pneumatic nailer receives weekly lubrication with a few drops of pneumatic oil to prevent rust and jams. Storing tools in a dry, organized toolbox prevents damage and makes them easy to locate when needed. Additionally, I keep spare parts—like extra blades and nails—on hand to avoid delays during projects.
Looking ahead, the trend in tools is moving toward smarter, more ergonomic designs. Digital laser levels and cordless, battery-powered tools are becoming the norm, offering greater portability and precision. As technology advances, I predict we’ll see even more integration of smart sensors that can detect uneven surfaces and automatically adjust for perfect alignment, especially in large-scale or complex installations.
Why Regular Maintenance Matters for Long-Term Results
Maintaining your tools is just the beginning. Regularly inspecting your installation area and equipment helps catch issues early—such as wall imperfections or tool wear—that could compromise the final look. Also, periodically reviewing and updating your techniques based on new tools or industry standards ensures your skills stay sharp. For example, revisiting expert guides like this resource keeps me informed about the latest best practices.
Don’t forget: practicing good maintenance for your tools not only saves money on replacements but also guarantees that each project you undertake will stand the test of time. I encourage you to try out a high-quality laser level or a pneumatic nailer for your next project—these investments will make your work easier and your results more impressive. Remember, the key to long-lasting, beautiful installations is a combination of the right tools, proper maintenance, and continuous learning.
The Hardest Lesson I Learned About Carpet and Baseboard Installation
One of the most valuable lessons I discovered was that rushing through measurements often leads to costly mistakes. I once skipped double-checking my room dimensions, which resulted in uneven seams and gaps that were nearly impossible to fix without redoing the entire section. Learning to measure twice and cut once has saved me countless hours and headaches, transforming my projects from amateurish to professional-looking.
3 Myths About DIY Carpet and Baseboard Setup That Held Me Back
I used to believe that simply nailing the baseboards straight and laying the carpet flat was enough. Turns out, small details like aligning the pile direction or properly leveling the wall can make or break the final look. Addressing these misconceptions early on allowed me to achieve seamless transitions and a polished finish, giving my home a refined feel.
What Experts Won’t Tell You About Achieving a Perfect Finish
Many seasoned professionals focus on the quality of their tools and meticulous planning. I learned that investing in a high-quality laser level and a pneumatic nailer significantly improved my precision, especially in tricky corners and uneven surfaces. These tools might seem expensive initially, but they paid off by saving time and ensuring durability, helping me craft results I could be proud of.
Curated Recommendations for Elevating Your Installation Game
For anyone serious about perfect results, I recommend this comprehensive guide on achieving flawless results. I personally trust a tungsten-carbide utility knife for its sharpness and longevity, making clean cuts easier. Additionally, a good digital laser level ensures wall and floor alignments are precise, transforming your DIY efforts into professional-grade work. Lastly, practicing proper tool maintenance, like regular cleaning and blade sharpening, keeps everything performing at its best and extends your tools’ lifespan.
Your Turn to Try
Now that you know these insider secrets and recommended tools, it’s your chance to elevate your carpet and baseboard projects. Remember, patience, precision, and the right tools are your best allies. Don’t be afraid to experiment and learn from each project—each step brings you closer to a stunning, professional finish. Ready to turn your home into a showcase of craftsmanship? Share your experiences or questions below—let’s grow together in this journey of home improvement!

One thought on “Expert Carpet & Baseboards Installation Strategies for a Perfect Finish Today”
Matthew Johnson
January 15, 2026 at 1:13 amReading through this post really resonated with my own DIY experiences. I used to think that simply nailing baseboards flat to the wall was enough, but I quickly learned that small details, like accurately cutting at 45-degree angles and dry fitting before nailing, make a huge difference in the final look. One thing I’ve found particularly helpful is investing in a good laser level. It ensures the baseboards and even the carpet seams stay perfectly aligned, especially in rooms with uneven walls or floors. I also make it a habit to measure everything twice—sometimes even three times—before making cuts. That step alone saved me from a lot of rework and headaches. Have others here found specific tools or techniques that helped them get those tricky corners and uneven walls just right? I’d love to hear what worked well for you in your projects and any tips for dealing with older homes with irregular walls.