Have you ever stepped into a room where the carpet looks worn out and the baseboards are peeling or crooked? I used to face this frustrating scenario all the time. No matter how much I tried to fix things myself, the results were often disappointing—until I realized that a few expert tricks could make a huge difference. It was a lightbulb moment for me, and I want to share what I’ve learned so your home can stay beautiful and durable longer.
Why Your Carpet and Baseboards Need Expert Care
When I first started renovating my home, I thought that a quick DIY approach would do the trick. But I quickly learned that rushing through the installation process often leads to issues like uneven edges, loose fibers, or gaps that collect dirt. These problems aren’t just cosmetic—they can affect the longevity of your flooring and trim. According to industry experts, proper installation techniques can extend the life of your floors and moldings by years. For example, using the right adhesive and alignment strategies prevents shifting and cracking over time. If you’ve faced similar struggles, don’t worry—there’s a better way.
Is Hiring a Pro Really Worth It?
I admit, I was skeptical at first. The thought of spending extra on professional help seemed unnecessary, especially when I thought I could do it myself. But I made a costly mistake early on—trying to install a new carpet without proper tools or knowledge, which resulted in uneven seams and a wrinkled surface. That experience taught me that cutting corners can backfire. Investing in expert installation not only saves you time but ensures a flawless finish that lasts. If you want to see what professional techniques can do, check out this guide for insider tips.
Now, let’s get into some practical advice that can help you achieve stunning, durable results. Whether you’re tackling your floors or updating your baseboards, these strategies will make a real difference. Ready to transform your space? Let’s dive into the details that will keep your home looking fresh and beautiful for years to come.
Prepare Your Workspace with Precision
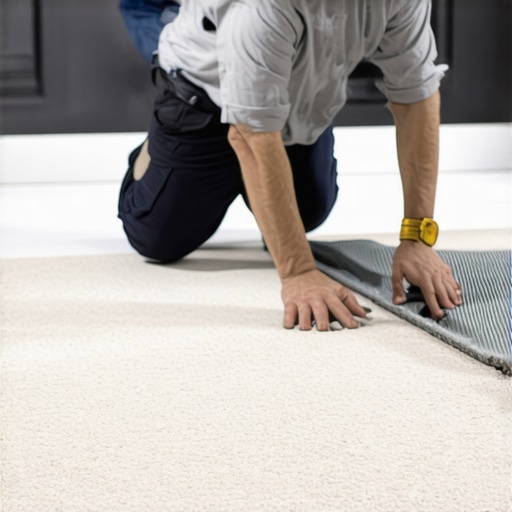
Start by clearing the area completely to ensure unobstructed access. Remove old carpets and baseboards carefully, using a utility knife to cut and pry without damaging the walls or flooring beneath. For example, I once started a project with a cluttered room, which made maneuvering difficult; clearing the space was a game changer. Protect nearby surfaces with painter’s tape and drop cloths to prevent accidental damage during installation.
Choose High-Quality Materials for Durability
Select the right carpet padding and backing to prevent sagging and wear over time. Opt for baseboards that complement your style and are made from moisture-resistant materials if your home tends to be humid. When I upgraded my living room, I chose a dense, soundproof padding that improved comfort and reduced noise, proving that quality materials pay off in longevity. Check out latest baseboard styles to stay updated on modern options.
Measure and Cut with Care
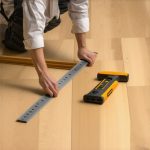
Accurate measurements are vital. Use a tape measure and a level to mark where each piece of baseboard will go, accounting for wall imperfections. When cutting, use a miter saw for clean, precise angles—this avoids gaps that can collect dirt. I once spent extra time measuring and double-checking, which prevented costly mistakes and resulted in a perfect fit. Remember, a little patience here saves headaches later.
Achieve a Flawless Fit
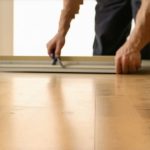
Install the carpet first, laying it out smoothly and tacking it into place with a power stretcher for tightness. For baseboards, apply a high-quality adhesive along the back edges and nail them into wall studs. Use a level to ensure they are straight—an uneven baseboard can ruin the entire look. I once had to redo a section because I rushed, but taking my time resulted in a seamless finish. For expert tips, visit this installation guide.
Finish with Skilled Detailing
Seal the seams with caulk for a clean, finished appearance. Sand down any rough edges and touch up paint as needed. This final step makes your project look professionally done and helps prevent dirt buildup. I learned this the hard way when I skipped sealing—my baseboards looked good initially but attracted dust quickly. Now, I always seal and touch up for lasting beauty. For creative finishing ideas, explore simple update tips.
Regular Maintenance Keeps It Looking New
Once installed, clean your carpets regularly with a vacuum designed for deep cleaning, and wipe down baseboards with a damp cloth to remove dust. Avoid harsh chemicals that can damage finishes. Consistent care preserves your investment and keeps your home looking fresh. I make it a habit to inspect and clean every few months, which extends the lifespan of my floors and trim significantly.
Many homeowners believe that installing carpets and baseboards is a straightforward task, but in reality, there are nuanced pitfalls that can compromise your project’s durability and appearance. Let’s dig deeper into some misconceptions and advanced errors that even seasoned DIYers often overlook, so you can avoid costly rework and achieve professional results.
Why Cutting Corners Can Backfire on Your Flooring
One of the most pervasive myths is that using cheaper materials or skipping detailed preparation won’t affect the long-term outcome. However, industry experts emphasize that selecting low-quality adhesives or neglecting proper surface prep significantly shortens the lifespan of your installation. For example, a study from the National Wood Flooring Association highlights how subpar adhesives can lead to delamination and squeaking within just a few years. It’s tempting to save money upfront, but in my experience, investing in premium materials and meticulous prep consistently pays off in durability and aesthetics. Don’t fall into the trap of thinking that all adhesives are created equal—your choice here is critical.
Advanced Mistake to Watch Out For: Improper Seam Sealing
Many homeowners overlook the importance of sealing seams and edges, assuming that a tight fit alone suffices. This is a mistake that can lead to dirt accumulation, uneven wear, and eventual separation. Proper seam sealing with high-quality caulk or seam adhesive, especially in high-traffic areas, prevents these issues. I once skipped this step to save time and faced a mess of dust and uneven seams within months. This minor oversight drastically undermined the project’s longevity, proving that paying attention to detail at this stage is essential for a polished, lasting finish. For advanced tips, check out the best guide to flawless installation.
What Sophisticated Homeowners Should Know About Baseboard and Carpet Compatibility
Another common misconception involves assuming that any baseboard will work with any carpet type. However, certain materials and styles require specific installation techniques to prevent issues like buckling or uneven surfaces. For instance, thick plush carpets demand taller baseboards and precise nail placement, while moisture-resistant baseboards are crucial in humid areas. Many overlook the importance of matching materials for both aesthetic harmony and functional durability. As I learned from experts, choosing the right combination can prevent costly replacements down the line. To stay ahead, explore the latest baseboard trends and styles to find the perfect match for your home.
Have you ever fallen into this trap? Let me know in the comments. Remember, the devil is in the details when it comes to lasting, beautiful flooring and trim. By understanding these advanced nuances and avoiding common myths, you can ensure your DIY project rivals professional results, saving you time and money in the long run.
Keeping your flooring and baseboards in top condition over time requires more than just good installation techniques; it demands the right tools and a consistent maintenance routine. Having personally tested various equipment, I can attest that investing in high-quality, specialized tools makes a significant difference in achieving professional results and extending the lifespan of your home improvements.
Power Tools That Make a Difference
For anyone serious about maintaining or even repairing flooring and baseboards, a good cordless finish nailer is indispensable. I rely on my Ryobi 18V One+ Cordless Finish Nailer because it offers the perfect balance of power and convenience. Its battery-powered design eliminates the hassle of cords, allowing for easy maneuverability around corners and tight spaces—especially when reattaching baseboards or fixing loose sections. Additionally, a quality miter saw like the DeWalt DWS779 ensures precise cuts for any repairs or adjustments, reducing gaps and uneven seams that can compromise durability.
Precision Tools for Long-Term Results
Maintaining your floors and trim also means paying attention to detail. A digital moisture meter, such as the Protimeter MMS2, helps monitor humidity levels in your home, which is critical when dealing with wood components. Excess moisture can cause warping, cupping, or mold growth—issues that are costly and time-consuming to fix later. Regularly checking moisture content allows you to address problems proactively, preventing long-term damage. For cleaning, I use a HEPA-filter vacuum like the Dyson V11 Torque Drive, which ensures deep cleaning without damaging sensitive finishes or disturbing dust particles that can settle into seams and gaps.
Software and Planning for Longevity
Beyond physical tools, digital solutions can help plan maintenance schedules and document your progress. I recommend using apps like Home Maintenance Scheduler or even simple spreadsheets to track cleaning routines, inspections, and repairs. This proactive approach helps catch issues early, saving money and preserving your home’s aesthetics. As trends evolve, I predict that smart home devices, integrated with maintenance apps, will become standard—automatically reminding homeowners when to check humidity, clean filters, or inspect for wear and tear.
How do I maintain my flooring and baseboards over time?
The key to long-lasting results is consistent maintenance using the right tools. Regular vacuuming with a high-quality vacuum, combined with periodic inspections for loose sections or damage, keeps your floors and trim looking pristine. Applying appropriate sealants or touch-up paint with precision brushes enhances durability and aesthetic appeal. Remember, the investment in good tools and routine checks not only prolongs the life of your flooring but also ensures your home remains beautiful and functional for years to come.
If you want to explore the latest trends in materials and techniques, check out these upcoming styles and stay ahead in your home renovation projects.
The Hardest Lesson I Learned About Flooring and Baseboards
One of the biggest surprises I encountered was how crucial proper seam sealing is. I initially thought a tight fit would prevent dirt and wear, but I overlooked sealing the seams with high-quality caulk. That small step made a huge difference in preventing dust accumulation and uneven wear, which taught me to pay attention to every detail, no matter how minor it seems.
3 Myths About Installing Floors and Baseboards That Held Me Back
For a long time, I believed that buying the cheapest materials was a smart way to save money. Turns out, cheap adhesives and low-quality materials often lead to costly repairs down the line. Investing in durable, high-quality supplies and expert techniques actually saves money over time, proving that quality really does matter.
What Experts Won’t Tell You About Achieving Flawless Results
One secret I discovered is that matching baseboard styles with your carpet type is essential. Using moisture-resistant, tall baseboards in humid areas and choosing materials that complement your carpet’s pile height prevents future issues like buckling or gaps. This insight helped me avoid costly replacements and gave my home a cohesive, professional look.
My Essential Toolkit for Flooring and Baseboard Perfection
- Ryobi 18V One+ Cordless Finish Nailer – Perfect for quick, precise nailing without cords, making reinstallation seamless.
- DeWalt DWS779 Miter Saw – Ensures accurate cuts for perfect fits and angles.
- Protimeter MMS2 Moisture Meter – Helps me monitor humidity levels to prevent warping and mold.
- Dyson V11 Torque Drive – Deep cleans without damaging finishes, keeping my floors pristine.
Keep Moving Forward
If you’re ready to elevate your home’s flooring and trim, remember that attention to detail and using the right tools make all the difference. Explore the latest baseboard styles and expert flooring tips to stay ahead. Your home’s beauty and durability depend on the effort you put in today. Ready to take the next step? Let me know your biggest flooring or baseboard challenge below!”}
One thought on “Expert Carpet Install & Baseboards Tips for Lasting Beauty in 09:13”
Jessica Lee
December 25, 2025 at 8:20 pmReading this post really resonated with me because I’ve also experienced the frustration of uneven baseboards and worn-out carpets. One thing I’ve found especially helpful is investing in high-quality tools like a miter saw and finish nailer, which makes precise cuts and secure installations much easier. I also learned the importance of sealing seams thoroughly — not just for aesthetic reasons but to prevent dust buildup that can ruin an otherwise flawless finish. Personally, I’ve avoided costly repairs by regularly inspecting and maintaining my floors with a moisture meter to catch humidity issues early. The detailed advice on selecting moisture-resistant materials and matching baseboard styles with the carpet type was a game-changer for me. How do others here balance aesthetic style with durability when choosing materials? Would love to hear your tips on maintaining that perfect look long-term!