I’ll never forget the moment I finished my first big flooring project — only to realize a few weeks later that the new carpet was bubbling at the edges, and the baseboards looked lopsided. That sinking feeling of knowing I had rushed through the prep or skipped a crucial step taught me a hard lesson. It’s one thing to install flooring; it’s another to do it in a way that stands the test of time.
If you’re like I was, frustrated by uneven floors or peeling edges, you’re probably wondering, why do some installations last for decades while others crumble within a few years? The answer lies in expert strategies that many DIYers overlook — and more importantly, how to implement them confidently. Today, I promise to share proven techniques and actionable tips that will turn your home’s flooring into a durable, beautiful feature.
Why Cutting Corners Can Cost You Big Time
It’s tempting to think that rushing through flooring installation will save time and money. But in reality, taking shortcuts often leads to costly repairs down the line. For example, I once tried to skip the detailed surface preparation, thinking that a quick sweep was enough. The result? Uneven tiles and cracked vinyl that needed replacing sooner than I expected. Early mistakes like these can be avoided by understanding what truly matters, which is why I recommend diving into comprehensive guides like our guide to durable flooring installation.
It’s a myth that professional results are reserved for specialists. With the right knowledge and attention to detail, anyone can achieve lasting quality. But it all starts with understanding the fundamental strategies that will eliminate common pitfalls and ensure your investment pays off.
Is It Really Worth All the Hype About Expert Strategies?
Early in my journey, I was guilty of oversimplifying flooring projects, thinking a good enough job would do. That mistake cost me both time and money. According to industry experts, improper installation is the leading cause of floor failure in homes, even when high-quality materials are used. Proper techniques — like correct subfloor preparation and sealing — are essential to preventing issues like warping or squeaking. I learned this the hard way, but now I know better.
If you’ve ever faced a flooring mishap or hesitated because the process seems overwhelming, rest assured that with guidance and patience, you can avoid these mistakes. The key is to follow expert insights and tailored tips that match your specific project. Ready to make your flooring last for decades? Let’s explore the practical steps that will bring your vision to life without regret.
.
Prepare the Surface with Precision
Start by thoroughly cleaning the subfloor to remove dust, debris, and grease. I once skipped this step and ended up with uneven flooring that warped over time. Use a heavy-duty vacuum and a damp mop, then inspect for any cracks or imperfections. Fix large cracks with a suitable patch, and sand down high spots. Think of your subfloor as a canvas—smooth and clean, it sets the stage for a flawless finish.
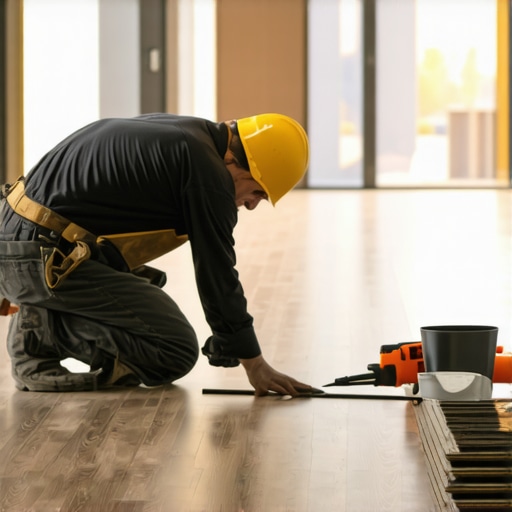
Measure and Plan Carefully
Accurate measurements prevent waste and ensure proper layout. I recommend measuring the room twice and marking the center point of the space, then snapping chalk lines to guide your installation. For carpets, consider the direction of pile and traffic flow. For example, I once misaligned my carpet so it looked skewed once installed; careful planning avoids this. This step ensures symmetry and reduces the need for costly adjustments later.
Cut Materials Precisely
Use quality tools like a straightedge, utility knife, and a sharp saw. When I installed baseboards, I used a miter saw with fresh blades for clean cuts. For carpets, cutting against the pile ensures clean edges. Measure carefully—adding a small allowance for expansion or seams is wise. Think of each cut as crafting a puzzle piece—precision ensures everything fits seamlessly.
Lay the Flooring Securely
For Carpets
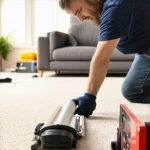
Stretch the carpet tightly using a power stretcher to prevent wrinkles. I once tried to lay a carpet without stretching, and it bubbled after a few weeks. Attach the edges with tack strips along the perimeter, making sure they’re flush with the floor. Use a knee kicker to position the carpet precisely as you stretch and secure it. This creates a smooth, durable surface that withstands heavy foot traffic.
For Hard Floors (Tiles, Vinyl)
Apply adhesive evenly with a notched trowel, following manufacturer guidelines. When I tiled my bathroom, I ensured the surface was level and used spacers for grout lines. Tap the tiles gently to settle them into the adhesive, and check alignment frequently. Use a level to confirm each row stays straight. Proper laying prevents shifting, cracking, and unevenness over time.
Finish with Flawless Edges and Details
Add baseboards or thresholds to cover gaps and protect the flooring edges. I painted and installed new baseboards, carefully sealing the seams with caulk for a clean look. When installing baseboards, use a miter saw for precise corners and nails spaced consistently. This not only improves aesthetics but also secures the edges for longevity. For a modern touch, consider trends like innovative baseboard designs in 2025.
Seal and Protect for the Long Haul
Seal grout lines and vulnerable areas to prevent water intrusion and staining. My mistake was neglecting this step in my bathroom renovation, which led to mold leaks. Use a high-quality sealant suitable for your flooring type, applied with a brush or sprayer. Regular maintenance, like cleaning and resealing as recommended, helps maintain the flooring’s appearance and function for decades.
Many homeowners believe that DIY flooring, carpentry, and shower upgrades are straightforward tasks, but in reality, the devil is in the details. A common misconception is that choosing high-end materials alone guarantees durability. However, even premium products will fail prematurely if installation nuances are overlooked. For instance, understanding the importance of acclimating flooring materials to your home’s environment can make the difference between a lasting installation and early buckling. Experts agree that improper acclimation is a leading cause of flooring failures, as highlighted in industry reports, emphasizing the importance of nuanced knowledge before starting a project.
Another misconception revolves around baseboards and finish carpentry. Many assume that cutting corners on precision — like neglecting mitered corners or using subpar fasteners — won’t impact the aesthetics or longevity. But, as seasoned installers will tell you, attention to small details, such as sealing seams properly and choosing the right adhesive, prevents gaps and cracks over time. These seemingly minor steps are integral to a seamless, durable finish. Find more expert tips on elevating your interior with trendy baseboard updates.
Why do some shower installations last decades while others leak or mold in a few years?
The key lies in understanding waterproofing nuances. It’s a common mistake to assume that applying standard sealant or tile adhesive alone provides sufficient moisture protection. Industry leaders advocate for meticulous layering — installing waterproof membranes, proper sloping, and sealant detailing — which prevents water ingress and mold growth. Skipping these steps often results in costly repairs. A study from the Building Industry Association confirms that water intrusion remains the primary cause of bathroom remodeling failures, underscoring the need for expert-level moisture management techniques. Take a look at luxury shower secrets to get it right the first time.
Furthermore, understanding the subtle differences between standard and commercial-grade materials can significantly affect long-term performance. For example, using high-quality vapor barriers and ensuring proper curing times for grout and sealants can help your shower stand the test of time. Don’t underestimate the power of nailing down these advanced steps; they are often the difference between an elegant, lasting upgrade and repeated failures. So, before you start your next project, ask yourself: Are you applying these nuanced techniques? For more steps toward perfection, explore expert flooring tips for 2025.
Finally, I encourage you to recognize that the most overlooked aspect is often the preparation phase — whether it’s leveling subfloors, sealing edges, or managing moisture barriers. These are the tricks that seasoned pros swear by because neglecting them can silently sabotage your efforts. Remember, excellence in installation doesn’t come from the materials alone but from mastering the nuances that ensure peace of mind and longevity. Have you ever fallen into this trap? Let me know in the comments and share your experiences.
Maintaining your home upgrades isn’t just about choosing the right materials—it’s equally about using the proper tools and techniques to ensure durability over time. I personally rely on a select few high-quality instruments that have consistently delivered professional results, saving me time and money in the long run.
Invest in Precision Equipment
For flooring projects, I swear by a high-precision laser level like the Bosch GLL3-330C. It gives me accurate, three-dimensional alignment across large surfaces, which is crucial when laying tiles or setting baseboards. Unlike traditional bubble levels, this laser provides consistent reference points, especially on uneven surfaces, minimizing the need for rework.
When installing carpets, I prefer a power stretcher such as the Milwaukee M18 FCOS. Its cordless design offers maneuverability and power where I need it most, ensuring my carpet is stretched tightly and evenly without wrinkles or bubbles. Proper stretching not only elevates the aesthetic but also extends the lifespan of your carpet by preventing premature wear.
Utilize Advanced Adhesive and Sealant Techniques
Applying the right bonding agents makes all the difference. For shower renovations, I use a specialized waterproof membrane like modular waterproof systems instead of traditional sealants alone. These membranes create an additional moisture barrier, preventing leaks and mold growth. Following manufacturer instructions precisely ensures the membrane adheres properly, as recommended by industry standards.
For sealing grout lines, I advocate using a high-quality, silicone-based sealant such as Sikaflex-11 FC+. It remains flexible over years, which accommodates minor floor or wall shifts without cracking, thus maintaining water tightness and visual appeal.
Implement Digital Planning and Monitoring Tools
To keep your project on track, digital tools like the PlanGrid app help me manage measurements, photos, and progress notes seamlessly. It reduces errors caused by manual record-keeping and ensures every detail is captured accurately. As projects scale in complexity, such software becomes indispensable, giving you a clear window into your project’s timeline and needs.
How do I keep my installations functioning well over time?
Regular maintenance is key. For instance, inspecting grout lines annually and resealing them prevents water infiltration. Cleaning with pH-neutral solutions avoids damaging tiles or sealants. For showers, I review the waterproofing membrane periodically, especially after any major renovation. Don’t forget to check that baseboards and trim are securely attached—loose edges can trap moisture or cause structural issues. The evolving trend in the industry points toward smart home sensors that monitor humidity and detect leaks in real-time, offering proactive protection against future problems. Industry reports, like those from our comprehensive guide, emphasize that combining reliable tools with routine inspections extends your home’s beauty and function for decades. I recommend trying out a high-precision laser level or a digital planning app on your next big project to see immediate improvements in quality and efficiency.
How My Biggest Mistake Became a Silent Teacher
Rushing through surface prep taught me a priceless lesson about patience and detail—skipping the small steps can cause big setbacks down the line. That experience deepened my understanding of the importance of thoroughness, especially when working with materials that demand precision, like tile or carpet. It’s these mistakes that refine our craft and make us better at ensuring longevity.
Tools That Changed My Approach to Flooring and Beyond
Investing in quality tools like laser levels and power stretchers transformed my results. Reliable equipment not only saves time but also ensures accuracy and durability—crucial for flooring that endures decades. For instance, a laser level helps me maintain perfect alignment, which is key to a flawless finish, echoing what I learned from industry experts. Check out this guide to upgrade your toolkit.
What Goes Unnoticed Can Break Your Trust in DIY
Details like proper sealing, acclimation, and moisture management often fly under the radar but are vital for long-term success. Overlooking waterproofing in shower projects, for example, may seem minor at first but can result in costly repairs years later. Embracing expert strategies—like layering membranes and allowing materials to adjust—saves headaches and money down the road. Want insider tips? Explore this resource.
Celebrating the Small Wins That Make a Big Difference
Precision in measurements, cuts, and finishing touches builds confidence and crafts perfection. Every mitered corner and sealed seam is a quiet victory towards a durable, eye-catching result. I’ve learned that patience during these steps pays off exponentially, preventing issues before they start and creating spaces I’m proud of. Remember, it’s the sum of these tiny details that creates lasting value.
Spreading the Wisdom for Better Homes
Sharing what I’ve learned with fellow DIY enthusiasts encourages continuous growth and collective excellence. Whether it’s recommending our comprehensive guide or suggesting a high-quality sealant, empowering others fuels my passion for quality craftsmanship. Let’s build not just better floors but a community that values mastery over shortcuts.
Keep Moving Forward—Your Home Deserves It
Every project is an opportunity to learn, improve, and create a space that lasts. With patience, proper tools, and attention to detail, achieving professional results becomes accessible. Don’t let hesitation hold you back—start small, stay curious, and embrace the process. Remember, the quality of your home speaks volumes about your commitment to comfort and beauty.