Ever spent hours installing new flooring only to find it warped, uneven, or just plain disappointing a few months down the line? I’ve been there. I remember one project where I overlooked a crucial step—making sure the subfloor was perfectly level—and it haunted me every time I walked across that room. That lightbulb moment taught me a hard but invaluable lesson: proper installation is everything if you want your floors to stand the test of time.
Why Cutting Corners Can Cost You Big Time
When I first started out, I thought I could wing it after watching a few DIY videos. Spoiler alert: I was wrong. Skipping important prep work or rushing through the process leads to issues like squeaks, cracks, and uneven surfaces. According to a study by the National Wood Flooring Association, improper installation is the leading cause of flooring failure within the first five years. That’s a statistic that really made me rethink my approach. If you’re tired of fixing problems down the line, it’s time to learn the expert tips that guarantee a flawless finish from the start.
Is It Worth Investing in Professional-Grade Tips?
At first, I was skeptical. Surely, I could handle this on my own, right? But I made a mistake early on—underestimating the importance of proper underlayment and moisture barriers. That mistake cost me both time and money. Now, I know better. From selecting the right materials to mastering the correct installation techniques, these little details can make a huge difference. Curious about the best practices? Check out expert flooring tips for 2025 that have helped countless homeowners achieve stunning results.
If you’ve ever faced the frustration of redoing a flooring job or simply want to avoid common pitfalls, keep reading. I’ll share the tried-and-true methods that professionals swear by—so your floors stay beautiful and durable for years to come. Ready to get started? Let’s dive into the essentials that will transform your space and save you headaches later on.
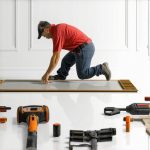
Prepare Your Space with Precision
Before laying down your new floors, clear the room completely. Remove furniture, baseboards, and any existing flooring to create a clean workspace. Then, inspect the subfloor for damage or unevenness. Use a long level or straightedge to identify high and low spots. If you find dips or bumps, address them with a self-leveling compound or sanding to ensure a flat surface. I once skipped this step and ended up with a squeaky, uneven floor that took me hours to fix later. Proper preparation saves time and guarantees a flawless finish.
Choose the Right Materials and Tools
Select flooring materials suited for your space—hardwood, laminate, vinyl, or tile. For example, I chose vinyl for my kitchen because it’s water-resistant and easy to install. Gather essential tools: tape measure, chalk line, saw, hammer, spacers, and a pry bar. Don’t forget safety gear like goggles and gloves. Using quality materials and tools from the start makes the installation smoother and more durable. For detailed material selection tips, visit this comprehensive guide.
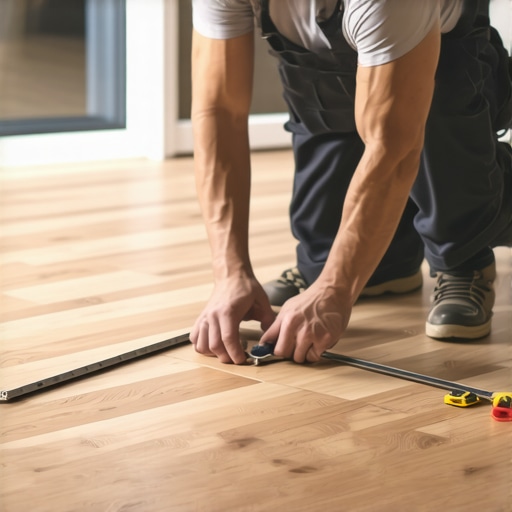
Lay Out Your Flooring for a Seamless Look
Measure your space carefully and plan the pattern or direction of the planks or tiles. Start laying out the pieces without adhesive or nails to visualize the pattern. For instance, I laid out my hardwood planks in a running bond pattern, similar to brickwork, to add visual interest. Use spacers to maintain expansion gaps along the walls—this prevents buckling as the material expands or contracts. Think of this step as setting the stage for a perfect performance; it ensures your final look is balanced and professional.
Install the Flooring with Care and Precision
Begin installing from the longest wall or the most visible area. For hardwood or laminate, click or glue the planks together following manufacturer instructions. For tile, spread thin-set mortar evenly with a notched trowel, and press tiles firmly into place. Use a rubber mallet to tap boards into alignment. I once used a level to check the elevation after laying every few rows, which kept my floor flat and avoided unevenness. Regularly check your work with a straightedge or level to catch issues early. This meticulous approach saves you from redoing sections later.
Finish with Baseboards and Trim
Once the flooring is in place, install baseboards or shoe molding to cover expansion gaps. Use a miter saw for clean cuts, and nail the trim into wall studs. For a seamless look, caulk the gaps between trim and wall, then paint or stain as desired. I experimented with different styles of baseboards in a recent project, which gave my room a fresh, modern feel. For trendy options, explore 2025 baseboard styles. Proper finishing touches elevate your DIY flooring to a professional-level finish.
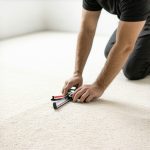
When it comes to flooring, carpet installation, or bathroom showers, many homeowners fall into traps that can compromise the durability and aesthetic of their projects. Let’s dig deeper into some nuanced mistakes that are often overlooked but make a huge difference.
Why Most People Overlook Subtle Details That Matter
Everyone hears about the importance of level subfloors or proper moisture barriers, but what about the little things? For instance, applying the wrong type of adhesive or ignoring expansion gaps can lead to problems down the line. I’ve seen many DIYers rush these steps, assuming they’re minor, only to face squeaky floors or cracked tiles months later. Proper attention to these details, as explained in expert installation tips, is what separates a lasting finish from a short-lived fix.
Is There a Better Way to Seal Shower Edges and Baseboards?
This is a common area of neglect. Many think applying a quick bead of caulk is enough, but the sealant must be high-quality and applied with precision. Improper sealing around shower bases or baseboards can lead to water infiltration, mold, and rot. For advanced homeowners, understanding the nuances of sealant types and application techniques is crucial. Check out these shower renovation tips for a perfect, long-lasting seal.
Why the Myth of DIY Superiority Is Dangerous
Many believe that DIY projects save money and are straightforward. However, this myth ignores the complexity of proper installation. For example, installing baseboards isn’t just about nailing them to the wall; it involves precise measurements, miter cuts, and sometimes filling gaps for a seamless look. Skipping these steps results in a less professional appearance and potential damage over time. To elevate your results, consider exploring latest baseboard trends and techniques.
Advanced Tips for Flawless Results
For those who want to go beyond the basics, understanding the importance of acclimating flooring materials or using the right tools for cutting and fitting can dramatically improve outcomes. Also, paying attention to environmental factors like humidity and temperature during installation can prevent future issues. As I learned early in my career, meticulous preparation and attention to the smallest details make all the difference. For comprehensive guidance, visit this guide.
Have you ever fallen into this trap? Let me know in the comments. Remember, mastering these nuances can save you time, money, and stress in your renovation projects.
Keeping your flooring, showers, and baseboards in top shape requires more than just proper installation; it demands consistent maintenance and the right tools. Over time, even the most durable materials can succumb to wear and tear if neglected. As someone who has spent years refining my approach to home upgrades, I can confidently say that investing in quality tools and adopting a regular maintenance routine is key to preserving your work and ensuring it lasts for decades.
How do I maintain my flooring and showers over time?
First, always use specialized cleaning tools tailored to your material. For hardwood floors, I swear by microfiber mops that gently pick up dust without scratching. For tile and showers, a grout brush combined with a mild, pH-neutral cleaner prevents mold buildup and keeps grout lines pristine. Regularly inspecting your sealants and reapplying caulk around showers or baseboards every couple of years prevents water infiltration and mold growth. Remember, a proactive approach saves costly repairs later.
Another crucial aspect is employing precision tools for ongoing touch-ups. A high-quality miter saw is indispensable for trimming baseboards perfectly, especially when making miter cuts for corners. I prefer a saw with a positive stop system that guarantees consistent angles, reducing errors and ensuring seamless joints. For stubborn adhesive residues or caulk, I use a plastic scraper—metal tools can scratch surfaces and cause more damage. These tools might seem minor but can dramatically improve the longevity and appearance of your installations.
What equipment do I recommend for long-term maintenance?
For flooring, I recommend a steam mop for hardwood and vinyl, as it effectively sanitizes without excessive moisture. For tiles and showers, a handheld grout cleaner with rotating brushes makes deep cleaning easier and more effective. Investing in a quality sealant applicator gun ensures you can re-seal edges and grout lines evenly, preventing water damage. Additionally, a good-quality moisture meter helps monitor humidity levels in bathrooms and basements, protecting your investment from mold and warping.
Looking ahead, the trend is moving toward smart home solutions that monitor environmental conditions and alert you to potential issues before they become major problems. Devices like smart moisture sensors can notify you when humidity exceeds safe levels, allowing quick intervention. Embracing these technologies now can save you money and stress in the future.
Try this advanced tip to keep your installations flawless
One of my favorite tricks is to keep a small container of silicone sealant and a caulk finishing tool handy. Regularly reapplying sealant around showers and baseboards not only maintains a fresh look but also prevents water intrusion. Applying sealant with a steady hand and a finishing tool ensures a smooth, professional appearance that lasts. For detailed guidance, check out these shower sealing tips for a perfect, long-lasting finish. Make this a monthly routine, and you’ll extend the life of your bathroom fixtures significantly.
Remember, maintaining your home’s surfaces with the right tools and regular care is an investment that pays off by avoiding costly repairs and keeping everything looking new. Don’t wait until issues arise—start incorporating these maintenance tips today and enjoy a beautifully durable home for years to come.
The Hardest Lesson I Learned About Flooring and Shower Installations
One of my biggest realizations was how crucial it is to double-check every step—like ensuring your subfloor is perfectly level before laying down new flooring or sealing your shower properly. Rushing through these details can cost you time, money, and frustration later. That lightbulb moment taught me that paying attention to the small, often overlooked details makes all the difference in creating a durable, professional-looking finish.
3 Myths About Flooring and Shower Installations That Held Me Back
- Myth 1: The right tools alone guarantee a perfect job.
Truth: Technique and preparation are just as important as quality tools. Even with the best gear, rushing or neglecting prep can ruin your project. - Myth 2: You can skip professional-grade materials to save money.
Truth: Investing in top-tier adhesives, sealants, and underlayment pays off in long-term durability. - Myth 3: Sealing around showers is simple and quick.
Truth: Precision in applying high-quality sealant and understanding its curing process are key to preventing leaks and mold.
What Experts Won’t Tell You About Achieving Lasting Results
One secret I uncovered is the importance of acclimating flooring materials and environmental conditions before installation. This prevents warping and cracking over time. Additionally, mastering the art of making clean miter cuts for baseboards elevates the final look significantly. For an in-depth dive into these techniques, check out expert flooring tips for lasting results. Remember, patience and precision are your best allies in creating a home that stands the test of time.
Curated Toolbox for Perfect Flooring and Shower Projects
- High-quality Caulk Gun: Ensures smooth, even application of sealants around showers. I recommend the best caulk guns for professional results.
- Moisture Meter: Helps monitor humidity levels, preventing future warping or mold. A must-have for bathrooms and basements.
- Precision Miter Saw: Critical for making perfect cuts on baseboards and trim, saving you time and giving a seamless finish.
- Deep Cleaning Grout Brush: Keeps tiles and grout lines pristine, extending the life of your shower and tiling work.
Your Turn to Try
Now that you’ve learned some of the hardest lessons and insider secrets, it’s time to put them into action. Remember, meticulous preparation, using quality materials, and attention to detail are what turn a DIY project into a professional-quality finish. Don’t be afraid to experiment with new techniques or tools, and always prioritize patience over speed. Your future self will thank you for the beautiful, durable results.
What’s been your biggest challenge when installing flooring or showers? Share your experiences or questions below—I’d love to hear your story and help you troubleshoot!