Have you ever laid down a new hardwood or vinyl floor only to watch it warp, creak, or lose its shine within just a year? I’ve been there, trudging through the frustration of costly redo after redo, thinking, “There has to be a better way.” That lightbulb moment hit me hard when I realized that the secret isn’t just in choosing quality materials — it’s in the installation process and ongoing maintenance. If you’re tired of your floors aging prematurely, stick around. Today, I promise to share proven expert tips that will help your flooring stay beautiful, durable, and hassle-free for years to come.
Why Proper Flooring Installation Matters More Than You Think
Most homeowners underestimate how much the installation process affects the longevity of hardwood and vinyl floors. A flawless finish isn’t just about aesthetics; it’s about creating a foundation that withstands daily wear and tear. From my own experience, rushing through the installation or ignoring key prep steps can turn your dream floor into a nightmare—warping, buckling, or squeaking becoming the unwelcome norm. Did you know that improper subfloor prep is one of the top reasons floors fail prematurely? According to industry experts, taking the time for proper leveling and moisture barriers can extend your flooring’s life significantly (source). If you’ve faced issues like peeling vinyl or cracked hardwood, it’s likely because some fundamental installation principles were overlooked.
Is DIY Installing Floors Actually Worth the Risk?
Early on, I thought I could save money by doing it myself. Spoiler alert: I made a mess of my hardwood planks and ended up calling in a professional anyway. The mistake I made was underestimating the importance of precise measurement and acclimation of flooring materials. DIY can be rewarding, but only if you’re willing to invest time in learning the nuances or have the right tools. Otherwise, the cost of mistakes can outweigh the savings. For a detailed walkthrough of the process, check out this comprehensive guide. It covers everything from moisture testing to proper adhesive techniques, ensuring your floors stay flawless for years.
Now that we understand why proper installation is crucial, let’s dive into the practical steps that will help you achieve durable, stunning floors that stand the test of time. Ready to transform your space with confidence? Let’s go!
.
Prepare the Subfloor with Precision
Think of your subfloor as the foundation of a house; if it’s uneven or damp, everything built on top will suffer. I once encountered a basement with a warped concrete slab. I used a long level and a moisture meter to identify high spots and moisture issues. Using a self-leveling compound, I smoothed out the surface, then installed a moisture barrier. This step prevents future warping or buckling, and it’s crucial for both hardwood and vinyl flooring. Missing this step is like building a house on shifting sands—disaster waiting to happen.
Acclimate Your Flooring Materials
Before installation, I always leave my hardwood and vinyl planks in the room where they’ll be laid for at least 48 hours. This allows the materials to adjust to the room’s temperature and humidity. During one project, I ignored this step, and within weeks, my hardwood started to expand and contract, causing gaps. Proper acclimation reduces the risk of movement after installation, ensuring a snug, lasting fit. For detailed acclimation procedures, check out this guide.
Measure and Plan Carefully
Precision in measurement prevents costly mistakes. I once cut a plank a little too short, leading to awkward gaps. I now measure twice, cut once, and lay out all planks beforehand. Using a chalk line and a tape measure, I plan the layout to minimize waste and ensure aesthetic balance. For complex patterns, consider a mock layout on the floor to visualize the final look before nailing or gluing down the planks.
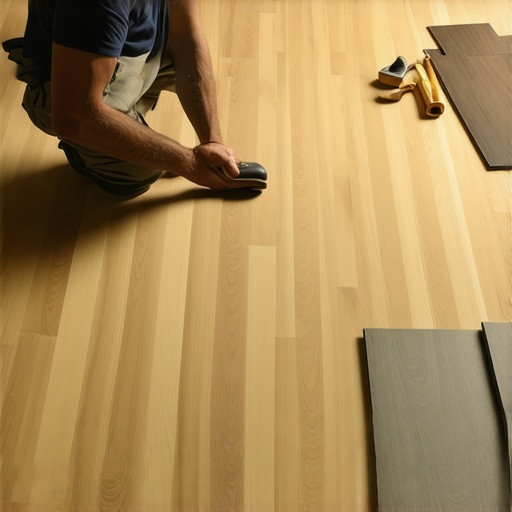
Install with Proper Techniques
When laying the flooring, I follow manufacturer instructions meticulously. For hardwood, I use a pneumatic nailer, ensuring nails are driven at the correct depth. With vinyl, I use the right adhesive and a notched trowel to avoid bubbles and uneven bonding. I once rushed this step and ended up with loose planks. The key is to work systematically, staggering joints, and leaving expansion gaps around the perimeter, covered later with baseboards. If you’re unsure, consulting this expert resource can help you avoid common pitfalls.
Finish and Seal Properly
Once installed, I sand and seal hardwood floors to protect against moisture and scratches. For vinyl, I apply a topcoat to increase durability. During my first attempt, I skipped sealing, and the floor showed wear after just a year. Proper finishing enhances not only longevity but also the overall appearance of your floors. Remember, this is the last step before enjoying your beautiful new surface.
While many homeowners focus on choosing the right materials and tools, there’s a less obvious but equally critical aspect that often gets overlooked: the nuanced details of installation techniques and common myths that can sabotage your project. Let’s dig deeper into what most people get wrong about flooring installation and how to avoid costly mistakes that compromise durability and aesthetics.
Why the Popular Myths About Flooring Installation Are Misleading
One widespread misconception is that a good quality floor automatically guarantees longevity. In reality, even premium materials can fail prematurely if installed improperly. Many assume that following basic instructions suffices, but expert installers know that nuances such as proper acclimation, precise measurement, and correct subfloor preparation are vital. For instance, ignoring moisture testing before installation can lead to significant warping down the line, a mistake that’s all too common. According to a study by the National Wood Flooring Association, improper moisture management is responsible for over 30% of early floor failures (source). This underscores the importance of mastering the subtle art of moisture control and acclimation, which many DIYers overlook.
The Critical Oops You Must Avoid When Installing Floors
One of the most overlooked pitfalls is neglecting expansion gaps. It might seem trivial at first—just a small space around the perimeter—but failing to leave adequate room for expansion can cause buckling and cracking as the floor naturally reacts to temperature changes. I once saw a homeowner install hardwood planks flush against the wall, only to face a warped, unsightly mess in summer. This simple mistake can be avoided by understanding how materials expand and contract, an advanced concept that even experienced DIYers sometimes miss. For detailed guidelines, check out this expert resource.
How Can Advanced Techniques Elevate Your Flooring Project
Beyond the basics, mastering advanced techniques like staggered joint installation and using proper adhesive application can significantly enhance the durability and aesthetic appeal. For example, staggered joints prevent weak points and improve overall strength, which is a detail often missed by novices. Moreover, understanding the importance of acclimating flooring in the specific climate of your home requires more than just placing planks in the room; it involves monitoring temperature and humidity over several days. According to industry experts, these subtle steps can extend your floor’s lifespan by years, saving you money and frustration in the long run. For a comprehensive discussion on sophisticated installation strategies, visit this guide.
Have you ever fallen into this trap? Let me know in the comments. Remember, the devil is in the details, and mastering these nuances ensures your flooring not only looks stunning but also endures the test of time.
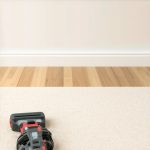
Keeping your floors in top condition over time requires the right tools and a proactive maintenance routine. From my experience, investing in quality equipment not only simplifies the upkeep process but also extends the lifespan of your flooring. One of the most valuable tools I rely on is a high-quality floor buffer or polisher. These devices help to remove surface scratches, restore shine, and prepare the floor for sealing or sealing touch-ups. For hardwood floors, a soft microfiber mop combined with a gentle cleaning solution is ideal for regular cleaning without causing damage. Vinyl flooring benefits from a specialized cleaner that maintains its flexibility and appearance. Consistency is key — monthly cleaning and periodic deep maintenance prevent dirt buildup and surface wear, which can lead to costly repairs down the line.
Invest in Quality Repair Tools
When minor damages occur, having the right repair tools can make all the difference. I keep a set of fine-grit sandpaper, a putty knife, and matching touch-up stain or sealant handy. These allow me to address scratches or chips promptly, preventing them from worsening. For vinyl floors, a heat gun can be used to gently smooth out bubbles or wrinkles, saving a full replacement. Proper maintenance also involves monitoring and controlling humidity levels, especially for hardwood floors, which can expand or contract with moisture changes. A reliable hygrometer helps track room conditions, guiding you on when to run a dehumidifier or humidifier to maintain optimal levels (around 35-55%). Industry experts emphasize that stable indoor climates significantly reduce the risk of warping or buckling (source).
Future Trends in Flooring Upkeep
Looking ahead, I believe smart home technology will play a bigger role in flooring maintenance. Automated sensors capable of detecting moisture or surface damage might become standard, alerting homeowners instantly. Additionally, advancements in self-healing coatings could revolutionize how we preserve floors, automatically repairing minor scratches or wear. For now, however, the most effective approach remains regular cleaning with the right tools and paying attention to environmental factors. Try integrating a professional-grade floor polisher into your routine, and you’ll see immediate benefits. If you’re interested in elevating your maintenance practices, I recommend exploring detailed guides like this expert resource.
How do I maintain my floors over time?
The key to long-lasting floors is a combination of consistent cleaning, timely repairs, and environmental control. Avoid harsh chemicals that can degrade surface finishes; instead, opt for manufacturer-approved cleaning solutions. Regularly inspect for signs of damage or wear, and address issues promptly using specialized tools. For hardwoods, reapplying sealant every few years helps protect against moisture and scratches. Vinyl floors can benefit from a fresh layer of protective finish to maintain their shine. Remember, a proactive approach saves money and preserves beauty. Start by investing in a good floor buffer, and keep a repair kit nearby to handle minor damages before they escalate. Maintaining your floors is an ongoing process, but with the right tools and habits, you’ll enjoy their beauty for decades. For more detailed tips, check out this guide.
The Hardest Lesson I Learned About Flooring Durability
One of the biggest revelations I had was that even top-tier materials can fail prematurely if the installation isn’t done correctly. I once chose premium hardwood, only to have it warp within a year because I skipped proper moisture testing. That mistake taught me that quality alone isn’t enough—proper preparation and technique are key to lasting beauty.
3 Myths About Flooring Installation That Held Me Back
I used to believe that following basic instructions was sufficient. Turns out, nuances like acclimation and precise measurement are what truly make a difference. Busting these myths helped me avoid costly repairs and achieve professional-looking results every time.
What Experts Won’t Tell You About Extending Floor Life
Many overlook the importance of leaving adequate expansion gaps. I used to install floors tight against the wall, only to face buckling during temperature spikes. Learning to plan for natural material movement has been a game-changer in maintaining long-lasting floors.
Curated Recommendations for Flooring Success
My Essential Toolkit for Flooring projects includes a high-quality moisture meter, a pneumatic nailer, and a reliable floor buffer. I trust these tools because they deliver consistent results and simplify complex tasks. Additionally, reading industry-leading guides such as this comprehensive installation guide has been invaluable in honing my skills. Finally, I recommend staying updated with trends via latest design insights to keep your flooring both functional and stylish.
Your Turn to Try
Transforming your flooring setup isn’t just about choosing the right material—it’s about mastering the details that ensure durability and beauty over time. With the right knowledge and tools, you can create a stunning, long-lasting foundation for your home. Remember, every expert was once a beginner who decided to learn the nuances of their craft.
Have you ever struggled with ensuring proper subfloor prep or leaving expansion gaps? Share your experiences below—I’d love to hear your stories and tips!