Ever spent hours laying down a new floor, only to have it start showing wear and tear after just a few months? I’ve been there. One day, I thought I had nailed the installation, but a couple of seasons later, those scratches and loose boards told a different story. It’s frustrating — and honestly, it made me realize that good-looking floors aren’t just about choosing the right material. It’s about the right installation techniques, timing, and ongoing care.
Why Proper Flooring Installation Matters More Than Ever in 2024
In my experience, the secret to a truly durable floor is a comprehensive approach that begins right at the start. As homes get smarter and more stylish, our floors need to keep up in both form and function. Whether you’re dreaming of a sleek hardwood, cozy carpet, or modern tile, the way it’s installed can make or break its lifespan. According to industry experts, improper installation is the leading cause of early flooring failure — and it’s often preventable. In fact, a recent study by HomeAdvisor revealed that nearly 60% of flooring issues stem from installation mistakes rather than material flaws.
So, what’s the fix? That’s exactly what we’re diving into today. I’ll share tried-and-true tips, common pitfalls, and how to avoid them. If you’ve ever wondered whether your DIY efforts will stand the test of time or if it’s worth hiring a pro, stick around. Because with the right knowledge, your floors can be a beautiful, lasting feature of your home for years to come.
Have you faced issues with flooring that didn’t last as long as you hoped?
Trust me, I’ve made my fair share of mistakes — like skipping the proper underlayment or rushing through the corners. Those early blunders taught me that careful preparation and expert techniques matter. Want to learn the secrets to flawless installation and long-lasting results? Let’s get started with the essentials that will ensure your floors stay stunning for 2024 and beyond.
Choose the Right Materials and Prepare Thoroughly
Start by selecting high-quality flooring suited for your space. Hardwood, tile, or carpet all have specific requirements; knowing these ensures longevity. When I replaced my living room floor, I spent time researching the best materials and preparing the subfloor meticulously. I removed old flooring, cleaned the surface thoroughly, and fixed any uneven areas. This step is crucial because a solid foundation prevents future issues. For a detailed guide on selecting durable flooring, check this resource.
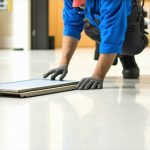
Master the Proper Subfloor Preparation
Think of your subfloor as the bed for your new flooring. If it’s uneven or unstable, the entire installation will suffer. Use a level to identify high and low spots, then sand or fill them. I once skipped this step, and within months, my tiles cracked due to unevenness. After fixing the subfloor by grinding down high points and filling low spots with quality patching compounds, the new tiles stayed perfect. Proper preparation is the key to a flawless finish. For more insights, visit this comprehensive guide.
Use Quality Adhesives and Underlayments
Choosing the right adhesive or underlayment can make a significant difference. For example, I learned this the hard way when my laminate flooring started squeaking after a year. Switching to a high-quality adhesive and underlayment designed for soundproofing eliminated the problem. Always match your materials with manufacturer recommendations. This ensures better adhesion and prevents gaps or lifting. To find the best products, explore recommended adhesives and underlays.
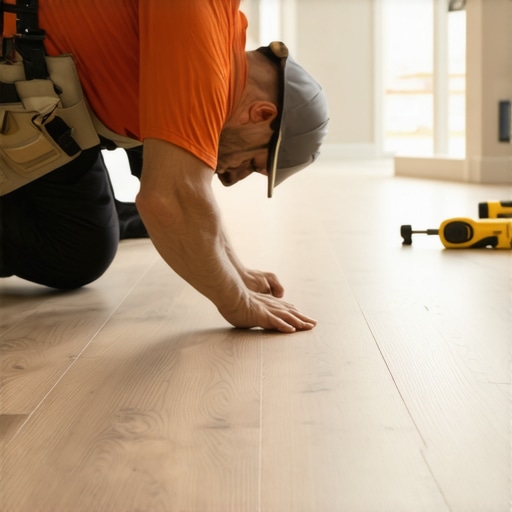
Follow Precise Installation Techniques
Pay attention to spacing, alignment, and cutting. During my first DIY project, I ignored the importance of leaving expansion gaps around the perimeter. Months later, my floor buckled due to temperature changes. I corrected this by installing with suitable gaps and using spacers for consistent spacing. Use a tapping block and a rubber mallet for seamless joints. Precise alignment prevents gaps and uneven surfaces. For step-by-step techniques, see this detailed tutorial.
Allow for Proper Acclimation and Climate Control
Materials like hardwood need time to acclimate to your home’s humidity and temperature. I failed to do this once, and my hardwood warped after installation. I learned to store the flooring in the room where it will be installed for at least 48-72 hours. Maintaining consistent indoor climate during and after installation prevents expansion and contraction. For more tips, visit this guide.
Finish with Proper Sealing and Edge Treatments
Sealing the edges and applying baseboards protect your flooring from moisture and damage. I once installed a wood floor without sealing the edges, and it developed water stains after a few months. Installing quality baseboards and sealing the edges with appropriate finishes create a barrier against spills and humidity. Check out this article for stylish baseboard ideas that complement your flooring and enhance durability.
While most homeowners focus on selecting the right material and following basic installation steps, there’s a subtle but crucial aspect that often gets ignored: the importance of environmental conditions during installation. Many believe that as long as the space is clean and the tools are sharp, the job is done. However, failing to account for temperature and humidity can lead to long-term issues, even with high-quality materials.
For instance, hardwood floors are especially sensitive to climate fluctuations. If the wood isn’t allowed to acclimate properly, it can expand or contract after installation, causing gaps, buckling, or warping. This is why expert installers recommend a period of at least 48-72 hours for acclimation, and maintaining consistent indoor humidity levels—ideally between 35-55%—throughout the year. Neglecting this step is a common mistake that leads to costly repairs down the line.
Furthermore, many assume that the subfloor preparation is a one-time task. In reality, environmental factors can affect the subfloor as well. Moisture levels in the concrete or wood subfloor should be checked with a moisture meter before installation, and sometimes additional vapor barriers are necessary. Overlooking this can cause moisture-related problems like mold, mold, or floor failure.
Why is climate control during installation so critical for durability?
Research by the National Wood Flooring Association underscores that improper climate management is one of the leading causes of flooring failure. This is a nuanced point that even experienced DIYers often miss, but understanding it can save you hundreds or thousands of dollars in repairs. It’s a prime example of how the details matter in achieving professional-grade results.
So, next time you plan a flooring project, don’t just focus on the materials and tools. Pay close attention to your home’s climate and ensure proper acclimation and moisture control. This hidden nuance might be the difference between a beautiful floor that lasts for decades and one that needs replacing in a few years. Have you ever fallen into this trap? Let me know in the comments.
Investing in quality tools and establishing a regular maintenance routine can dramatically extend the lifespan of your flooring. Over the years, I’ve found that using the right equipment not only simplifies the installation process but also ensures a professional finish that lasts. For example, I personally rely on a calibrated laser level for precise alignment, which helps avoid uneven joints and gaps that can develop over time. Incorporating a moisture meter into your toolkit is equally critical, especially when working with hardwood or laminate, to prevent future buckling or warping. Regularly cleaning your floors with manufacturer-approved products preserves their beauty and structural integrity. For detailed advice on the best tools, I recommend checking out this comprehensive guide.
When it comes to maintenance, establishing a consistent cleaning schedule tailored to your flooring type is vital. For hardwood, this means using a damp mop and avoiding excess water, which can cause swelling. For tiles, sealing grout lines periodically prevents stains and moisture infiltration. Additionally, implementing protective measures like felt pads on furniture legs helps prevent scratches and gouges. I also suggest investing in a high-quality vacuum with adjustable height settings to remove debris without damaging the surface. In the future, I predict tools incorporating smart sensors and IoT connectivity will become standard, offering real-time monitoring of subfloor conditions to catch issues early. So, try integrating a moisture meter into your routine and see how it can save you from costly repairs down the line.
How do I maintain my flooring tools and ensure long-term results?
Proper maintenance of your tools is essential for consistent, high-quality results. After every project, clean and calibrate your laser level and moisture meter to keep them in top shape. Store tools in a dry, climate-controlled environment to prevent rust and degradation. Regularly check for upgrades or firmware updates, especially for digital equipment, to benefit from improved accuracy and features. Using protective cases and desiccants further prolongs the lifespan of sensitive electronics. By following these practices, you ensure your tools remain reliable and ready for your next project, ultimately saving you time and money. Mastering the upkeep of your equipment is a small step that delivers big benefits for long-term durability and professional results. Don’t forget to explore this guide for more expert tips on maintaining your tools and achieving flawless results.
The Hardest Lessons I Learned About Flooring Durability
One of my biggest mistakes was ignoring climate control during installation, which led to warped hardwood floors within months. I realized that understanding and managing indoor humidity and temperature is crucial—this was a game-changer. Additionally, rushing subfloor preparation caused uneven surfaces, resulting in cracking tiles later. The lesson? Never underestimate the importance of proper acclimation and thorough prep. Lastly, I learned that choosing quality adhesives and sealants prevents moisture infiltration and extends your floor’s life, saving you money in repairs down the line.
My Essential Toolkit for Flooring Success
I trust this guide for selecting durable materials and expert installation tips that cover everything from subfloor prep to finishing touches. A high-quality moisture meter is indispensable—it helps prevent future warping. For precise alignment, I rely on a laser level, which ensures a professional finish every time. These tools and resources form the backbone of my DIY and professional projects, guaranteeing longevity and beauty.
Don’t Hesitate Your Next Step
Now is the perfect moment to elevate your flooring game. Remember, proper climate control, quality materials, and meticulous installation are your best allies for a lasting, stunning floor in 2024. Don’t let common mistakes hold you back—embrace these insider secrets and transform your space with confidence. Your floors can truly stand the test of time if you follow these proven strategies. Ready to start your flooring journey today? Let’s make it happen!
One thought on “Expert Flooring Installation Tips for Lasting Results in 2024”
Benjamin Carter
January 24, 2026 at 8:50 amThis post really hits home for me, especially the importance of climate control during installation. I made the mistake once of installing hardwood floors without allowing them to acclimate, and I ended up with warping and gaps within just a few months. Since then, I’ve learned how crucial it is to keep the indoor humidity steady and give the wood the time it needs to settle. I’m curious, have others found that using a humidifier or dehumidifier during the acclimation process makes a noticeable difference? Sharing practical tips on maintaining consistent conditions at home could be valuable for DIYers and pros alike. Also, I’d love to hear about tools or methods others use to monitor environmental factors during flooring projects. It’s often the small details that really determine a successful, long-lasting installation.