Have you ever installed a new floor only to see it warp, creak, or lose its luster within just a few months? I remember the frustration of watching my carefully laid hardwood buckle after a harsh winter, convinced I’d made a mistake. That lightbulb moment hit me hard—installation isn’t just about laying down materials; it’s about the right techniques that stand the test of time. And trust me, this isn’t just my opinion—proper installation can extend your flooring’s life significantly, saving you money and headaches in the long run.
Why a Flawless Floor Starts with the Right Preparation
Before you even think about the finished look, the foundation of your success is proper prep work. Skimping on this step can lead to uneven surfaces, squeaky boards, or worse—early replacement. I’ve learned that taking the time to measure, level, and clean the subfloor pays off big. It’s like building a house on solid ground—without it, everything risks collapsing. For those who want their floors to last, investing in quality underlayments and moisture barriers is non-negotiable. If you’re unsure about the right materials, check out my comprehensive guide to durable flooring.
Have You Faced the Common Pitfalls of Flooring Installation?
Early in my DIY days, I made a costly mistake—skipping the acclimation process for my hardwood. I thought it was just a formality, but the result was warping and gaps once the wood adjusted to the room’s temperature. That taught me the importance of letting materials sit in the space where they’ll be installed for at least 48 hours. A little patience here saves a lot of trouble later. Remember, rushing the prep work often leads to problems that are far more expensive to fix. So, ask yourself—have you ever rushed through installation and paid the price?
To make sure your project doesn’t fall into the same trap, I recommend reading more about expert installation strategies at my guide to expert flooring results. Now, let’s move from the why to the practical steps you need to get it right—every time.
},
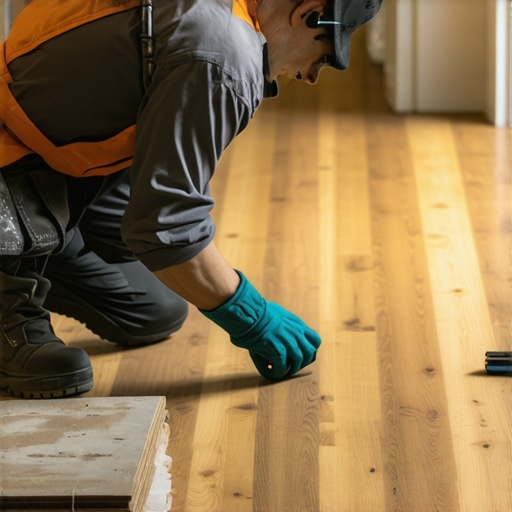
Prepare Like a Pro to Avoid Common Pitfalls
Start by thoroughly cleaning and leveling your subfloor. Think of it as laying a strong foundation for a house—any cracks or uneven spots can cause problems later. During my first hardwood project, I skipped this step and ended up with squeaks and gaps. To prevent this, use a level to check your surface and apply a quality primer or leveling compound when necessary. This ensures your flooring sits perfectly flat and reduces the risk of warping or buckling over time.
Acclimate Materials to Your Space
Let your flooring materials sit in the room where they’ll be installed for at least 48 hours. This is like letting a good wine breathe—materials adjust to the room’s humidity and temperature, preventing future expansion or contraction. I once rushed this step, and my hardwood warped after a cold snap. A simple staging area and patience can save you from costly adjustments or replacements later. For more expert insights, visit my guide to expert flooring results.
Precisely Measure and Plan Your Layout
Accurate measurements are critical. Use a tape measure and chalk line to mark your starting point. I once miscalculated the layout and had to redo a row, wasting time and materials. To avoid this, double-check your measurements and plan your pattern before cutting any boards. Think of it as a puzzle—each piece has a perfect spot, and a clear plan makes assembly smoother.
Use the Right Tools and Techniques
Invest in quality tools like a tapping block, pull bar, and spacers. These help you fit boards tightly without damage. When I installed my first laminate floor, I used a hammer directly, which cracked some planks. Learning to use spacers and tapping blocks made a huge difference, resulting in a seamless finish. For detailed tool strategies, see my masterclass on flooring installation.
Maintain Consistent Adhesive and Fastening
If your project requires adhesive or nails, consistency is key. Apply glue evenly and follow manufacturer instructions. During a recent project, uneven glue application caused gaps. I learned that a notched trowel ensures a uniform layer, which is crucial for durability. Similarly, proper nailing techniques prevent squeaks and ensure stability. Don’t rush this step—patience pays off with a long-lasting, professional-looking floor.
Finish with Precise Cutting and Fitting
Measure and cut your boards carefully, accounting for expansion gaps. Use a saw with a fine blade for clean cuts. I once cut a board too short, leaving a gap that was noticeable. Using a template or a measuring jig can improve accuracy. Finishing touches like baseboards also need precise fitting. For stylish options, explore my baseboard trends for 2025.
Seal and Protect Your Floor
Once installed, apply a quality sealant or finish to protect your flooring from moisture and wear. I neglected this step on a DIY project, and water caused damage within months. Proper sealing enhances durability and keeps your floors looking new. Regular maintenance, like cleaning with suitable products, extends your investment’s lifespan.
Many homeowners believe they know the best way to install flooring, but some ingrained myths can actually sabotage your project. Let’s dig deeper into the nuances that often trip people up and how to avoid these pitfalls with advanced insights that make a real difference.
Why Listening to DIY Myths Can Cost You More in the Long Run
A prevalent misconception is that flooring installation is a straightforward process anyone can master with a few tutorials. While basic techniques are accessible, the truth is that professional results demand an understanding of subtle nuances, like the importance of proper acclimation and precise measurements. For example, many think that simply letting the materials sit for a few hours suffices, but experts recommend a full 48 hours of acclimation in the room where the floor will be installed. Skipping this step can lead to warping and gaps later—an expensive mistake that could have been avoided. To ensure your project is durable, I recommend reading my comprehensive guide.
Common Mistake: Underestimating the Importance of Subfloor Preparation
Many assume that the subfloor is just a base layer and doesn’t require much attention. However, even minor imperfections can cause squeaks, buckling, or uneven surfaces. I’ve seen projects where homeowners skipped leveling or cleaning, only to face costly repairs down the line. The nuance here is that a well-prepared subfloor isn’t just about removing dust; it’s about ensuring a perfectly flat, moisture-free surface. Using a high-quality leveling compound and a reliable moisture barrier can prevent future issues. Remember, your floor’s longevity hinges on this foundational step. Read more about expert strategies at my installation masterclass.
Advanced Tip: Recognizing the Hidden Impact of Climate and Humidity
One of the biggest overlooked factors is climate control. Many think that once the floor is installed, environmental conditions won’t affect it anymore, but humidity fluctuations can cause wood and laminate to expand or contract, leading to gaps or buckling. Experts advise not just acclimating the materials before installation, but also maintaining consistent room humidity—ideally between 35-55%. Using a humidifier or dehumidifier can preserve your flooring’s integrity over time. This nuance is often neglected, yet it can save you from frequent repairs. For more insights, check out my guide to climate considerations in flooring.
Have you ever fallen into this trap? Let me know in the comments. Remember, understanding these subtle but critical factors is what separates a professional finish from a DIY disaster. For tailored advice, don’t hesitate to reach out to my team.
Keep Your Flooring in Top Shape with the Right Tools and Maintenance
Maintaining your flooring over time is crucial to preserving its beauty and durability. To do this effectively, I rely on a handful of specialized tools and proven methods that make long-term care easier and more efficient. Investing in quality maintenance equipment not only extends the lifespan of your floors but also ensures they stay looking brand new for years to come.
Powerful Vacuum Cleaners Designed for Floors
One of my go-to tools is a high-quality vacuum with adjustable suction and multiple attachments. I prefer models like the Dyson V11, which offers excellent suction power and versatile tools that can reach into corners and along edges. Regular vacuuming removes dust, dirt, and debris that can scratch or dull the surface over time. For hardwood or laminate floors, I always choose a vacuum with a soft brush head to prevent scratches.
Microfiber Mops for Gentle Cleaning
When it’s time to mop, I recommend a microfiber mop system. Microfiber cloths trap dirt more effectively than traditional mops, and they require less cleaning solution. I use a lightweight, adjustable handle with a washable microfiber pad—this setup allows me to clean thoroughly without damaging the finish. Remember, avoid excessive water on hardwood floors, as moisture can cause warping or swelling. For detailed cleaning routines, check out my guide to durable flooring maintenance.
Sealant and Polish for Continued Protection
To keep your floors looking polished and protected, I regularly apply a quality sealant or finish designed for your specific flooring type. For hardwood, a polyurethane or wax coating can provide a protective barrier against scratches and spills. I recommend using a microfiber applicator for even distribution. Reapplying these finishes every few years helps maintain the surface’s integrity and enhances the natural beauty. Remember, proper sealing is an investment that pays off over the years.
How do I maintain my floors over time?
The key to long-lasting flooring is consistency. Establish a routine that includes regular vacuuming, gentle mopping, and periodic resealing. Keep an eye out for signs of wear or damage—early intervention can prevent costly repairs. Additionally, controlling indoor humidity levels with a dehumidifier or humidifier can prevent wood from expanding or contracting, which is a common issue that leads to gaps or buckling. Maintaining a stable environment is as important as the cleaning process itself. For more expert tips, visit my comprehensive maintenance guide.
In the future, I believe advancements in smart home technology will further simplify flooring maintenance. Automated vacuum systems that detect dirt and schedule cleaning sessions are already gaining popularity, and I predict they’ll become even smarter and more efficient. Embracing these innovations now can help you stay ahead in the game of flooring care. Ready to try a professional-grade maintenance routine? Start with a quality microfiber mop and schedule regular inspections—your floors will thank you!
The Hardest Lesson I Learned About Flooring Mastery
One of the most valuable lessons I encountered was how crucial proper acclimation is. I once rushed the process and ended up with warped hardwood. Patience in letting materials breathe in the room where they’ll be laid is essential—this simple step prevents costly warping and gaps later. It’s a reminder that even small steps can have a big impact on the longevity of your floor.
3 Myths About Flooring That Held Me Back
I believed that subfloor preparation was just a minor detail, but neglecting it led to squeaks and uneven surfaces. The truth is, a flawless finish depends heavily on a perfectly prepared foundation. Using a quality leveling compound and moisture barrier can save you from future headaches. Don’t underestimate the power of good prep work—your floor’s durability depends on it.
What Experts Won’t Tell You About Flooring Longevity
Climate control is often overlooked. Fluctuations in humidity can cause wooden floors to expand or contract, leading to gaps or buckling. Maintaining consistent room humidity—ideally between 35-55%—is a game-changer. Investing in a humidifier or dehumidifier can protect your investment over the years, ensuring your floors stay beautiful and functional.
My Essential Toolkit for Flooring Success
Investing in quality tools like a tapping block, pull bar, and spacers makes a real difference. I rely on these to fit boards tightly and achieve a seamless look. A good set of tools not only improves the finish but also reduces the risk of damage during installation. For a detailed look at the tools that can elevate your project, check out my comprehensive masterclass.
Your Turn to Try
Now that you know some of the secret lessons learned, it’s your move. Whether you’re a seasoned DIYer or just starting out, applying these insights can dramatically improve your flooring results. Remember, the key to lasting beauty and durability lies in the details—so take your time and enjoy the process. Ready to transform your space with confidence? Share your plans or questions below, and let’s make it happen!

2 thoughts on “Expert Flooring Installation Tips for Lasting Results in 2024”
Samuel Johnson
February 12, 2026 at 1:13 amThis article hits home for me because I recently tackled a DIY flooring project and learned many of these lessons the hard way. The importance of proper subfloor preparation and acclimating materials cannot be overstated. I remember rushing through the acclimation, only to find the hardwood warping after a cold snap. Once I slowed down and followed the recommended 48 hours, the process went much smoother, and the results looked professional. I’m curious, how do others manage their environment during installation, especially in areas with fluctuating humidity? I’ve considered using a humidifier, but I’d love to hear practical tips from those with experience managing tricky conditions. This post has taught me that patience and attention to detail really are the keys to long-lasting flooring, and I look forward to applying more of these expert strategies in my future projects.
Maria Gonzalez
March 21, 2026 at 10:50 amReading this article really highlights how crucial proper climate management is during flooring projects. I’ve experienced firsthand how rapid temperature shifts can cause hardwood to warp if not properly acclimated. I found that employing a dehumidifier during humid months and a humidifier during dry seasons helped keep the environment stable, especially in older homes where temperature fluctuations are more common. It’s also helpful to keep the space ventilated but avoid sudden drafts that could cause rapid moisture changes. One thing I’ve learned is that a consistent environment not only prevents warping but also ensures tight, squeak-free installation. Have others found success with particular climate control devices or strategies? I’d love to hear more tips for managing tricky environments, especially in regions with extreme seasonal changes. At the end of the day, patience and monitoring your space’s humidity levels really pay off in achieving a professional, long-lasting result.