Ever spent hours or even days installing new flooring only to find it warping, cracking, or coming apart after just a few months? I’ve been there. I remember the moment I realized I’d rushed through the prep work, thinking I could skip some steps. The result? A costly redo and a lesson learned the hard way. If you’re tired of your flooring not holding up, I get it. The good news is, the secret isn’t just about choosing the right material — it’s about mastering the installation process itself. Today, I’ll share personal insights that can save you time, money, and frustration, ensuring your floors look great and last for years to come.
Why Proper Installation Matters More Than You Think
When I first started tackling flooring projects, I underestimated the importance of meticulous installation. I thought selecting quality materials was enough. Spoiler alert: it’s not. Proper installation is the backbone of durability and long-lasting beauty. Skipping steps or rushing can lead to issues like uneven surfaces, gaps, or even mold and water damage down the line. According to industry experts, nearly 70% of flooring failures are caused by poor installation rather than material flaws. That’s a staggering statistic that made me rethink my approach. If you’ve ever wondered whether it’s worth investing extra time or money into professional tips, I’ll tell you: Yes, absolutely. And the good news is, with a little guidance, you can do it right the first time.
Is Cutting Corners Really Worth It?
I admit, I once tried to save a few bucks by skipping some prep work, only to pay for it later. One of my biggest mistakes was not leveling the subfloor properly. This led to uneven spots that made the entire floor look sloppy. Trust me, that’s a mistake you want to avoid. If you’re serious about long-lasting results, dedicating time to proper surface preparation, acclimating your flooring to the room’s environment, and using the right tools makes all the difference. For detailed tips on creating a perfect base, check out this comprehensive guide. The effort pays off, and your future self will thank you for it.
So, if you’ve faced the frustration of redoing flooring sooner than expected, you’re not alone. But the good news is, mastering these expert tips can help you avoid common pitfalls and achieve a flawless finish. Ready to learn how to install flooring that stands the test of time? Let’s dive into the steps that will transform your space and give you peace of mind for years to come.
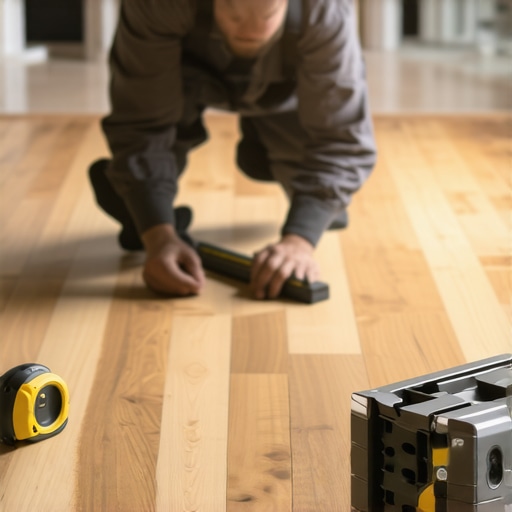
Start with a Solid Foundation
Before you lay down any flooring, ensure your subfloor is perfectly flat and clean. I once skipped this step and ended up with a wavy, uneven floor that cracked after a few months. To avoid this, use a leveling compound and a straightedge to identify high and low spots. Sand down any bumps and vacuum thoroughly to remove dust. Think of this as laying a sturdy base for a house; without it, everything else is at risk.
Acclimate Your Flooring Materials
Many overlook this crucial step, but letting your flooring sit in the room for 48-72 hours helps prevent future warping or gaps. I remember opening a box of hardwood flooring straight into my living room and noticing gaps forming within weeks. To prevent this, store your planks in the room where they’ll be installed, keeping them in their packaging, and avoid installing immediately. This helps the materials adjust to humidity and temperature, reducing the risk of expansion or contraction.
Precise Measurements and Layout Planning
Measure your space accurately and plan your layout. Use chalk lines or a laser level to mark the starting point. When I installed laminate flooring, I drew a chalk line as a guide, which kept my rows perfectly straight. Always start along the longest wall or the most visible area. This minimizes the appearance of cut edges and ensures a professional look.
Cutting and Fitting with Accuracy
Use a quality saw and measure twice before cutting. I once made a cut that was a fraction too long, forcing me to redo the piece and waste time. To get perfect cuts, mark your measurements clearly, use a straightedge, and cut slowly. For tricky corners, a jigsaw provides clean, precise cuts. Remember, better to cut slightly longer and sand down than to risk a piece being too short.
Proper Adhesive and Fastening Techniques
Follow the manufacturer’s instructions for adhesives and fasteners. I once used too much glue, which seeped out and made cleanup a nightmare. Applying the right amount ensures a strong bond without mess. For hardwood, nails or staples can be used, but only in the right places to avoid damaging the surface. For floating floors, leave expansion gaps around the perimeter to allow for movement.
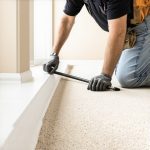
Sealing and Finishing Touches
Once the flooring is installed, add baseboards or trim to cover expansion gaps. I learned this the hard way when I left gaps visible, making the room look unfinished. Use a nail gun or adhesive to secure the baseboards, and caulk any gaps for a seamless look. For a professional finish, consider painting or staining the baseboards and adding transition strips between different flooring types.
Following these concrete steps can dramatically improve your flooring’s durability and appearance. For more insights on creating a cohesive look, explore baseboard trends in 2025. Remember, patience and precision are your best tools for long-lasting results. Every detail counts, so don’t rush through these critical steps.
Many homeowners believe that choosing the most expensive flooring material guarantees durability, but in my experience, the real secret lies in how you install it. There’s a widespread myth that professional installation is only necessary for complex projects, yet even simple DIY flooring can go awry if nuances are overlooked. For instance, skipping surface leveling or failing to acclimate flooring properly often results in warping, gaps, or cracking later on. These mistakes are common but avoidable with proper knowledge and preparation. Interestingly, a study by the Flooring Contractors Association shows that nearly 70% of flooring failures stem from poor installation practices rather than material flaws, underscoring the importance of mastering the installation process.
One of the biggest misconceptions I encountered is the belief that adhesives can be applied generously without consequence. In reality, over-application can cause uneven surfaces and seepage that damages the finish. Always follow the manufacturer’s instructions for adhesive quantity, and use quality tools for spreading. Also, many assume that once the flooring is laid, the job is done, but the finishing touches like baseboards and transition strips are vital for both aesthetic and functional reasons. Properly installed, these elements help prevent gaps and protect the edges from damage, extending the lifespan of your floor.
Have you ever fallen into this trap? Let me know in the comments!
How can advanced preparation techniques prevent long-term issues?
Advanced preparation, such as detailed subfloor inspection, moisture testing, and environmental acclimation, can dramatically reduce the risk of future problems. For example, I once failed to check moisture levels before installing hardwood, which led to cupping and buckling within months. Experts recommend using a moisture meter and waiting until humidity levels stabilize, particularly in areas with fluctuating climates. Proper environmental control during installation ensures the flooring expands and contracts uniformly, preventing gaps and warping. For more tips, visit this guide that emphasizes meticulous preparation for lasting results.
Remember, mastering these nuances is what separates a professional-looking finish from a costly mistake. If you’re interested in elevating your project, check out tips for luxurious bathroom upgrades that align with durable, expert-level craftsmanship.
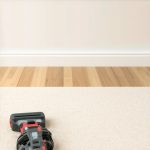
Keeping your flooring in top shape requires the right tools and ongoing maintenance practices. Over the years, I’ve found that investing in quality equipment not only makes the installation process smoother but also extends the lifespan of your floors. One of my most trusted tools is a high-precision moisture meter, which I use regularly to monitor humidity levels, especially before and after installation. This simple device helps prevent problems like warping or buckling caused by excess moisture, a common issue that can ruin even the best flooring if left unchecked. For detailed insights on moisture testing, visit this comprehensive guide.
Another essential is a quality flooring roller, which I personally prefer for vinyl and laminate floors. It ensures proper adhesive contact and eliminates air bubbles, resulting in a flawless surface. I also recommend keeping a set of precision saws, like a fine-tooth hand saw and a jigsaw with variable speed control, to make clean cuts and fit pieces perfectly. Using the right blades and maintaining sharpness is critical; dull blades can cause splintering or inaccurate cuts, leading to gaps and uneven edges. Regularly cleaning and replacing blades keeps your work sharp and precise.
For ongoing maintenance, I swear by microfiber mops and gentle cleaning solutions specifically designed for your flooring type. Routine sweeping and damp mopping prevent dirt buildup that can scratch or degrade your floors over time. Additionally, applying protective pads under furniture legs can prevent dents and scratches, especially on hardwood or laminate surfaces. These small adjustments save a lot of trouble and cost in the long run.
Looking ahead, I predict that smart tools equipped with IoT capabilities will become more popular for home maintenance. Imagine moisture meters that sync with your smartphone or robotic vacuums that can detect and alert you to potential issues. Embracing these innovations can make keeping your floors pristine easier and more effective. To stay ahead, consider integrating such technology into your routine and explore products that offer real-time monitoring.
How do I maintain my flooring over time?
The secret to long-lasting floors is consistent, gentle care. Regular inspections help catch issues early—look for signs of wear, moisture intrusion, or loose edges. Schedule professional checkups if you notice any anomalies, and promptly address repairs to prevent small problems from becoming costly repairs. Additionally, staying informed about the latest cleaning products and techniques can make a difference. For example, avoiding overly abrasive cleaners preserves your floor’s finish and prevents scratches. Lastly, keep environmental factors in mind—controlling indoor humidity and temperature levels minimizes expansion or contraction, which can cause gaps or buckling. Using a dehumidifier or humidifier as needed can stabilize conditions and extend your flooring’s lifespan.
If you haven’t already, try calibrating your moisture meter before your next project or routine inspection. Proper calibration ensures accurate readings and helps you make informed decisions about your flooring environment. Remember, investing in the right tools and adopting consistent maintenance practices are key to keeping your floors beautiful and durable for years to come.
The Hardest Lesson I Learned About Flooring Installation
One of my most eye-opening experiences was realizing that rushing the prep work was the root of many flooring failures. Skipping surface leveling or neglecting acclimation led to warping and gaps that were costly to fix. Through trial and error, I discovered that patience during preparation is the key to long-lasting results.
3 Myths About Flooring That Held Me Back
- Myth: Expensive material guarantees durability.
Fact: Proper installation practices are what truly determine longevity. - Myth: DIY installation is always cheaper and easier.
Fact: Without proper tools and knowledge, mistakes are costly and time-consuming. - Myth: Once laid, the flooring needs no further attention.
Fact: Ongoing maintenance and inspections are vital for preserving quality.
What Experts Won’t Tell You About Flooring Durability
Many professionals emphasize environmental acclimation and meticulous subfloor inspection, but few highlight how critical consistent moisture testing is. Using a quality moisture meter and monitoring indoor humidity can prevent cupping and buckling, issues that often surprise homeowners. This simple step can save you from expensive repairs down the line.
Curated Recommendations: My Essential Toolkit for Flooring Success
- Moisture Meter: A high-precision tool I trust for accurate readings, ensuring your subfloor and flooring are compatible.
- Quality Saw: A fine-tooth jigsaw and straight saw are essential for precise cuts. Dull blades cause splintering, so keep them sharp.
- Leveling Compound: For creating a perfectly flat surface, this product is my go-to for avoiding uneven surfaces.
- Microfiber Mop and Gentle Cleaners: Routine cleaning preserves the finish and extends your floor’s lifespan. I swear by gentle, flooring-specific solutions for best results.
The Future of Flooring Maintenance and Why It Inspires Me
Technology is transforming home upkeep. I’m excited about moisture meters that sync with smartphones and robotic vacuums with sensors to detect early issues. Embracing these innovations makes maintenance less daunting and more effective. Investing in smart tools now can ensure your flooring remains stunning for years to come.
Your Turn to Try
Remember, mastering these subtle yet crucial details can make all the difference in your flooring project. Don’t rush—your future self will thank you for the durable, beautiful floors you create. What’s the biggest challenge you face when installing flooring? Share your experience below and let’s learn together!
One thought on “Expert Flooring Installation Tips for Long-Lasting Results Today in 09:17”
Jessica Morgan
December 18, 2025 at 12:30 pmReading this post resonated with my own experiences in DIY flooring projects. One thing I learned the hard way was the importance of environmental acclimation, especially in areas with fluctuating humidity. I once installed laminate flooring immediately after unboxing it from a warm room to a cooler, more humid space, and it warped within a few weeks. Now, I always ensure the materials sit in the installation room for at least 48 hours before laying them down. It’s fascinating how such a simple step can prevent big issues later on. I’m curious, how have others handled moisture testing in challenging climates? Do you have tips for maintaining consistent conditions during and after installation? I think many DIYers underestimate the power of these small details—they truly make the difference between a lasting floor and a costly mistake.