I remember the moment I discovered my shower was leaking—water seeping steadily into the wall, causing a musty smell that no fresh coat of paint could hide. It was a lightbulb moment for me, realizing that a simple oversight during waterproofing could lead to serious problems down the line. That experience taught me a valuable lesson: preventive measures are far better than costly repairs.
The Hidden Dangers of Inadequate Waterproofing
Water leaks aren’t just a minor annoyance; they can damage your home’s structure, promote mold growth, and drastically reduce your bathroom’s aesthetic appeal. With the increasing complexity of shower designs and waterproofing materials, it’s more crucial than ever to ensure your installation is foolproof. This is where thorough waterproofing tests come into play, especially as we look toward 2026 and beyond.
Have you ever faced a mysterious damp patch or a clever water stain that seemed to appear out of nowhere? You’re not alone. Many homeowners discover these issues only after significant damage has occurred. Early detection through comprehensive testing can save you thousands of dollars and endless headaches.
According to recent studies, improper waterproofing is responsible for up to 60% of bathroom repairs related to water damage. That’s a staggering number, underscoring the importance of rigorous testing before sealing the deal.
As someone who initially skipped some essential steps—trust me, I made my fair share of rookie mistakes—I’m here to guide you through the process. By mastering the 4 Critical Waterproofing Tests for 2026, you’ll prevent issues before they start and enjoy peace of mind knowing your shower is truly protected.
In the sections ahead, I’ll share practical tips and tested techniques to help you pinpoint vulnerabilities and ensure your waterproofing holds firm. Ready to become your home’s waterproofing hero? Let’s dive in.
Prepare Your Workspace and Gather Necessary Tools
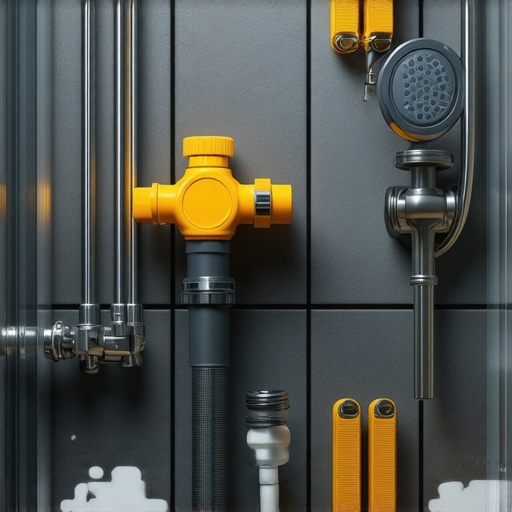
Start by clearing the area around your shower to ensure unobstructed access. Collect essential waterproofing test tools such as a waterproofing membrane, a water spray bottle, a moisture meter, and a level. Using high-quality materials can be the difference between a reliable seal and future leaks. I once neglected this step and ended up having to redo the entire waterproofing after a small leak went unnoticed—learning the hard way.
Visual Inspection
Begin by carefully examining the waterproofing membrane for any visible gaps, tears, or improperly sealed joints. Pay close attention to corners and seams, which are common leak points. For instance, during my first attempt, I missed a tiny crack in the sealant strip, leading to water infiltration later. A thorough visual inspection is your first line of defense. Think of it like checking the foundation of a house—if cracks are present, water will find them.
Perform a Water Test with Controlled Spray
Next, simulate shower conditions by gradually spraying water on the waterproofed surface using a spray bottle or garden sprayer. Focus on seams, corners, and edges. Maintain a consistent spray to mimic real usage but avoid over-saturating the area. After spraying, wait for 15-20 minutes to observe any signs of moisture seepage or bubbling. This step resembles checking for leaks in a swimming pool liner—small leaks can be elusive but become evident when water pressure is evenly applied.
Use a Moisture Meter for Precision
Utilize a moisture meter to detect unseen moisture behind the surface. Place the sensor on various points, especially behind corners and along seams. Interpreting the readings helps identify areas where water may be penetrating. I once relied solely on visual cues and missed a leak that moisture detection later revealed. Think of the moisture meter as your home’s health monitor; it provides concrete data beyond surface appearance.
Conduct a Negative Pressure Test
Seal the drain opening tightly and gently create a vacuum in the shower pan using a standard hand pump or by blocking the drain temporarily. Observe if the pressure holds steady over a 10-minute interval. A drop indicates possible leaks or compromised waterproofing. This method is akin to checking an air mattress for leaks—if the air escapes, you know there’s a problem.
Document and Analyze Results
Record all findings meticulously, noting spots with moisture or pressure loss. Cross-reference visual signs with tool data for accuracy. If any issues are detected, revisit the waterproofing process—scrutinize seams, reapply sealant, or reinforce vulnerable areas. Remember, catching these flaws early is cheaper and easier than fixing soaked drywall or mold issues later. For in-depth guidance on waterproofing techniques, check out our shower renovation tips.
When it comes to home upgrades like flooring, showers, and baseboards, many homeowners and even some professionals fall prey to myths that can compromise the quality and longevity of their projects. Understanding these nuances is essential for achieving lasting results rather than simple temporary fixes.
A typical misconception is that watching a project done by a DIY enthusiast or a less experienced contractor guarantees a flawless result. In reality, advanced installation techniques—such as proper acclimation of flooring materials or careful substrate preparation—play a pivotal role in durability. For example, rushing to lay down hardwood without allowing it to acclimate can lead to buckling or gaps as the wood expands or contracts over time. You can find comprehensive guidance on these techniques in our detailed flooring installation guide.
Another common myth involves shower waterproofing. Many believe that applying a waterproof membrane alone guarantees water resistance, but the real magic lies in meticulous sealing of joints and cut edges, especially around niches and drain penetrations. Overlooking these can result in leaks and mold, even if the membrane seems intact. Incorporate advanced testing methods, like the negative pressure test discussed earlier, to verify your waterproofing system effectively prevents water infiltration.
When it comes to carpet installation, a prevalent mistake is assuming that surface-level stretching is sufficient for a tight, wrinkle-free finish. In reality, proper padding, precise stretching techniques, and securing the carpet at the right tension are crucial. For expert insights on achieving perfect results, visit our carpet installation secrets.
Baseboard installation often gets simplified to just nailing boards to walls, but advanced considerations include scribing for uneven walls and ensuring seamless transitions between different flooring types. Failing to account for seasonal wood movement can cause gaps or buckling over time. For trendy, durable designs, explore our latest baseboard styles.
**Have you ever fallen into this trap? Let me know in the comments!** The key is understanding that detailed preparation, precision, and sometimes advanced testing distinguish amateur results from professional, lasting craftsmanship. Don’t shy away from investing time in these subtleties—they define the longevity and aesthetic appeal of your home upgrades.
Keeping It Working: The Tools I Recommend for Durability and Precision
Achieving a professional finish is just the start; maintaining your flooring, showers, and baseboards over time requires the right tools and a proactive approach. I personally rely on a handful of specialized equipment that ensures long-lasting results. For instance, a high-quality moisture meter like the Protimeter Antibody Plus allows me to detect hidden water intrusion behind surfaces without invasive procedures—saving time and preventing costly repairs. Similarly, a digital laser level, such as the Bosch GLL 3-80, guarantees perfect alignment of baseboards and tiles, especially in rooms with uneven walls or floors, which I’ve found invaluable for consistent, professional results.
Power tools shouldn’t be overlooked either. A cordless oscillating multi-tool like the Fein MultiMaster provides precision for trimming, sanding, or removing grout around tiles and shower niches. Its versatility helps prevent damage to surrounding surfaces, a lesson I learned after damaging a delicate tile edge using less controlled tools. For ongoing maintenance, a handheld grout cleaner can help keep joints looking fresh without the mess of regrouting entirely.
On the software front, I swear by design programs like SketchUp for planning updates or expansions—be it adding new baseboards or extending flooring seamlessly. Visualizing the end result helps me identify potential issues early on, like uneven transitions or improper seam placements, which can compromise long-term durability. In fact, according to industry standards outlined by our guide, accurate planning combined with precise tools significantly extends the lifespan of home upgrades.
How do I maintain flooring, showers, and baseboards over time?
Routine inspections paired with the right maintenance tools are key. Regularly check for signs of water seepage or gaps—detecting issues early can prevent major repairs. Using a moisture meter every six months helps catch hidden leaks before visible damage occurs. Additionally, I recommend applying protective sealants over grout lines and in seams once a year, which can be easily done with a small brush or applicator gun—keeping surfaces resistant to moisture and stains. For showers, installing a temperature and humidity monitor temporarily can alert you to conditions that might accelerate mold growth or degrade seals, especially in high-humidity environments. Consistent upkeep with these tools and practices will keep your investments functioning beautifully for years to come.
Looking ahead, the integration of smart home sensors that monitor humidity and water leaks in real time is on the rise. Incorporating these advanced systems into your routine could revolutionize maintenance strategies, offering early alerts and preventing damage before it happens. As experts suggest, leveraging technology is the next step towards truly intelligent home upkeep, making maintenance more efficient and less stressful.
Don’t hesitate to experiment with tools like the moisture meter or laser level in your next project. Precision now makes repairs later much easier—try implementing one of these advanced maintenance practices today for peace of mind tomorrow.

Embarking on your home improvement journey, I’ve learned that the most overlooked details can unexpectedly become costly hurdles—like skipping a simple waterproofing test and waking up to a soggy surprise. My early failures taught me that confidence without thorough testing is a gamble, especially when it comes to showers, flooring, and baseboards where water damage lurks behind the walls. But with the right knowledge and tools, you can dodge these pitfalls and ensure your bathroom remains a sanctuary, not a repair project.
Lessons from the Trenches: Hard-Won Waterproofing Wisdom
- Don’t Wait for Visible Signs: Relying solely on visual inspections is risky; unseen moisture behind tiles can ferment mold and weaken structures. Early detection saves money and health.
- Master the Negative Pressure Test: Creating a vacuum in your shower pan might sound techy, but it’s the most reliable way to catch leaks before sealing everything up. I’ve seen this test save countless homeowners from future water woes.
- Moisture Meters Are Game Changers: Investing in a good moisture meter turns guesswork into precision. It’s like having a doctor’s stethoscope for your home’s health, revealing hidden dampness beneath surfaces.
- Documentation Is Your Best Friend: Keep detailed records of test results. When issues arise down the line, your notes will guide swift fixes—think of it as a home’s health diary.
Your Next Steps: Build Confidence with Trusted Resources
Tools like the Protimeter Antibody Plus moisture meter and a reliable digital laser level have become staples in my DIY arsenal. For detailed techniques, the ultimate flooring installation guide offers step-by-step insights that apply seamlessly to shower waterproofing. When planning upgrades or repairs, visualizing your project through smart planning tips helps prevent costly mistakes and ensures lasting results.
Move Forward With Confidence and Care
Every successful home improvement project begins with a commitment to quality and precision. By integrating these waterproofing tests into your routine, you’re not just preventing leaks—you’re safeguarding your sanctuary and peace of mind. So, start today, equip yourself with the right tools, and watch your bathroom transformation unfold with confidence. Remember, the best home upgrades are those built on careful steps and informed decisions.
Have you ever doubted whether your waterproofing was truly foolproof? Share your stories or questions below—I’m here to help you make your home the best it can be!