I vividly remember the day I watched my freshly installed carpet start unraveling right at the edges. It was a slow, almost pathetic fraying that made me question my own DIY skills. Despite meticulously laying the fibers, it seemed like no matter what I did, the edges began to show signs of wear within months. That moment sparked a lightbulb—there had to be a smarter way to tuck and secure those stubborn edges, especially with the new demands of 2026’s flooring standards. If you’ve faced similar frustrations—wishing there was an easier, professional-looking trick—you’re not alone. Today, I promise to share proven tucking hacks that will give your carpet edges a clean, durable finish that lasts.
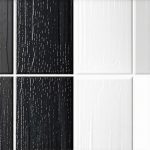
Why Pro Edges Make All the Difference in Your Home
Are Tucking Hacks Really Worth the Effort?
Early in my DIY journey, I made the mistake of rushing the finishing touches, thinking a quick tuck would do the trick. That quick fix only led to edges that curled, frayed, and looked amateurish. Over time, I learned that premium edges aren’t just about aesthetics—they protect your investment and prevent costly repairs down the line. The quality of your carpeting edges affects everything from safety — no tripping over loose fibers — to visual harmony within your space. Trust me, a professional edge isn’t just for show; it’s the backbone of a lasting carpet installation. Check out how innovative trim techniques, like those discussed in Carpet Install Secrets, are transforming home projects today.
Now, I want to ask: Have you ever struggled with frayed or uneven carpet edges that just won’t hold? If so, keep reading. I’ll walk you through four reliable tucking hacks to achieve edges that look and feel like they were done by a pro—without the hefty price tag. Mastering these techniques will ensure your carpets stay pristine and durable, no matter what 2026 throws at us with new flooring materials and standards.
Secure the Carpet Edge with Double-Sided Tape
During my first attempt at finishing a carpet edge, I used generic adhesive, but it lacked stability. Instead, I applied high-quality double-sided carpet tape along the subfloor’s perimeter, pressing firmly to ensure adhesion. Think of it as the foundation of a brick wall—without a solid base, everything else crumbles. To visualize this, imagine unfolding a new roll of tape and lining it precisely where your carpet will meet the wall, smoothing out air bubbles for a tight seal.
Shrink and Stretch the Carpet for a Taut Edge
Once the tape is down, I carefully pulled the carpet towards the wall, using a knee kicker to add tension. This process is akin to tightening a drumhead; the goal is a smooth, wrinkle-free surface. I worked from the center outward, applying more tension as needed, ensuring the fibers lay flat. This step prevents future fraying and creates a clean edge that resembles professional installations. Remember, deliberate, even pulls deliver the best results.
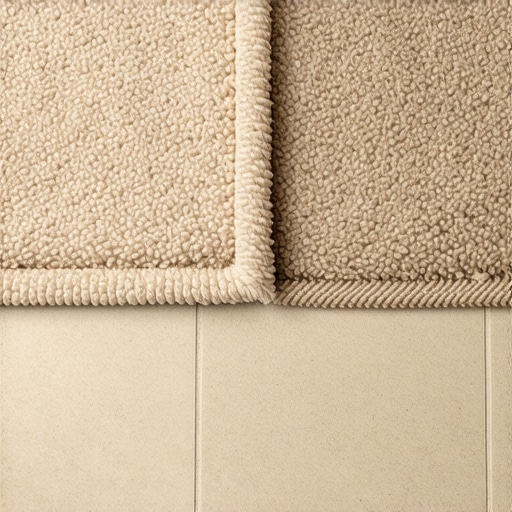
Scribe and Cut for Uneven Walls and Floors
In my experience, walls and floors are rarely perfectly straight. To accommodate this, I used a scribing tool, running it along the uneven surface while marking the excess carpet. Think of it as tracing the landscape to make your cuts fit perfectly. After marking, I carefully cut along the line using scissors or a utility knife, avoiding jagged edges. This precise fit ensures the carpet hugs irregularities seamlessly, enhancing both durability and appearance. It’s like tailoring a suit to fit snugly over complex contours.
Secure Edges with Staple or Tack Strip
Next, I installed a tack strip along the perimeter where the carpet meets the wall. Using a finish stapler or hammer, I pressed the carpet’s edges into the strip, locking it in place. This step is similar to securing a sail in place with clips—tight and reliable. The key is to work steadily, placing staples every few inches, which prevents lifting or curling over time. Proper anchoring is vital for long-lasting, professional-looking edges.
Finish with Binding or Baseboard Installation
Finally, I added a matching binding or installed new baseboards to conceal the cut edges. When attaching baseboards, I used a level to ensure they sat flush, nailing every 16 inches—think of it as putting up picture frames perfectly aligned. For a seamless transition, I caulked any gaps and painted the baseboards for a polished look. If you’re updating your room’s style, check out the latest baseboard trends for 2025 to choose modern profiles that elevate your space. This finishing touch not only enhances aesthetics but also protects against wear and tear, securing your investment in a tight, durable edge.When tackling bathroom renovations or flooring projects, many homeowners believe they know the essentials, but often miss subtle yet crucial details that lead to long-term failures. One common misconception is the overreliance on surface fixes like caulking to seal gaps around baseboards or shower edges. While caulk provides an initial seal, it isn’t a foolproof solution against water infiltration, especially in moisture-rich environments. Experts suggest integrating proper waterproofing techniques—such as waterproof membranes behind tile or sealed foam backer rods—to prevent leaks that can cause rot and mold over time. For flooring installation, a frequent mistake is neglecting expansion gaps and climate considerations, which can result in buckling or gaps after seasonal shifts. According to industry standards outlined in this guide, accommodating natural expansion is vital for durability. When it comes to carpets, many assume that a thicker padding always guarantees comfort. However, overly plush padding can actually cause issues like loose seams, especially if not installed correctly or if the subfloor isn’t properly prepared. The key lies in selecting the right padding thickness for the specific use case, which enhances longevity and appearance. Advanced installers also focus on precise seams, avoiding common pitfalls like misaligned joins that become evident over time. Moreover, improper transitions between different floor types or inconsistent wall surfaces complicate installations and compromise aesthetics. The nuanced aspect here is understanding that surface irregularities—like uneven walls or floors—require tailored scribing and fitting techniques rather than generic cuts. For an in-depth look into refining your skills, consider reviewing these upgrade strategies. Recognizing these hidden nuances and avoiding typical traps enhances the longevity of your projects and saves you money in the long run. Do you know what mistakes could be lurking in your current setup? Have you ever fallen into this trap? Let me know in the comments. Proper planning, advanced techniques, and a keen eye for detail are the real secrets to professional-quality results at home.
When tackling home renovation projects like installing showers, flooring, or baseboards, having the right tools and knowing how to maintain them is crucial for achieving professional results and ensuring longevity. As someone who’s been through countless projects, I’ve found that investing in high-quality equipment and diligently maintaining it saves time and money in the long run. Regular upkeep, proper storage, and understanding your tools’ specific needs empower you to keep your equipment working flawlessly over years of use.
Essential Power Tools and Their Care
For flooring installations, a quality circular saw with a fresh blade makes precise cuts much easier. I personally rely on a Dewalt DWS535 because of its durability and comfortable handle. Regularly cleaning the blade after each use prevents buildup of adhesives, dust, or debris, which can damage the motor or cause miscuts. Lubricating the moving parts with manufacturer-approved oil ensures smooth operation. Additionally, storing power tools in a climate-controlled space prevents rust and corrosion. An investment in a sturdy tool chest not only keeps items organized but also protects them from environmental damage.
Manual Tools That Last a Lifetime
Hand tools like tape measures, scribing tools, and chisels should be checked regularly for wear. I prefer to keep my tape measures in a dedicated case, replacing the tape if it loses accuracy or if the coating starts peeling. A good scribing tool, like one from Starrett, will last decades if properly cleaned and stored in a protective case. Sharp chisels benefit from occasional honing, which I do using a whetstone—keeping edges razor-sharp prevents slips and ensures clean cuts. Remember, dull tools not only produce subpar results but also pose safety risks.
Seal and Protect with Proper Maintenance
Using sealing sprays or protective coatings on your tools can prevent rust. For example, I apply a light layer of silicone-based spray on metal parts after cleaning, which forms a moisture barrier. This technique preserves the tools’ integrity over time, especially if you work in humid environments. When working with adhesives, always clean the tool immediately after use with appropriate solvents; dried glue makes cleaning much harder and can impair the tool’s function.
Future Trends and Investing in Smart Tools
The trend towards smarter, connected tools is expanding. Devices with Bluetooth connectivity can notify you about maintenance needs, such as battery health or calibration requirements, via apps. Personally, I see a future where augmented reality helps plan cuts and layouts, making projects more efficient. According to industry forecasts, integrating IoT (Internet of Things) into home improvement tools will become common within the next few years, simplifying maintenance and improving precision.
How do I maintain my installation tools over time
Consistent maintenance involves a few key habits: cleaning your tools immediately after each use, applying protective lubricants to metal parts, and storing everything in a dry, organized space. Using specialized storage options like wall-mounted racks for hand tools or waterproof cases for your power equipment makes it easier to keep everything in prime condition. Additionally, regularly inspecting tools for wear or damage prevents small issues from becoming costly repairs. For example, replacing blades on your saw before they become dull ensures cleaner cuts and reduces strain on the motor.
For a seamless flooring or shower installation that lasts, I strongly recommend trying the advanced tip of regularly refreshing your tools’ blades and lubricants, ensuring consistent performance. Proper upkeep may seem tedious but pays off in the quality and durability of your work. If you’re eager to elevate your project results, visit our contact page to learn more about expert maintenance tips or get personalized advice. Remember, well-maintained tools are the foundation of a successful and lasting renovation.
Lessons I Wish I Took More Seriously Before
- One of the hardest truths I learned was that rushing the edge finishing process often leads to fraying and curling years down the line. Patience and precision truly pay off when working on lasting edges.
- Investing in quality tools and understanding their maintenance dramatically reduces long-term costs and enhances your craftsmanship. It’s not just about having the tools, but knowing how to care for them.
- Surface irregularities are often overlooked, but tailoring your cuts and using proper scribing techniques transform uneven walls or floors from obstacles into seamless surfaces. Attention to detail here makes all the difference.
- Professional results are rooted in preparation—whether it’s applying the right adhesive, tensioning your carpet correctly, or securing edges with the proper tack strips. Skipping steps always costs in the end.
My Go-To Resources to Elevate Your Flooring Skills
- TileCraftsmen’s Project Guides: Their comprehensive tutorials, like this guide, have transformed the way I approach complex installations with confidence.
- High-Quality Tools from Dewalt: Investing in durable blades, lubricants, and storage solutions ensures longevity and consistent performance. Trust me, high-end tools save you time and stress.
- Design Trend Reports from 2025: Staying updated with latest trends helps craft interiors that are both stylish and future-proof, especially with new standards looming in 2026.
- Online Forums and Community Groups: Sharing experiences and solutions with fellow DIYers can expose you to troubleshooting hacks I wish I discovered sooner, like clever scribing tips for tricky corners.
Take Action and Elevate Your Craft
Remember, perfecting your skills in carpeting and flooring edges isn’t just about aesthetics—it’s about creating a durable, safe, and beautifully finished space that lasts for years. The future of home renovation is all about precision and care, and every step you take improves the quality of your work and your confidence as a DIY enthusiast. So, start with small projects, practice these hacks, and watch your craftsmanship grow. Your ideal home finish is just a few well-placed tools and a keen eye away. Are you ready to craft perfect edges that stand the test of time? Let me know your biggest challenge below and let’s tackle it together.