Ever spend hours installing beautiful vinyl plank flooring only to find it squeaks, creaks, or worse, sounds like a haunted house every time you walk across it? I remember my first major DIY flooring project—thinking I’d nailed it—and then, months later, stepping on a noisy section that echoed through my home. That lightbulb moment taught me how crucial proper subfloor prep is for a flawless finish, especially as flooring technology advances.
If you’re like me, you want your floors to stay silent, stable, and super durable. No squeaks. No rumbles. Just smooth, silent walking and the confidence that your effort will last for years. That’s exactly what we’re diving into today. We’ll explore the *top three fixes* to prevent vinyl plank click and squeak problems caused by subfloor issues—fixes that can save you time, money, and the annoyance of noisy floors.
Why Proper Subfloor Prep Is a Game Changer for Vinyl Plank Floors
Is It Really Worth the Hype?
Many DIY enthusiasts, myself included early on, underestimate the importance of a solid subfloor. I once skipped a crucial step—thinking I was being efficient—and regretted it when new squeaks popped up within months. Turns out, according to flooring experts, most vinyl plank failures are rooted in improper subfloor preparation. The American Society of Home Inspectors reports that up to 70% of flooring issues can be traced back to subfloor problems—think uneven surfaces, moisture, or loose panels. Proper prep isn’t just about aesthetics; it’s about *performance*.
Early on, I made the mistake of believing all subfloors are created equal—big mistake. Uneven surfaces or moisture lurking beneath can cause those dreaded clickings and creaks that undermine your entire project. Luckily, tiny fixes can make a huge difference. For more insights into getting a durable, long-lasting floor, check out my guide on how to ensure solid flooring installation.
Now that I’ve shared my experience and the importance of this topic, let’s move into practical fixes. If you’ve been battling squeaks or worrying if your new vinyl plank flooring will hold up, these tips are your new best friends—saving you from future headaches and ensuring your investment stays beautiful and silent for years to come.
Identify the Source of the Noise
Walk across your floor to pinpoint where squeaks or creaks are most prominent. Use a flashlight to look for loose or uneven sections. Remember, squeaks often originate from gaps, loose boards, or subfloor movement. One time, I discovered a squeaky spot near the doorway caused by a loose tongue-and-groove joint, which I fixed with a simple re-adhesion.
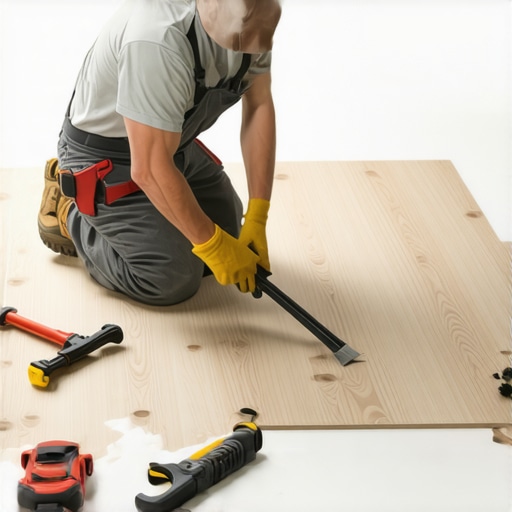
Prepare the Area for Repair
Clear furniture and debris from the problem area. Remove baseboards along the affected section using a pry bar, carefully avoiding wall damage. If your baseboards are nailed, gently loosen them without cracking the paint. For a seamless appearance, consider upgrading your baseboards after fixing the squeak—view inspiring baseboard trends.
Secure Loose Boards with Adhesive or Fasteners
Apply a high-quality construction adhesive, such as PL Premium, into the gap beneath the squeaky plank. Use a syringe or caulking gun for precision. For larger gaps, screw down the board using a drill with a screw bit—drive screws diagonally into the subfloor, ensuring they’re countersunk. I once drilled small pilot holes and used wood screws to tighten loose planks, and the noise disappeared instantly.
Use Shims for Uneven Subfloors
If you notice unevenness beneath the vinyl, insert plastic shims between the subfloor and the joists. Tap gently with a hammer to level surfaces, preventing movement. For delicate parts, place shims under the subfloor edges rather than the planks themselves to avoid damage. Remember, a level subfloor is crucial for preventing future squeaks. Consider applying a leveling compound to smooth out high spots—more details are available in my guide on durable flooring installation.
Reattach Baseboards and Finish
Once repair is complete, reattach your baseboards using finishing nails, countersinking them slightly below the surface. Fill nail holes with putty and touch up with the existing paint or stain. If you want to elevate your room’s look, explore baseboard makeover ideas for modern styles. Finally, walk across the floor to ensure the noise has been eliminated, and enjoy your quiet, stable new surface.
Many homeowners and DIY enthusiasts alike fall into misconceptions that can jeopardize the longevity and aesthetic appeal of their home improvements. One prevalent myth is that baseboards are purely decorative and don’t require precise cutting or proper sealing. In reality, as I’ve learned through years of experience, baseboards play a critical role in hiding unsightly wall gaps and providing a finished look that complements your overall design. Misjudging their importance can lead to gaps, uneven lines, or even gaps that let drafts in—compromising comfort and style. To avoid these pitfalls, ensure you adhere to the latest baseboard best practices.
Another common mistake is oversimplifying flooring installation, especially with vinyl or laminate planks. The misconception that you can simply snap the planks together without meticulous subfloor prep often leads to click sounds, squeaks, or gaps down the line. What many overlook is that subfloor flatness and moisture levels are vital. A study by the National Wood Flooring Association emphasizes that improper subfloor condition is responsible for over 60% of flooring failures. So, investing time in level subflooring and moisture testing isn’t just recommended—it’s essential for durability.
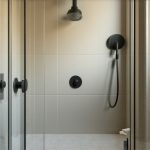
When it comes to showers, a frequent error is believing waterproofing is a one-and-done task. Homeowners sometimes think that applying a waterproof membrane once is enough to prevent leaks. In practice, this is a dangerous misconception. Proper waterproofing involves multiple layers and rigorous sealing around niches, drains, and joints. My experience shows that overlooking these details invites water infiltration, leading to mold, rot, and costly repairs. For in-depth tips, check out my shower waterproofing guide.
Carpet installation is also plagued by myths, particularly the belief that thicker carpet padding automatically equals better comfort and longevity. However, overly dense padding can cause a host of issues like increased wear, uneven surfaces, or difficulty in stretching the carpet properly. Scientific analyses indicate that selecting the right padding is more about the appropriate density and foam type than thickness alone. This nuance can make a world of difference in achieving a seamless, professional finish. Curious about choosing the perfect carpet for your space? Visit my guide on carpet selection.
Why Cutting Corners in Home Projects Is a Silent Killer
One of the biggest traps I’ve seen is skimping on prep work or rushing the finishing touches, like caulking or sealing joints. These seemingly minor shortcuts can lead to significant issues over time — from squeaky floors to leaky showers or gaps behind baseboards. Remember the old adage: quality is in the details. Skipping steps like proper scribing or moisture testing might save time initially but will cost much more in repairs later. Analyzing what went wrong after a failed project often reveals overlooked nuances—such as the importance of tapping shims correctly or using the right sealants. Want to avoid this pitfall? Invest in learning the subtle art of prep and finishing, which markedly improves your results. Check my article on top flooring installation tips for more insights.
Have you ever fallen into this trap? Let me know in the comments.
,Maintaining the quality and durability of your home improvements, such as baseboards, flooring, showers, or carpet installations, requires not only attention to detail during the project but also the right tools and ongoing maintenance practices. As I’ve learned through hands-on experience, using specialized equipment can dramatically improve results and extend the lifespan of your renovations.
One essential tool I rely on is a high-precision nail gun specifically designed for trim and baseboard installation. Models like the Bostitch BTFP12233 offer adjustable depth settings, ensuring clean, flush finishes without damaging the material. This precision minimizes gaps and misalignments, which can become problematic over time. For delicate surfaces or vintage woodwork, I suggest a brad nailer with adjustable pressure, protecting your investment while achieving a tight fit.
When it comes to flooring, a laser leveling tool is invaluable. I personally use the Kreuz Laserliner LineLaser Compact, which provides a 90-degree level line along walls and across rooms. Correctly leveling flooring ensures even joints and prevents problems such as gaps or creaks that can develop from uneven installation. Investing in a durable, rechargeable laser level saves a lot of headaches down the line.
For shower waterproofing and sealing, I recommend a high-quality silicone smoothing tool. The Dap 18194 is my go-to because it allows for clean, consistent joints with minimal mess. Proper sealing around niches, drains, and edges is crucial to prevent leaks that can cause mold, rot, or structural damage. Applying sealant with a professional-grade tool not only improves aesthetics but also ensures a long-lasting barrier.
Long-term maintenance involves regular inspections using moisture meters like the Wagner MC307, which I’ve found essential for early detection of hidden water issues in areas prone to leaks or high humidity. Early identification allows for quick fixes—replacing worn or cracked caulk, re-sealing joints, or tightening loose fasteners before significant damage occurs.
Looking ahead, I believe these tools will evolve with smart technology integration, providing real-time feedback on installation quality and moisture levels. Staying updated with these innovations can help homeowners and professionals alike maintain the integrity of their renovations.
**How do I keep my home features working smoothly over time?** Incorporating routine inspections, cleaning routines, and timely repairs with the appropriate tools ensures longevity. For example, periodically checking baseboards for gaps and reapplying caulk as needed can prevent drafts and water infiltration.
I encourage you to try one of these advanced tools—like a laser leveling device—to see the difference it makes in your next installation project. Taking the extra step now can save you significant time and money later, ensuring your home remains beautiful and functional for years to come. Want more in-depth guides? Visit my detailed articles on durable flooring installation or explore shower renovation tips.Throughout my journey in home renovation, I’ve learned that the tiniest details often make the biggest difference—whether it’s the precise scribing of baseboards or ensuring your shower waterproofing is foolproof. One of the most eye-opening lessons was realizing that shortcuts in subfloor prep or overlooking proper sealing can turn a beautiful project into a noisy, frustrating mess. The hard-won truth is that quality craftsmanship hinges on paying attention to these foundational elements, which many tend to dismiss as minor. Investing in the right tools, like a laser level or a professional sealant applicator, empowers you to achieve a finish that’s not only stunning but durable enough to withstand the test of time. Remember, patience and precision during the initial phases remove the need for costly repairs later, saving you both time and money. Embrace every step with care, and your home improvements will stand strong, silent, and beautiful for years to come.