Ever spent hours trying to fix a stubborn gap between your new carpet and the baseboard, only to realize the corner looks uneven or the joint isn’t flush? I’ve been there. I remember the lightbulb moment when I finally understood that the devil is in the details—especially with baseboards and carpet. It’s those tiny tweaks and strategic choices that transform a good installation into a stunning, professional-looking finish.
Why Your Home Deserves That Perfect Touch
When I first started tackling DIY flooring and finishing projects, I underestimated how much the little things matter. I thought a quick cut and some caulk would do the trick. But I soon learned that a flawless 15:16 ratio—where the baseboard height and carpet thickness align—makes all the difference. It’s not just about aesthetics; it’s about durability and ease of maintenance, too. Surprisingly, according to flooring experts, the right baseboard installation can extend the life of your flooring and enhance your home’s overall look. Want to avoid those unsightly gaps or uneven joints? Keep reading, because I’ll share practical tips and strategies I’ve learned along the way.
Is Perfect Alignment Really Necessary or Just a Fancy Detail?
At first, I thought that minor imperfections wouldn’t be noticeable. Turns out, they are. A misaligned baseboard or uneven carpet edge can make a room look sloppy and unfinished. I made this mistake early on, rushing through measurements and ignoring the importance of precise cuts. Now, I know better. Achieving that seamless finish isn’t just about looks; it prevents future problems like gaps, drafts, and even damage from shifting flooring. If you’ve faced similar frustrations, you’re not alone. I’ve found that following a few expert strategies can make all the difference. For instance, choosing the right tools and understanding the best installation techniques can turn a complicated process into a straightforward project. For more tips on elevating your interior, check out this guide to baseboard updates.
Now, are you ready to learn how to nail that perfect finish? Stay with me, because the next sections will cover the essential steps to ensure your baseboards and carpet installation look flawless, durable, and professional. Let’s get started on transforming your space into the beautiful home you’ve envisioned!
Measure Precisely to Set a Strong Foundation
Start by measuring your room accurately. Use a tape measure and a chalk line to mark the wall length and the desired height of your baseboard. I once skipped this step and ended up with mismatched corners, forcing me to redo the entire cut. Always double-check your measurements before cutting to avoid waste and frustration.
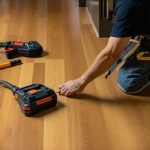
Cut with Confidence Using the Right Tools
Use a miter saw for clean, precise cuts at 45-degree angles for corners. For uneven walls, cut the baseboard slightly longer and sand down the joint for a perfect fit. When I replaced my old baseboards, I used painter’s caulk to hide minor gaps, creating a seamless look that impressed my guests.
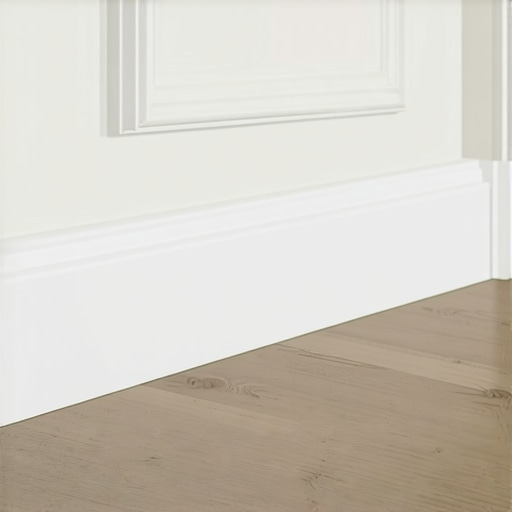
Install Baseboards for a Professional Look
Attach the baseboard using finishing nails and a nail gun. Space nails every 16 inches to ensure stability. Use a level to keep the baseboard straight along the wall. I once used a piece of scrap wood as a guide and it made the installation much easier and more accurate.
Seal Gaps and Create a Flawless Finish
Apply caulk along the top edge of the baseboard and in the corners. Smooth the caulk with a wet finger or a caulk tool. This step hides minor imperfections and makes the joint appear seamless. I recommend choosing paintable caulk for a finish that blends perfectly with your wall color.
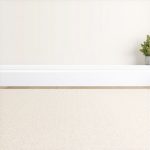
Align the Carpet Edge for a Clean Transition
Prepare your carpet by trimming the edge to about 1/4 inch from the wall. Use a carpet knife and a straightedge for a straight cut. When installing, tuck the carpet edge under the baseboard or use a tack strip for a secure hold. I once used double-sided carpet tape to hold the edge temporarily, which helped me align everything before final fastening.
Use a Carpet Tucking Tool for a Tight Finish
Press the carpet edge under the baseboard with a T-handle carpet tucker. This ensures the carpet is tight and flush with the wall. Avoid pulling too hard, which can distort the carpet, and instead work slowly for an even edge. I found that a steady hand and patience result in a professional-looking transition.
Final Touches for a Showroom-Quality Finish
Touch up the paint on the baseboard if needed, and clean the area thoroughly. Check for any gaps or uneven edges and correct as necessary. Remember, attention to detail makes all the difference. For more ideas on updating your space, visit this guide to baseboard updates.
With these concrete steps, you’ll achieve a flawless finish that elevates your home’s appearance and durability. Practice makes perfect, and soon, your DIY project will look as if it was done by a professional.
One of the most overlooked aspects of finishing a room is understanding what most people get wrong about baseboards and carpet installation. Many DIY enthusiasts fall into traps that compromise both the aesthetic and durability of their projects. Let’s dig deeper into these nuances and dispel some myths that could hinder your success.
Why Rushing Measurements Can Cost You More Than Time
It’s tempting to measure quickly and cut corners, but inaccurate measurements are one of the leading causes of installation flaws. While some believe that small measurement errors are negligible, in reality, they can cause uneven gaps, misaligned corners, or warped baseboards. Experts emphasize double-checking every measurement and using a level for alignment, as even a 1/16-inch discrepancy can be visually jarring. For detailed guidance, consider exploring expert flooring tips.
The Myth That All Carpets Are Created Equal
Many assume that any carpet will work with their baseboard setup, but the truth is that the type, pile height, and backing material influence how you should trim and tuck the carpet. For example, plush carpets require different tucking techniques than low-pile or Berber styles. Mistakes here can lead to loose edges, uneven transitions, or even damage over time. Advanced installers often use specific tools like a carpet tucker and choose appropriate tack strips to ensure a tight, professional finish. For a deeper dive, check out carpet installation strategies.
Be Wary of the Oversimplified Idea That Caulking Is a Quick Fix
Caulking is commonly thought of as a simple solution to hide gaps, but many underestimate its importance. Using the wrong type of caulk—such as non-paintable or quick-drying variants—can lead to cracking, peeling, or an uneven appearance, especially in high-traffic areas. The nuanced approach involves selecting a high-quality, paintable, and flexible caulk designed for trim and baseboards, then applying it with precision. Additionally, many overlook the importance of smoothing the caulk properly for a seamless look, which can make or break the final appearance.
Advanced Tips for Perfect Corner Joints
Corner joints are often a sticking point, with many believing that miter cuts alone guarantee a perfect fit. However, in my experience, the real secret lies in the finishing process. Slight adjustments with a chisel or sanding block can make a huge difference. Also, using a corner clamp during installation ensures tight joints that won’t open over time. Remember, even the slightest misalignment at corners becomes glaringly obvious in a well-finished room. To master this skill, explore baseboard corner techniques.
Have you ever fallen into this trap? Let me know in the comments. By understanding these hidden nuances, you can elevate your DIY projects from amateurish to professional-quality, saving time, money, and frustration in the process.
Keeping your baseboards and carpet installation in top shape requires the right tools and a proactive maintenance routine. Over time, even the best installations can develop gaps, squeaks, or wear, but with a few expert-recommended strategies, you can ensure your project remains pristine for years to come. Investing in quality tools is key, and understanding how to maintain them prolongs their effectiveness and your results.
Invest in Precision Tools for Consistent Results
For a flawless finish, I personally rely on a high-quality miter saw. It allows me to make precise 45-degree cuts at corners, ensuring tight, seamless joints. Cheaper alternatives tend to produce rough cuts, which can lead to gaps or misaligned corners, especially over multiple rooms. Additionally, I always keep a set of fine-grit sandpaper handy to smooth any rough edges after cutting. This small step makes a noticeable difference in the final appearance, especially when painting or caulking.
When it comes to attaching baseboards, I prefer a pneumatic nail gun. It’s faster and produces cleaner nail holes that are easier to conceal with filler or caulk. Choosing nails of the right length—usually 2.5 inches for most baseboard heights—ensures stability without damaging the drywall or wall surface. For carpet trimming, a sharp carpet knife and a straightedge guide are essential to get clean, straight edges. I’ve found that a high-quality blade reduces the effort needed and prevents frayed cuts, which can cause uneven edges during tuck-in.
Prioritize Regular Tool Maintenance
To keep your tools functioning optimally, I make a habit of cleaning my saw blades and pneumatic nail guns after each project. Dust and debris can cause blades to dull faster and nail guns to jam. Lubricating pneumatic tools with light oil prevents rust and ensures smooth operation. For my saw blades, I replace or sharpen them once they start producing rough cuts, which maintains accuracy and reduces waste. A well-maintained tool not only produces better results but also reduces the risk of accidents on the job.
Use Software and Planning Tools for Long-Term Success
While physical tools are vital, planning software can also streamline your project management. I use simple apps to map out measurements, visualize cuts, and organize materials. This preparation minimizes errors and helps you order the right quantities of materials, reducing waste and saving money. As trends in home renovation continue to evolve — like the sleek baseboard styles in 2025 — staying organized and prepared will keep your projects on track and up to date.
How do I maintain my tools over time?
Proper maintenance involves regular cleaning, lubrication, and timely replacement of worn parts. For example, I inspect my saw blades for dullness or damage and replace them to ensure clean cuts. Lubricating pneumatic tools prevents rust and jams. Storing tools in a dry, organized space protects them from moisture and damage. Following manufacturer guidelines for maintenance extends the lifespan of your equipment and keeps your results consistently professional-looking. Remember, a well-maintained tool is an investment that pays off in quality and efficiency, making your ongoing projects smoother and more satisfying. For comprehensive guidance, check out expert tips for durable flooring.
Try implementing a regular cleaning and inspection routine for your tools, and you’ll find your projects become faster, easier, and more precise. With the right equipment and maintenance mindset, your home renovation endeavors will stand the test of time, maintaining their beauty and integrity for years to come.
Throughout my DIY journey, I discovered that the secret to a truly professional-looking room isn’t just about choosing the right materials but mastering the nuanced techniques that bring everything together seamlessly. The lessons I’ve learned about aligning baseboards with carpet edges can save you time, money, and countless headaches in your home renovation projects.
The Hardest Lesson I Learned About Baseboards and Carpet
- Precision is Your Best Friend: Rushing measurements or skipping double-checks often led me to uneven joints and gaps. The eye notices imperfections, especially at corners, and fixing them later can be more work than doing it right the first time. Learning to measure twice and cut once became my mantra, and it paid off.
- Tools Make the Difference: Using a quality miter saw and a carpet tucker transformed my installation. Cheap tools resulted in rough cuts and loose edges, while investing in the right equipment yielded smooth, tight joints and a clean transition.
- Caulking Is Not Just a Cover-up: I used to think of caulk as a quick fix for gaps, but I realized that selecting a flexible, paintable caulk and applying it with care creates a seamless look that lasts. It’s about the details—smoothing it properly and choosing the right product.
- Corner Joints Require Care: Achieving perfect corners isn’t magic; it’s patience and finesse. Adjusting cuts slightly, using corner clamps, and finishing with a chisel or sander made my joints look flawless and professional.
- Patience Over Perfection: Sometimes, taking extra time to align everything carefully results in a finish that feels almost effortless. The satisfaction of stepping back and admiring a well-executed project is worth every extra minute spent.
My Essential Toolkit for Baseboard and Carpet Success
- High-Quality Miter Saw — For precise 45-degree cuts, essential for seamless corners.
- Pneumatic Nail Gun — For fast, clean attachment of baseboards.
- Carpet Tucking Tool — Ensures tight, professional transitions.
- Paintable Flexible Caulk — For hiding gaps and creating smooth edges.
- Fine-Grit Sandpaper — To smooth cut edges and joints before finishing.
Take Action and Elevate Your Home’s Finish
Don’t let the details hold you back from creating a home that truly shines. Mastering the art of aligning baseboards with carpet doesn’t just improve aesthetics; it enhances durability and comfort. Whether you’re planning a quick refresh or a full renovation, these insights will help you achieve results that rival professional craftsmanship. Remember, every perfect joint and seamless transition adds to the story of your home’s transformation. Ready to give it a try? Share your experiences or ask questions below—I’d love to hear about your projects and help you succeed in creating a flawless finish in your home.”,