Ever spent hours on a DIY project only to be disappointed by uneven edges, gaps, or mismatched finishes? I’ve been there. I once thought a quick, careless installation of baseboards and carpet would do the trick. Spoiler: it didn’t. The frustration of fixing mistakes afterward taught me a vital lesson about the importance of proper top baseboards and carpet install strategies. That lightbulb moment made me realize that even small details can make or break the overall look of a room. Today, I want to share how you can avoid my early pitfalls and achieve a flawless finish right now.
Why Proper Installation Matters More Than You Think
When it comes to flooring and trim, many homeowners underestimate the impact of precise installation. It’s not just about aesthetics—properly installed baseboards and carpets also enhance durability and ease future maintenance. A sloppy job might save time upfront but will cost you dearly in repairs, rework, or even damage down the line. According to industry experts, a well-executed installation can extend the lifespan of your flooring and trim, saving you money and frustration (source: expert tips).
Have you ever faced gaps, uneven cuts, or baseboards that don’t sit flush? If so, you’re not alone. These issues are often caused by neglecting key strategies that ensure a perfect finish. The good news is, with a little knowledge and patience, you can sidestep these common mistakes and create a professional look yourself.
In the sections ahead, I’ll guide you through the core techniques and insider tips I’ve picked up along the way. From choosing the right tools to mastering precise cuts and seamless transitions, you’ll learn how to make your home improvement project truly stand out. Ready to dive into the secrets of flawless installation? Let’s get started!
Secure the Perfect Fit with Precise Measurements
Start by measuring your room’s dimensions carefully, including wall angles and floor irregularities. I recall a time I skipped this step and ended up with baseboards that didn’t sit flush—wasted hours re-cutting and sanding. Use a reliable tape measure and mark cut lines with a pencil. Double-check your measurements before cutting to prevent costly mistakes.
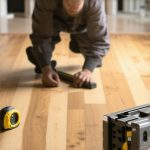
Choose the Right Tools for Clean Cuts
Invest in a quality miter saw or a sharp hand saw with a miter box. In one project, I used a dull saw, which caused jagged edges and uneven joints. A clean cut is essential for seamless baseboard corners. When cutting, support the material properly and make slow, steady passes. This ensures precision and reduces splintering.
Prepare the Surface for Seamless Installation
Before fixing baseboards or laying carpet, clean the floor and walls thoroughly. I once installed baseboards over dust and debris, resulting in gaps and unstable fittings. Use a vacuum or damp cloth to remove particles. A smooth, clean surface guarantees better adhesion and a professional look.
Use Adhesives and Fasteners Judiciously
For baseboards, a high-quality construction adhesive combined with finishing nails provides durability. When I first tried nailing without glue, the boards shifted over time. Apply adhesive along the back edge of the baseboard and press firmly into place. Use a nail gun or hammer for fasteners, but avoid overtightening, which can crack the wood.
Master the Corner Joints for a Professional Finish
Corner cuts should be mitred at 45 degrees for a snug fit. During my first attempt, I struggled with uneven angles, leaving gaps. Practice makes perfect—use a miter saw to ensure accuracy. For tricky internal corners, cut the baseboard at a compound angle or use coping joints for a seamless appearance.
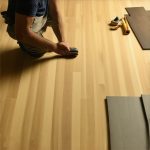
Lay Carpet with Precision and Care
Start by stretching the carpet evenly across the room using a power stretcher. I remember a time I ignored this step and ended up with wrinkles. Secure the carpet with tack strips along the edges, ensuring they are flush with the floor. Use a knee kicker to fit the carpet tightly into corners and edges.
Finish with Sealants and Touch-Ups
Apply caulk along baseboard edges for a clean look and to seal gaps. I once skipped this step, and dust collection became a nightmare. Use paintable caulk for a seamless finish. Inspect for any uneven cuts or nail holes and fill or sand as needed before painting or staining.
By following these core steps, you’ll avoid common pitfalls and achieve a flawless finish that transforms your space. For more expert tips, check out this comprehensive guide.
Many homeowners believe that installing baseboards and carpet is a straightforward task that anyone can do with minimal effort. However, this misconception often leads to costly mistakes and subpar results. Let’s dig deeper into what most people get wrong and how to avoid these pitfalls, especially if you aim for a professional finish.
What Most People Overlook About Precision and Alignment
While it’s tempting to focus solely on the overall look, the real nuance lies in the details—like ensuring perfect miter cuts and seamless joints. A common myth is that rough cuts are acceptable if they’re hidden behind the baseboard or carpet edge. In reality, even tiny inaccuracies become glaring over time, especially in visible corners or transitions. Advanced installers use coping joints instead of miters for internal corners or sand down small imperfections for a smoother transition. This extra step might seem minor but is crucial for a flawless finish. For expert advice on perfecting your installation, check out this detailed guide.
Beware of the Trap: The Cost of Skipping Proper Measurements
One of the most common mistakes is rushing measurements. Many assume that a quick estimate will suffice, but inaccuracies here can lead to gaps, overlaps, or the need to re-cut pieces. Advanced homeowners measure multiple times and account for irregularities like floor unevenness or wall angles. Using tools like a laser measure can significantly improve accuracy. Remember, a small discrepancy in measurement can result in a domino effect of issues down the line. If you want to master this step, visit this comprehensive resource.
Why Cutting Corners on Tools Is a False Economy
Skimping on quality tools might seem like a way to save money, but it often backfires. Dull saw blades or inexpensive tools cause rough cuts, splintering, and uneven edges. For advanced results, invest in or rent a high-quality miter saw and ensure blades are sharp. Support the material properly during cuts and take your time to make slow, controlled passes. The difference in finish quality is noticeable and well worth the investment. For more about professional-grade tools, see this expert guide.
Are You Making These Common Installation Mistakes?
Even experienced DIYers can fall into traps like neglecting surface preparation or using inappropriate adhesives. For instance, installing baseboards over dusty walls can cause gaps and instability, while using the wrong type of adhesive can compromise durability. Advanced installers prep surfaces meticulously and select adhesives suited for specific materials. They also pay attention to expansion gaps and allow for natural movement of flooring materials, which prevents future cracking or buckling. To learn more about avoiding these mistakes, explore this expert advice.
Have you ever fallen into this trap? Let me know in the comments. Remember, understanding the nuances and avoiding common myths can make all the difference in your home’s final look and longevity.
Once you’ve successfully installed your flooring and baseboards, the journey doesn’t end there. Maintaining your investment requires the right tools and a proactive approach to care, ensuring lasting beauty and durability. Over time, even the best materials can suffer from wear and tear if not properly maintained. That’s why I recommend keeping a set of high-quality, specialized tools on hand to handle routine upkeep and minor repairs efficiently.
One tool I swear by is a precision wood filler applicator. It allows for seamless repairs of small chips or gouges in baseboards or hardwood flooring without creating a mess. I prefer a high-quality, flexible putty knife paired with this applicator for smooth, even fills that blend perfectly with the existing finish. Regular touch-ups prevent minor damages from escalating into costly replacements. For carpets, a stair tool helps re-tension stretched areas, maintaining a flat, professional look over years of foot traffic.
Another essential is a multi-surface cleaner. Choose one that is safe for both carpet fibers and hard surfaces, as it simplifies routine cleaning and extends the lifespan of your flooring. I personally use a pH-neutral cleaner, which is gentle yet effective at removing dirt and grime without degrading adhesives or finishes. Regular cleaning not only preserves appearance but also prevents buildup that can cause premature wear.
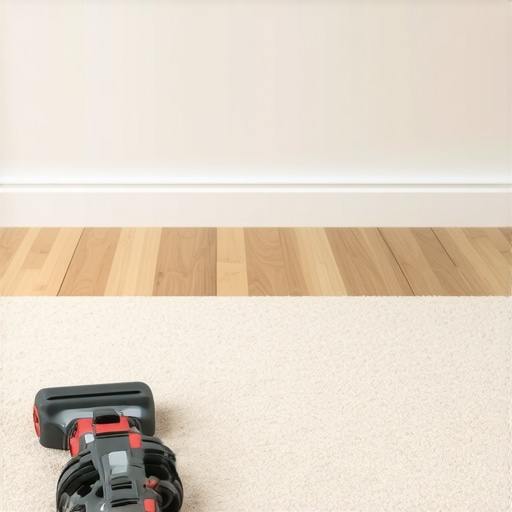
For long-term care, invest in a quality vacuum with adjustable height and specialized attachments. Carpet fibers, in particular, benefit from gentle suction and tools designed for delicate fibers. A good vacuum prevents dirt from embedding deep into the pile, which can lead to staining or fiber damage over time. Additionally, having a handheld steamer for carpets can refresh fibers and remove stubborn stains, extending the carpet’s life and keeping it looking new.
Future trends in flooring maintenance suggest an increasing reliance on smart cleaning devices. For instance, robotic vacuums equipped with mapping technology can consistently maintain your floors without manual effort, freeing up your time for other projects. As technology advances, I predict more homeowners will adopt these automated solutions for hassle-free upkeep.
How do I keep my flooring looking pristine without constant effort?
Implement a regular maintenance schedule that includes routine cleaning, prompt repairs, and protective measures like felt pads on furniture. Applying a protective coating or sealant periodically can also help resist scratches and stains, especially on hardwood. Remember, the key is consistency—small, regular actions prevent big problems later. For detailed guidance on maintaining your floors and avoiding common pitfalls, check out this comprehensive guide.
Don’t forget to document your maintenance routine and keep a checklist to ensure nothing gets overlooked. By staying proactive and investing in the right tools, you’ll keep your flooring looking stunning and perform optimally for decades to come. Try integrating a smart cleaning device into your routine and see how much easier maintaining your floors can become!
The Hardest Lesson I Learned About Installing Baseboards and Carpet
One of my most eye-opening moments was realizing how small details, like accurate miter cuts or surface preparation, can make a huge difference in the final look of a room. I once rushed measurements and ended up with gaps that took hours to fix. From that experience, I learned to double-check everything and never underestimate the power of meticulous preparation.
My Essential Toolkit for Perfect Flooring and Trim
Over the years, I’ve relied on a few key tools that make all the difference: a quality miter saw for clean cuts, a high-grade construction adhesive for durability, and a reliable vacuum with attachments to keep surfaces dust-free. These tools help me achieve results that rival professional installers, and I highly recommend investing in them for your project. For detailed tool recommendations, check out this expert guide.
Stay Inspired and Take Action Today
Remember, achieving a flawless finish isn’t just about having the right tools or techniques. It’s about embracing the process, paying attention to details, and never settling for shortcuts. Your home deserves the best, and with patience and practice, you can create a space that feels truly professional.
What’s your biggest challenge when installing baseboards or carpet? Let me know below, and I’ll share tips to help you overcome it!