Have you ever stepped into a bathroom and felt underwhelmed by the bland, outdated look? I definitely have. I remember the day I attempted to install new baseboards and a shower remodel myself. The corners didn’t line up, the grout cracks showed early, and I ended up spending more time fixing than enjoying the space. That lightbulb moment taught me something essential: the right design details can truly elevate a bathroom from forgettable to fabulous. If you’re tired of your current setup or frustrated with subpar results, you’re in the right place. Today, I’ll share my personal insights on choosing the perfect top baseboards and shower design ideas that modernize your bathroom, making it both stylish and functional.
Why the Details Make or Break Your Bathroom Remodel
In my experience, the smallest design choices—like selecting the right baseboards or shower tiles—can dramatically change the entire vibe of the room. When I first started renovating my bathroom, I underestimated how impactful these elements could be. I thought, “I’ll just pick what’s cheapest,” only to realize that cheap materials often lead to costly mistakes down the line. After learning the hard way, I now understand that carefully curated details—like a sleek shower niche or trendy crown molding—can create a cohesive and modern aesthetic that lasts. According to industry experts, focusing on these finishing touches can significantly boost your home’s value and appeal (source: [TileCraftsMen](https://tilecraftsmens.com/top-baseboards-showers-design-ideas-for-your-modern-bathroom-at-1747)).
Is Focusing on Design Details Actually Worth the Time and Money?
Admittedly, I used to think investing in trendy baseboards or fancy shower niches was overkill. I worried it wouldn’t make enough difference for the cost. That was a mistake. Early on, I installed a shower without considering proper waterproofing and style consistency, which led to leaks and aesthetic mismatches. It’s easy to fall into the trap of overlooking these elements, but the truth is, well-chosen details not only elevate your space visually but also enhance durability and ease of maintenance. If you’re concerned about whether spending extra on design details is justified, I encourage you to think about the long-term benefits—greater comfort, increased home value, and less hassle. Ready to explore some ideas that will truly transform your space? Let’s dive into those tips.
Prepare Your Workspace and Gather Tools
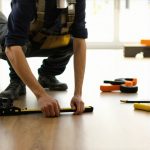
Before starting, clear the bathroom of all fixtures, accessories, and furniture. Lay down drop cloths to protect the floor and surrounding areas. Gather essential tools such as a measuring tape, level, utility knife, saw, hammer, drill, and adhesive. Personal experience taught me that being organized saves time and prevents mistakes, especially when working on delicate tasks like installing baseboards or shower tiles. Always double-check that you have all materials on hand to avoid mid-project interruptions.
Remove Old Elements and Assess the Space
Carefully take out outdated baseboards, tiles, and fixtures without damaging the underlying walls or flooring. Use a utility knife to cut away caulking and grout, then gently pry items loose with a pry bar. During my last project, I discovered water damage behind old tiles—this step uncovered hidden issues that, if ignored, could lead to costly repairs later. Once cleared, inspect the walls and floors for damage and plan repairs accordingly. This ensures your new design will sit perfectly and last longer.
Level and Prepare Walls and Floors
Achieve a flat surface by sanding or filling uneven spots. Use a level to ensure walls are straight, especially where new tile or shower enclosures will go. For floors, check for squeaks or loose areas and secure them with appropriate fasteners. My experience shows that a solid foundation is crucial; uneven walls or floors will compromise the look and durability of your finish. Proper preparation also simplifies installation of subsequent elements, like baseboards or shower panels.
Install Waterproofing and Insulation
Apply waterproof membrane to shower walls and floors, taking care to overlap seams properly. Use a quality vapor barrier behind walls if necessary. During my last renovation, meticulous waterproofing prevented leaks and mold growth—saving future headaches. Follow manufacturer guidelines carefully, ensuring all surfaces are clean and dry before application. Proper waterproofing is the backbone of a durable shower and prevents water damage from seeping into walls or floors.
Lay Down New Flooring and Waterproof Surfaces
Choose durable, waterproof flooring like porcelain tiles or vinyl planks. Start by dry-fitting tiles to confirm layout, then apply adhesive evenly with a notched trowel. Use spacers to ensure consistent grout lines. For floors, I found that working in small sections prevents setting before adjustments. Use a rubber mallet to gently position tiles and a level to check alignment frequently. After setting, grout the joints carefully, wiping away excess for a clean finish. For shower trays, follow the manufacturer’s installation instructions precisely to prevent future leaks.
Install Shower and Bathtub Components
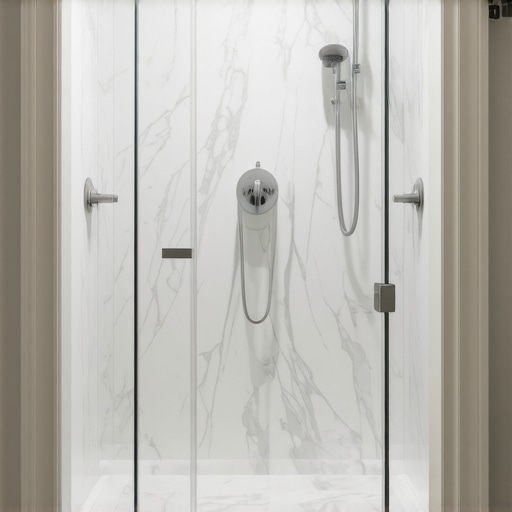
Set the shower base or tub level on a bed of mortar or appropriate adhesive. Secure fixtures according to the manufacturer’s instructions. Seal all edges with silicone to prevent water seepage. When I installed my shower, using a high-quality sealant avoided mold growth around the edges. Check for levelness periodically during installation to ensure water flows correctly. Proper sealing and secure fittings contribute to a luxurious and long-lasting shower experience.
Apply Finishing Touches to Walls and Surfaces
Tile the shower walls or wallboards, making sure to leave space for grout lines. Use a tile spacer to maintain uniform joints and cut tiles carefully with a wet saw for edges. For baseboards, measure carefully, cut at appropriate angles, and attach with a nail gun or adhesive. I learned that caulking around edges and seams prevents water infiltration and gives a polished look. Pay attention to alignment and spacing, which dramatically enhances the room’s overall aesthetic.
Finalize with Decorative and Functional Details
Add trim, new light fixtures, and accessories that match your style. Consider crown molding or wainscoting for extra flair. Select hardware and fixtures that complement the overall color scheme and design. During my recent project, coordinate these details early to avoid mismatches. Properly securing and sealing these elements ensures both beauty and longevity, making your bathroom not just functional but also a personal sanctuary.
Inspect and Clean Thoroughly
Finally, inspect all elements for secure attachment and proper alignment. Caulk around edges and test for leaks. Clean the entire space thoroughly to remove dust and debris, revealing your beautiful new bathroom. This step is critical; I make it a habit to double-check every nook to ensure everything is sealed and sparkling. A clean, well-maintained surface not only looks great but also prolongs the installation’s lifespan.
Remember, patience and attention to detail are your best tools. For further inspiration on creating a spa-like shower experience, visit this guide or reach out with questions at our contact page.
Many homeowners believe that choosing the right materials is enough for a flawless renovation, but the real pitfalls often lie in overlooked nuances. For instance, a common myth is that installing flooring or baseboards is straightforward; in reality, improper preparation and lack of attention to detail can lead to warping, gaps, or gaps over time. Similarly, many assume that shower renovations are just about the aesthetic, neglecting critical waterproofing techniques, which are essential for longevity and mold prevention. Did you know that even seasoned DIY enthusiasts often underestimate the importance of moisture barriers? According to industry experts, improper sealing and waterproofing can cause extensive damage weeks or months after completion, turning a beautiful remodel into a costly nightmare.
What are the subtle errors that even experienced pros might overlook during installation?
One subtle mistake is neglecting room-specific expansion joints, which accommodate material movement due to temperature and humidity changes—especially vital for wooden baseboards and certain flooring types. Failing to account for these can result in cracked grout lines or buckling floors. Moreover, most people don’t realize that wall preparation—like leveling and moisture testing—is more crucial than the choice of tile or fixture. Skipping these steps increases the risk of uneven surfaces and future repairs. An insightful study published in the Journal of Building Engineering emphasizes that detailed attention to preparatory phases significantly reduces warranty claims and callbacks, proving that investing time upfront pays off in durability and appearance. To master these details, check out expert tips on [transforming your home with proper flooring installations](https://tilecraftsmens.com/transform-your-home-expert-flooring-installation-tips-for-2025) or learn about [shower renovation ideas to achieve a modern, luxurious look](https://tilecraftsmens.com/shower-renovation-ideas-modern-designs-for-a-luxury-feel). Remember, the difference between a job well done and a headache-inducing nightmare often comes down to understanding and addressing these less obvious nuances. Have you ever fallen into this trap? Let me know in the comments.
Once you’ve completed your flooring installation or bathroom upgrades, maintaining these improvements is crucial to ensure their longevity and continued beauty. Having the right tools on hand can make ongoing maintenance more manageable and less time-consuming.
Tools I Recommend for Long-Term Upkeep
Personally, I rely on a few specialized tools to keep my renovations in top shape. A high-quality microfiber plaster brush is invaluable for dusting and cleaning delicate surfaces without scratching them. I also keep a cordless oscillating multi-tool; its versatility allows me to gently remove moldy grout, reattach loose baseboards, or smooth out worn edges. For more stubborn grime or soap scum, I prefer a steam cleaner—it’s chemical-free and effective for bathroom tiles and shower glass. Investing in a digital moisture meter helps me monitor humidity levels inside the bathroom, preventing mold growth and structural issues over time. These tools are not only practical but also extend the lifespan of your renovation efforts.
How do I maintain my bathroom and flooring over time?
Maintenance begins with routine cleaning—use non-abrasive cleaners suited for your surfaces. Regularly check for signs of water damage or loose fixtures, especially around showers and baseboards. For flooring, ensure that grout lines remain sealed; reapply grout sealer every couple of years to prevent staining and water infiltration. When installing new baseboards, I recommend periodically inspecting the caulking and repainting as needed, which you can learn more about in our Baseboards Makeover guide. Addressing brewing issues early prevents costly repairs later on. Additionally, scheduling professional inspections for waterproofing integrity can save you from unexpected leaks or mold problems.
Looking ahead, the trend toward smart maintenance systems—integrating sensors that monitor humidity or detect leaks—is likely to grow, simplifying long-term care. Embracing these innovations now can save time and reduce stress in the future.
For example, routinely reapplying grout sealant inspired me to extend the life of my shower tiles and keep the space looking fresh. Consider adding a moisture meter to your toolkit, which offers real-time insights into humidity levels, giving you a head start on preventing issues before they escalate.
If you’re interested in more advanced maintenance tips, I suggest trying to incorporate a moisture sensor into your routine—it’s a game-changer for keeping bathrooms dry and mold-free. Want to learn more about tools that can make these tasks easier? Reach out through our contact page for personalized advice and product recommendations.
The Unexpected Pitfalls That Changed My Approach
One of the most eye-opening lessons I learned was the importance of meticulous planning for waterproofing and expansion joints—details often overlooked by DIYers. Failing to address these subtle aspects led to water damage within months, emphasizing that even expert installations require unwavering attention to nuance. Moreover, I discovered that the choice of baseboard material, and how it’s installed around curves and corners, can dramatically impact the visual flow and longevity of your design. These behind-the-scenes insights have transformed how I approach every renovation, reminding me that patience and precision are key to lasting quality.
Tools and Resources That Brighten the Path
Over the years, I’ve come to rely on a handful of trusted tools like a high-quality moisture meter to detect hidden dampness, ensuring waterproofing remains intact. I’ve also found that engaging with industry blogs such as this guide on creating spa-like showers offers invaluable aesthetic ideas and technical tips. For materials, I personally trust brands recommended by experienced contractors, and I never skip professional-grade sealants and waterproof membranes—they make all the difference in durability. These recommendations have helped me avoid costly mistakes and feel confident executing complex tasks.
Embrace Your Renovation Potential Today
Remember, transforming your bathroom isn’t just about choosing trendy finishes; it’s an opportunity to deepen your craft and create a sanctuary that lasts. Every detail, from perfectly aligned baseboards to moisture-proofed showers, contributes to a space that reflects your effort and care. Don’t wait for the perfect moment—start small, stay patient, and build your skills. Your dream bathroom is within reach, and the satisfaction of a job well done is priceless. When will you take the first step towards your ideal space?
What’s been your biggest challenge or breakthrough during a renovation project? Drop your experiences below—I’d love to hear from you!